
Assigning a Photo to an Account Member
This image will show up when this member's card is scanned (or number is entered).
- Check that webcam is connected, turned on, and functioning properly
- From the Management home page, select Accounts tab from lefthand navigation
- Once the tab expands, select Search Members
- Enter the member's name in full or part (ex. just the last name)
- Locate and select the desired member
- Once in the member's page, select Upload Member Photo from the top center links, if you have a file to upload.
- Or select Capture a Photo with a Web Cam link to take a photo
- Once the image capture page loads, adjust the webcam until the image you'd like is in the left hand box
- Select Take Snapshot button
- If the image is acceptable, select Save
- Or select Capture a Photo with a Web Cam link to take a photo
- You will be brought to the member's page and can repeat these steps to update the image as needed
Assigning a Membership Number

- Locate the member number on the member's card
- From the Management home page, select Accounts tab
- Once the tab expands, select Search Members
- Enter the member's name in full or part (ex. just the last name)
- Locate and select the desired member
- Once in the member's page, select Membership Card from the top center links
- Once the card number page loads, place your cursor in the Scan New Membership Card box
- You may scan the member's card or enter in the card number manually
- Check that this number is correct and that any previously existing number is incorrect
- Click Submit – you'll be returned to the member's page
- It is important to note that only one card number may be assigned per member
Scanning a Membership Card
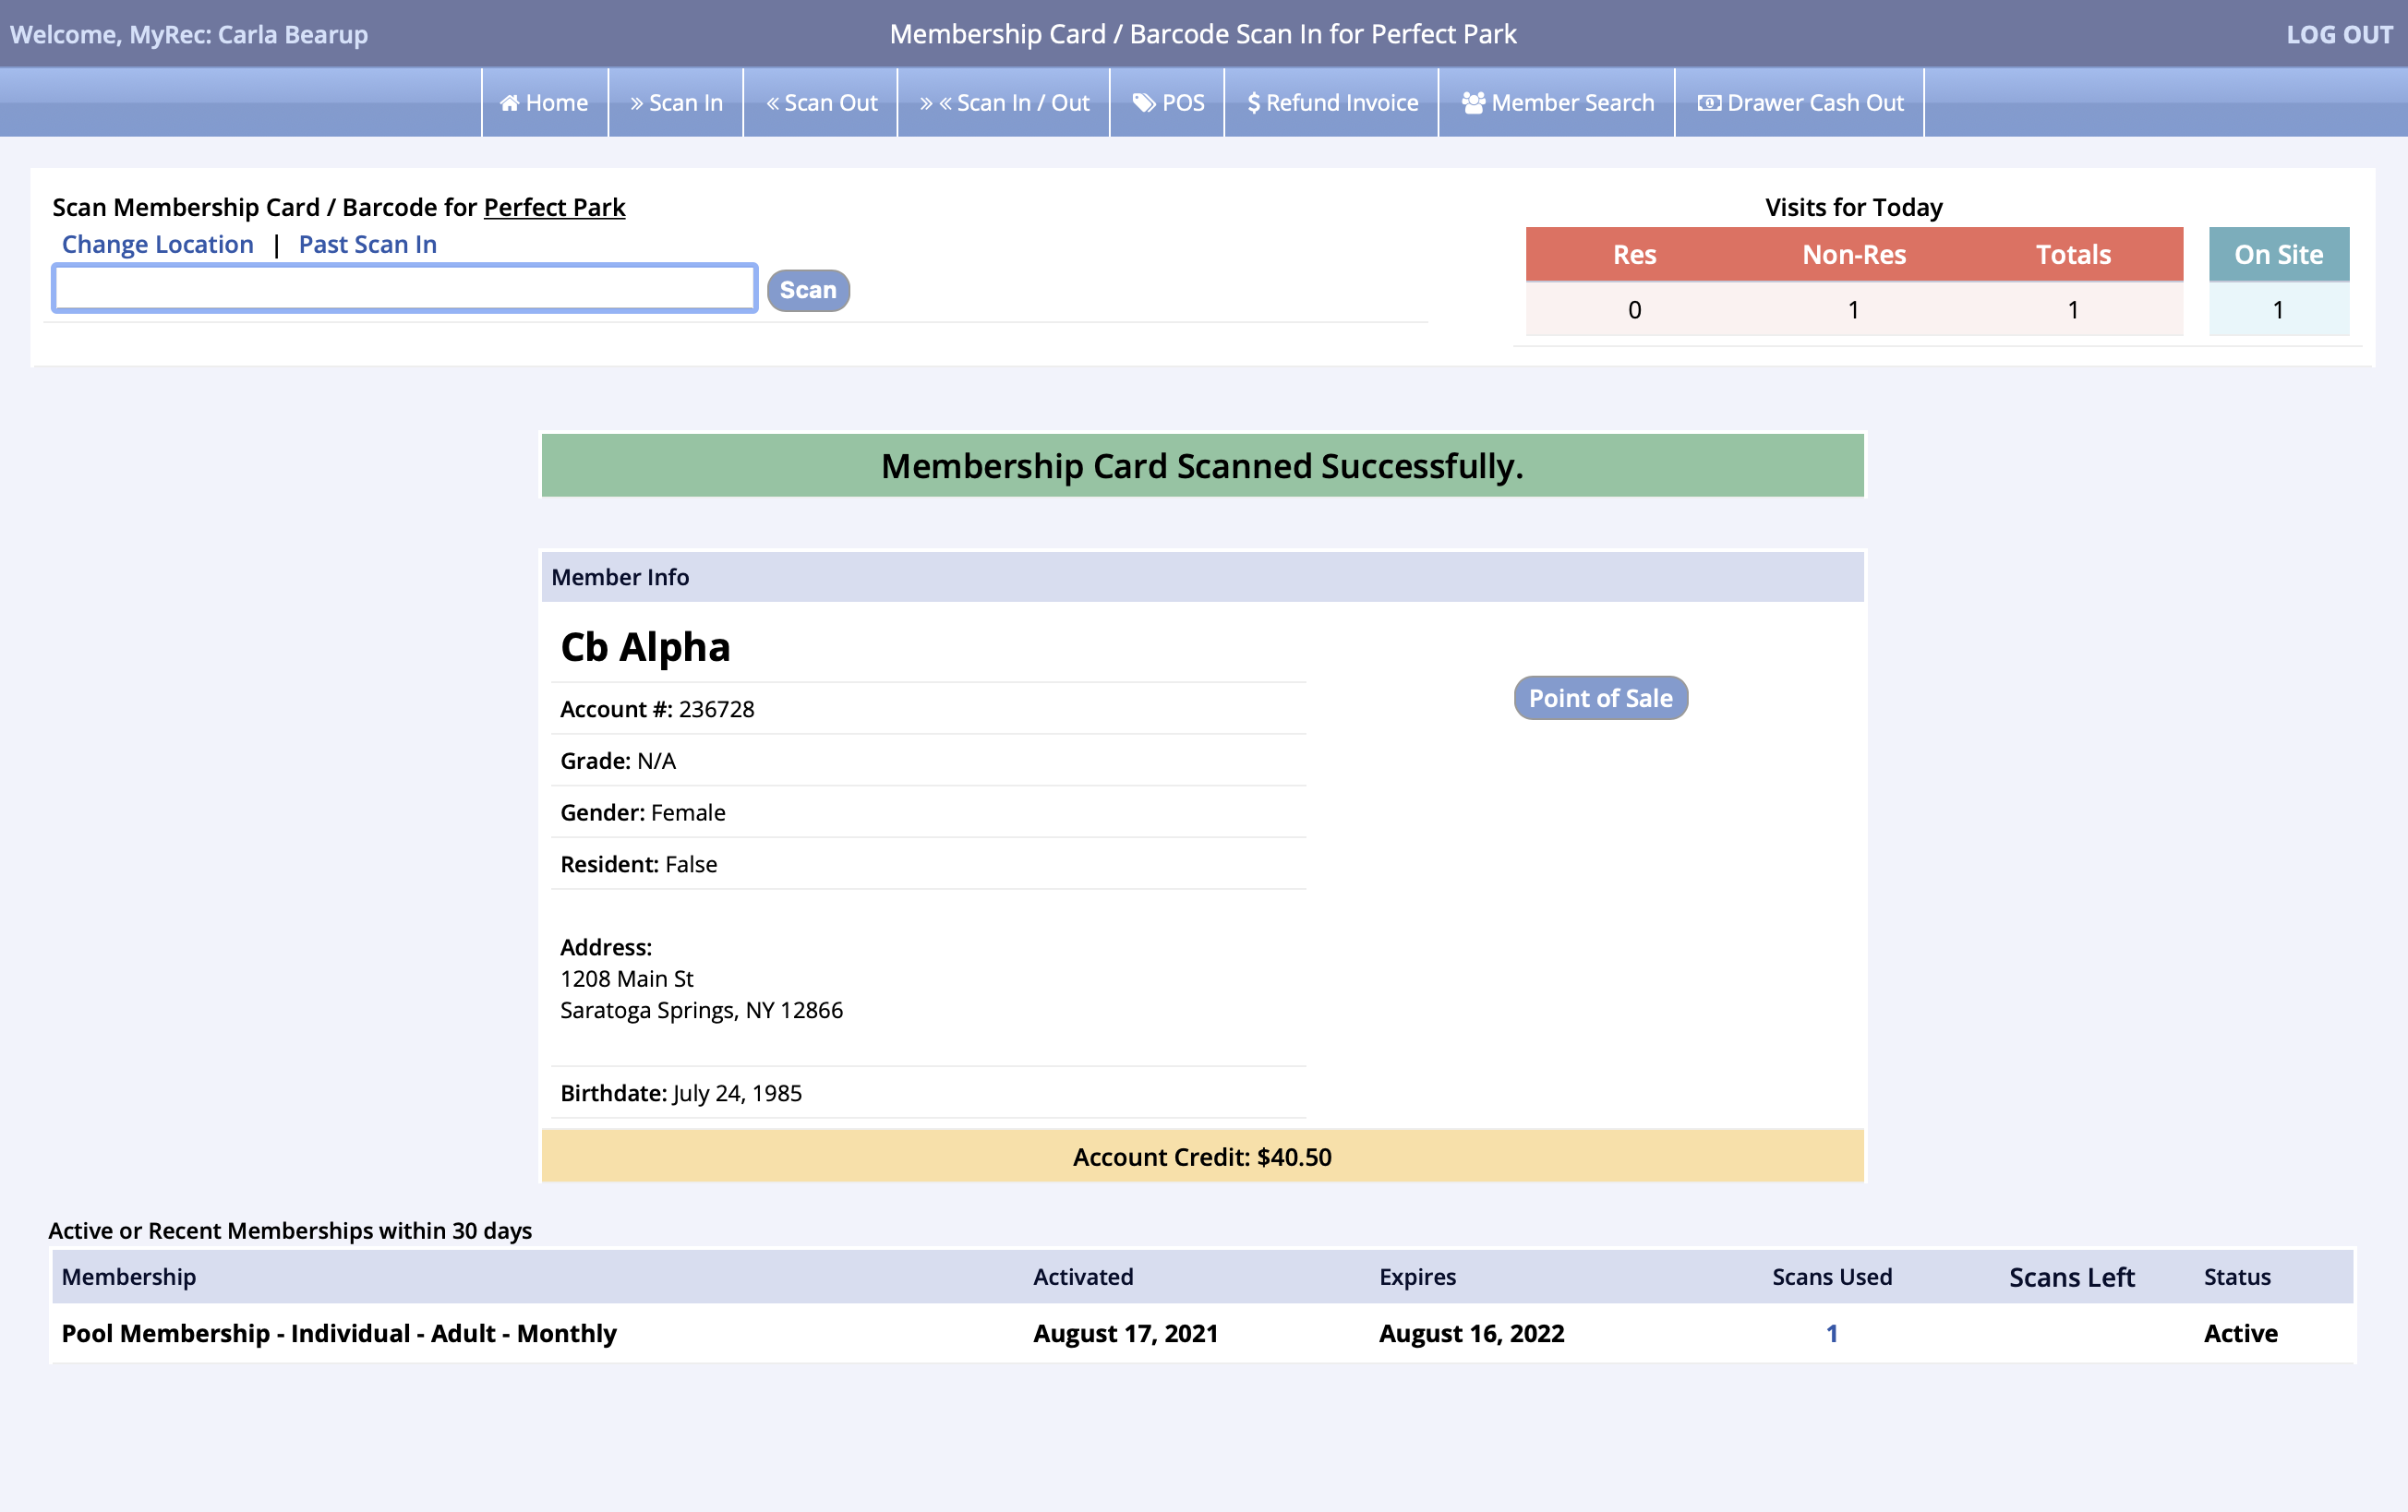
- From the Management home page, select Facility Access Portal from the Quick Icon in the center navigation or Member Check-in from Quick Utilities
- Select a facility from the list that appears – these steps may be already done for you
- Once you see the box that reads Scan Membership Card for [facility name], place your cursor in it
- Scan the member's card or type in the card number
- The system will let you know if their card allows them access to the facility
- Some possible reasons for lack of access are:
- Expired membership
- Membership not associated to the selected facility
- Exceeded scan limit on membership
- Membership not yet active
- Member not correctly associated to membership
- Some possible reasons for lack of access are:
- Proceed to the next member
Digital Membership Cards
Digital Membership Cards
Digital membership cards can be created by the department and used by their customers as a less expensive alternative to physical cards. The digital cards can be accessed through the customer’s account on both the management and public sides of the software. The card has a barcode which can be scanned for facility access and saved as a photo to the customer’s personal device, such as a phone or tablet. Not all scanners can read a barcode from an electronic screen, so an upgrade may be needed. Please refer to our Equipment Guide for recommended devices.
System Setup
Contact Client Support to have the following settings turned on:
- Memberships
- Use Membership Cards
- Allow Card Printing
Card Setup
- Create at least one card template. You can use one design for all your memberships or create different designs for each.
Creating the Template
You must add one or more card templates to be able to print out the cards. To do this:
- Go to Administration tab in lefthand navigation, then Settings
- Click on the Membership Card Settings tab
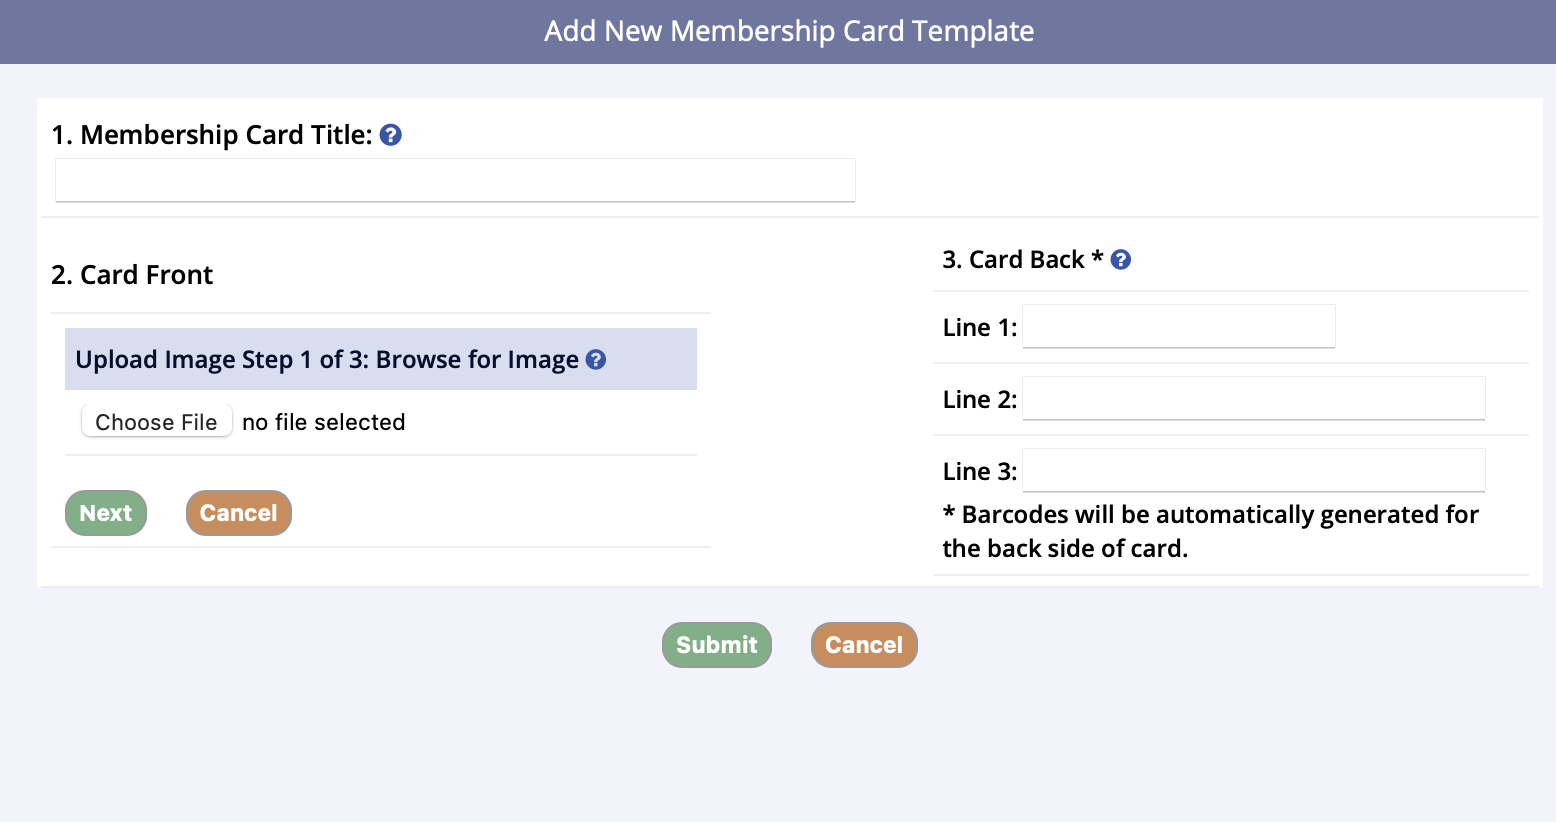
- Click Add New Membership Card Template
- Enter a title for the card
- For the Card Front, you must upload an image, which requires three steps:
- The first step is to upload an image
- Under Upload Image, click Choose File
- Click Next
- The second step is to crop the image if you wish, or you can leave it as is
- Click Next
- You will be on Step 3: Save Image
- You can either save the image, re-crop the image, or cancel
- The first step is to upload an image
- Next, enter the information on the Card Back
- You need to enter at least one line of text
- There will be three lines available
- The first one can have 25 characters, while the second and third are 50 characters each
- Also, barcodes will be automatically printed under this text based on the account member’s membership card ID
- You need to enter at least one line of text
- When you are finished entering the information, click Submit
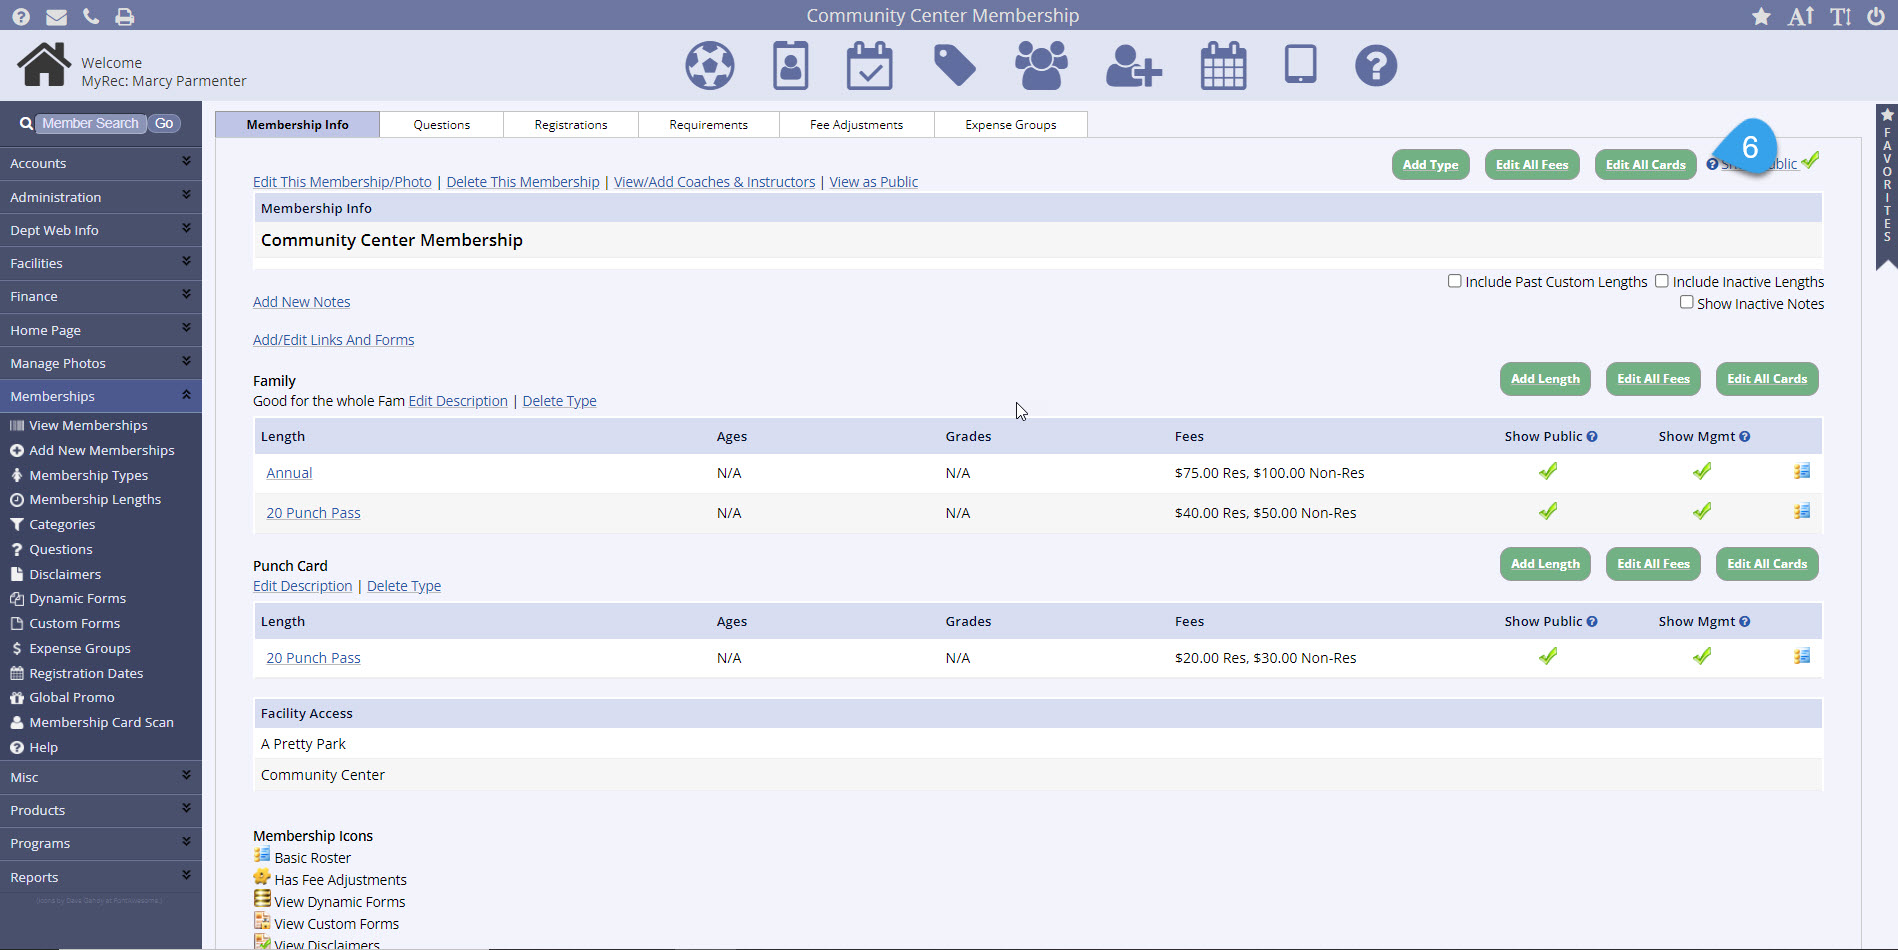
- From the left side navigation menu, select Membership
- Click View Memberships
- Select the Membership that will be allowing the use of digital membership cards
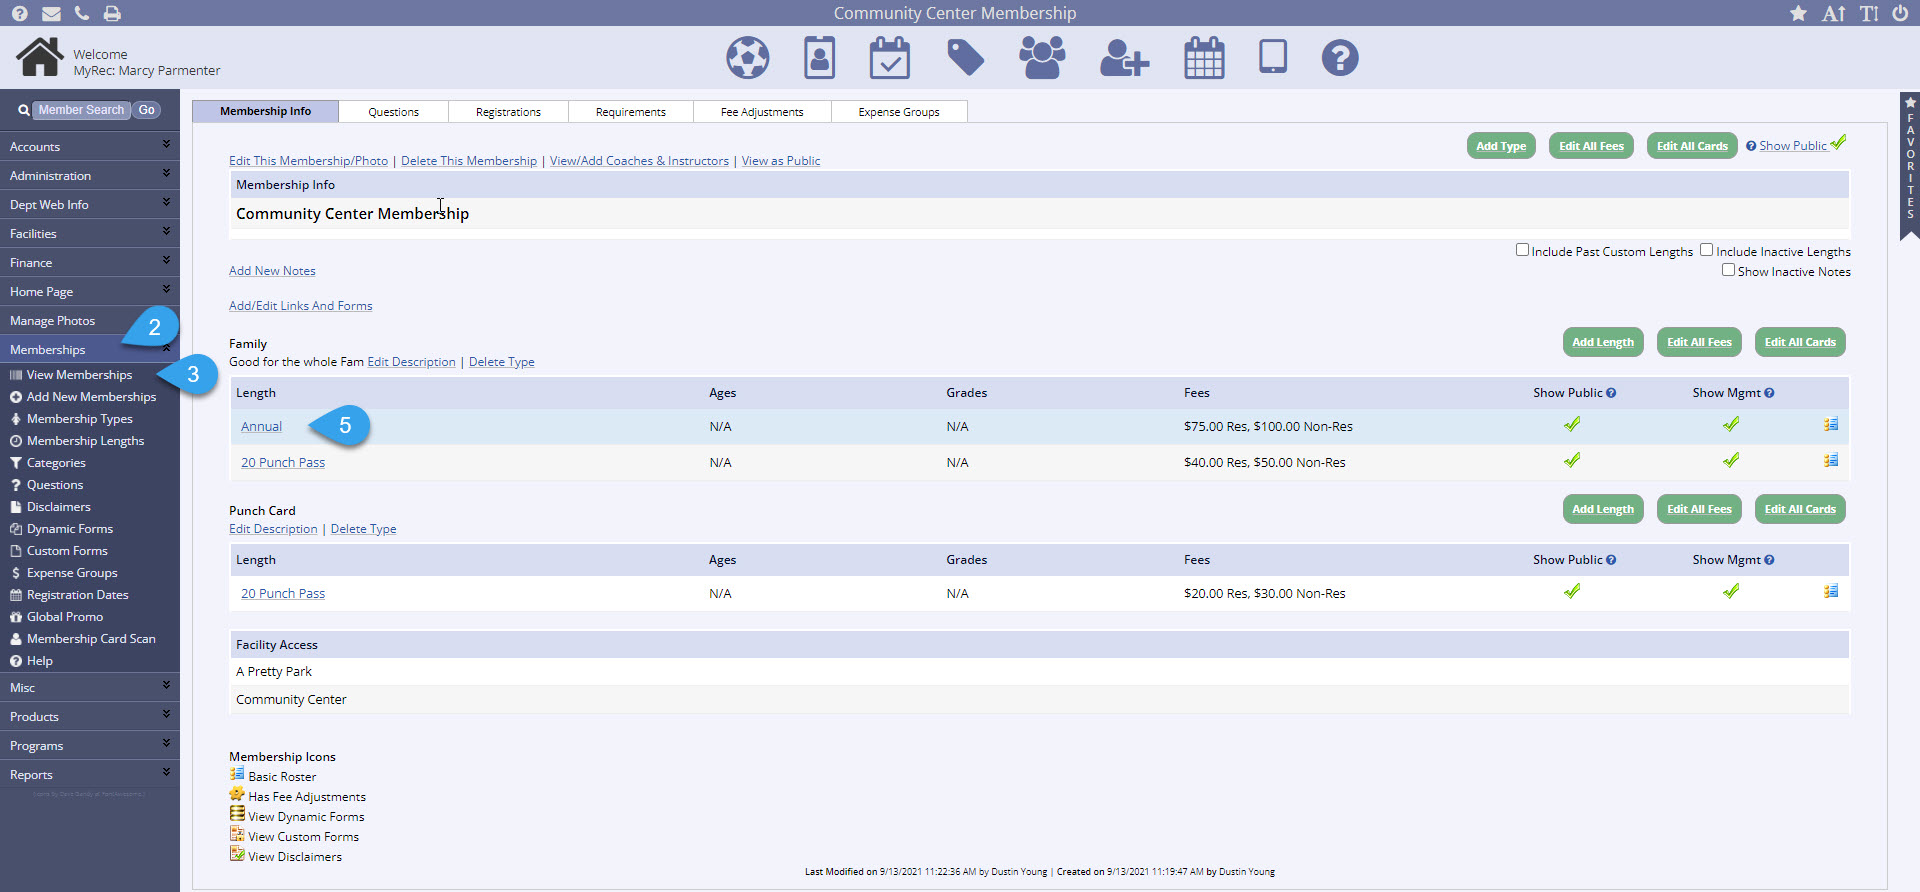
- Select the Length that will be allowing the use of digital membership card
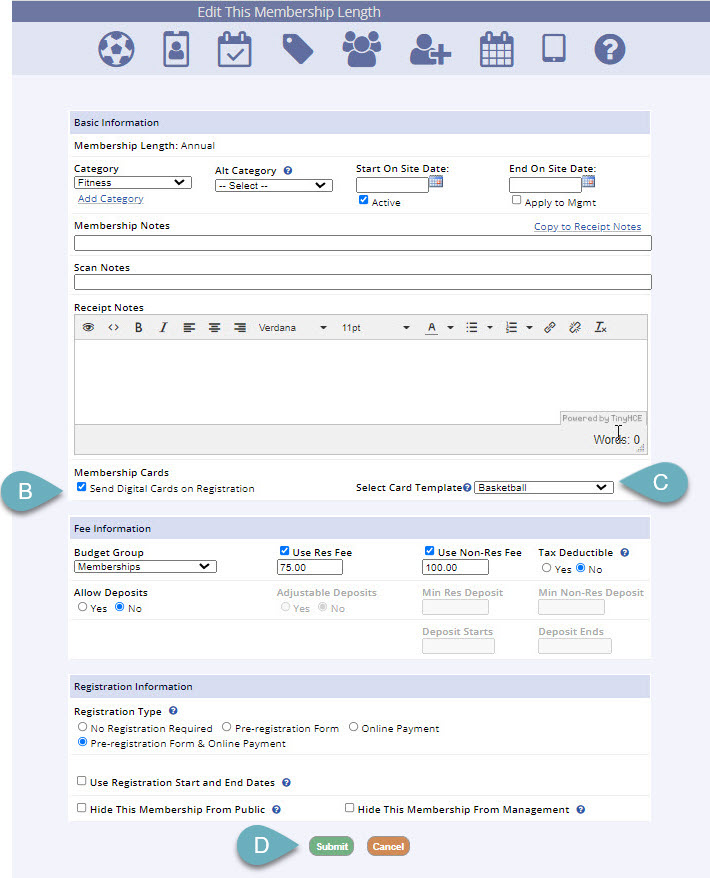
- Click Edit this Membership Length
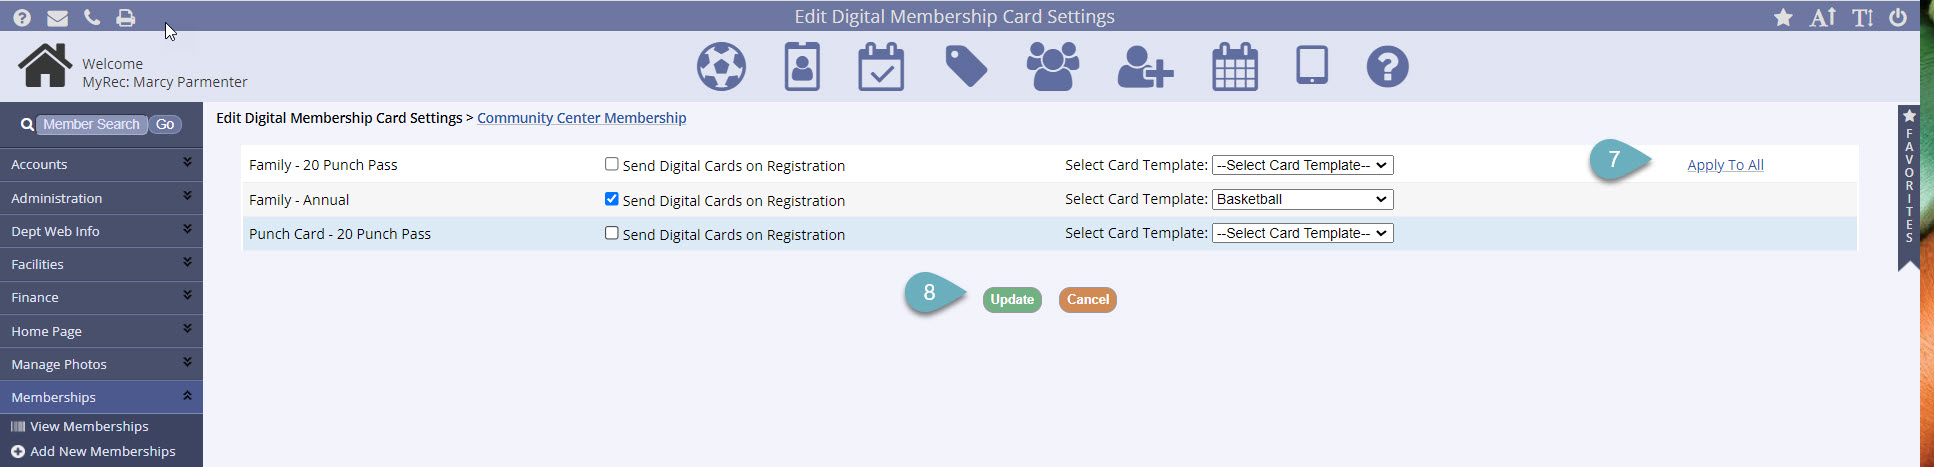
- Check Send Cards on Registration (optional, but recommended)
- Select the Card Template from the dropdown menu
- Click Submit
- If multiple lengths will be allowing digital membership cards, select the Edit All Cards button in the upper right corner of the selected Membership
- Make your selections by length, or if they are all the same, use the Apply to All link on the right
- Click Update
Using the Digital Card
From the Public Side
Once the registration for a membership is complete, the digital card assigned to it may be accessed through the household account on the Public Side, after logging into the account.
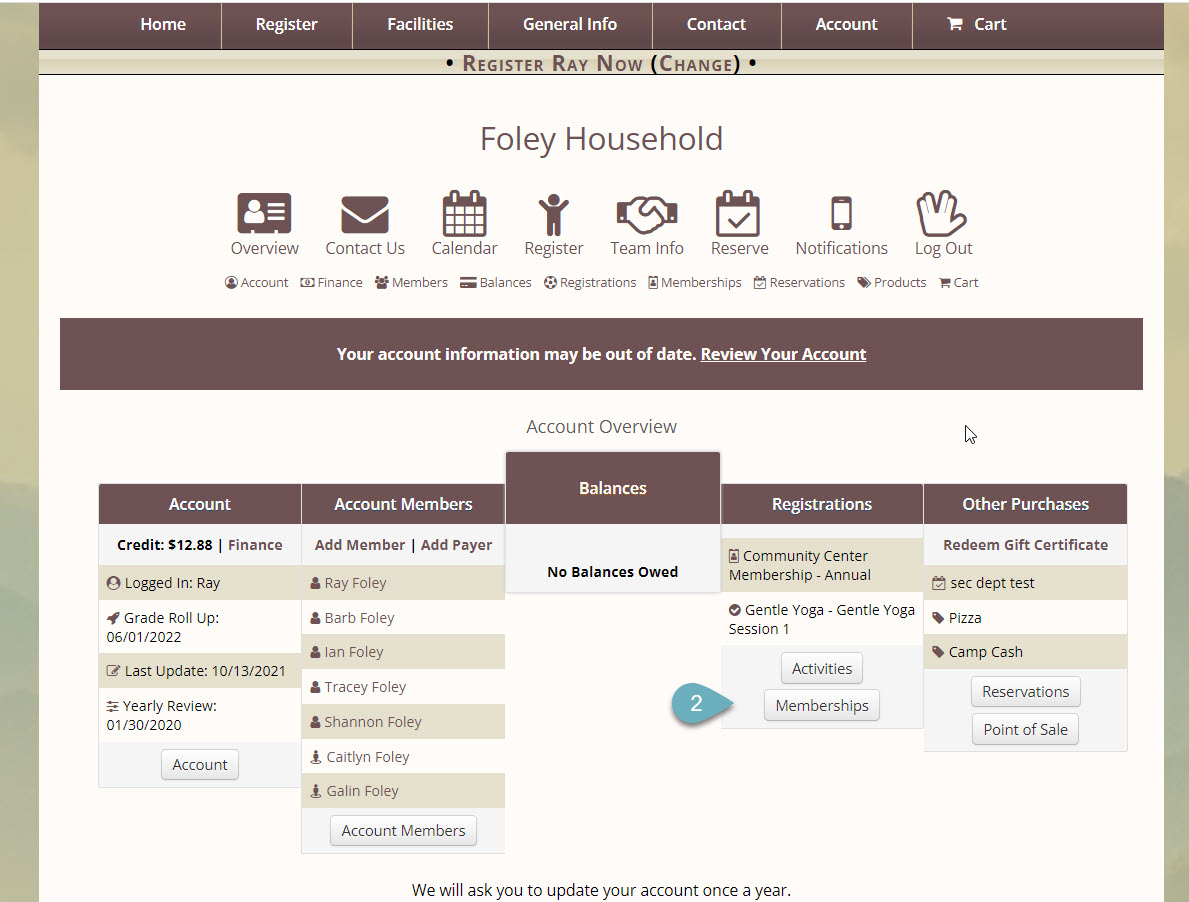
- Navigate to the Account Overview page
- Click the Memberships tab
- Select the View Membership Cards link, which will be under the associated membership
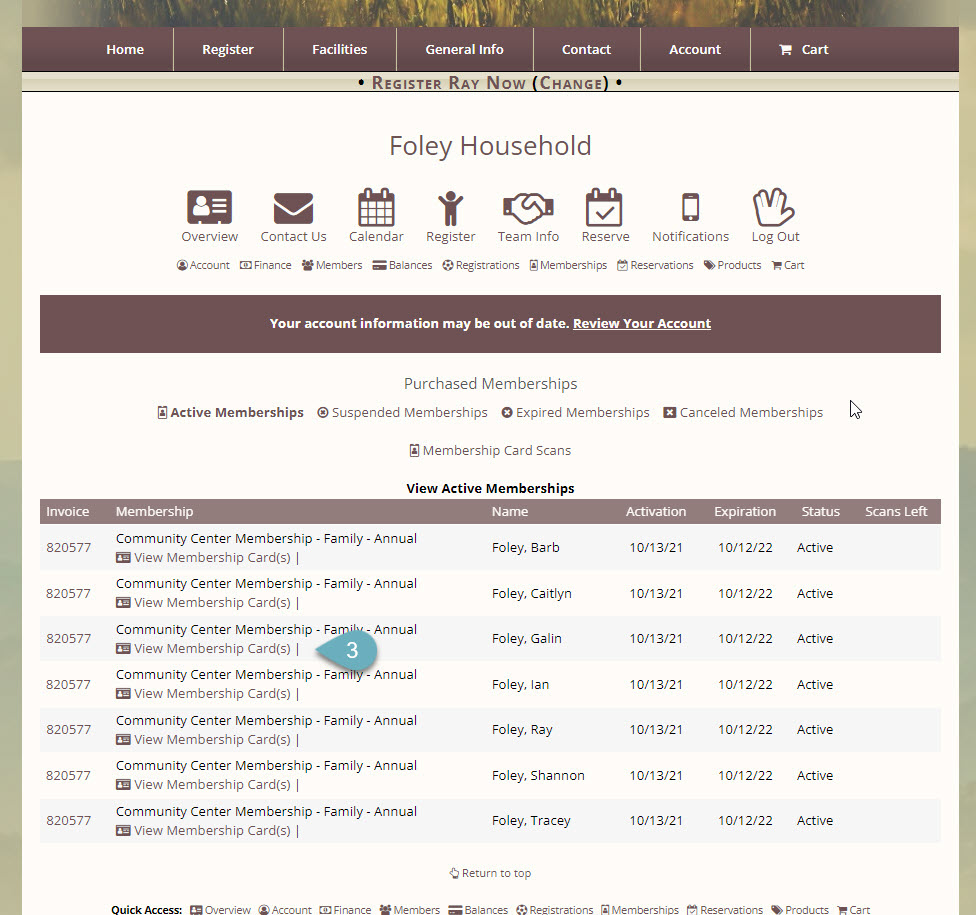
It may also be accessed through a link on the registration receipt, if the option to Send Cards on Registration is selected.
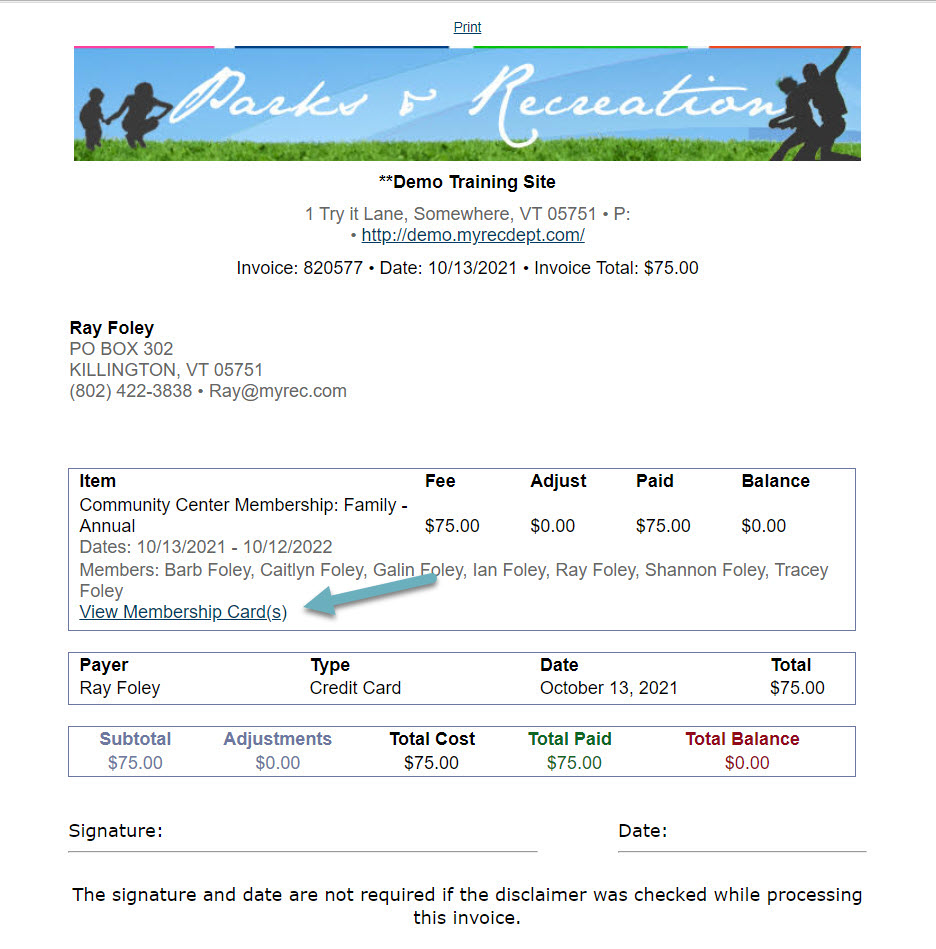
The card can be saved to the device it is being viewed on by selecting the Save to Device button at the top of the image. It will be saved as a PNG file.
From the Management Side
If a membership card number already exists in the member profile, the digital card will use the same number, allowing for the use of both cards. If there isn't a card number for the member, a new number will be generated upon registration.
- Access the household account
- Click the Membership tab
- View Membership Cards link will be under the associated membership
Image of card will open in a separate window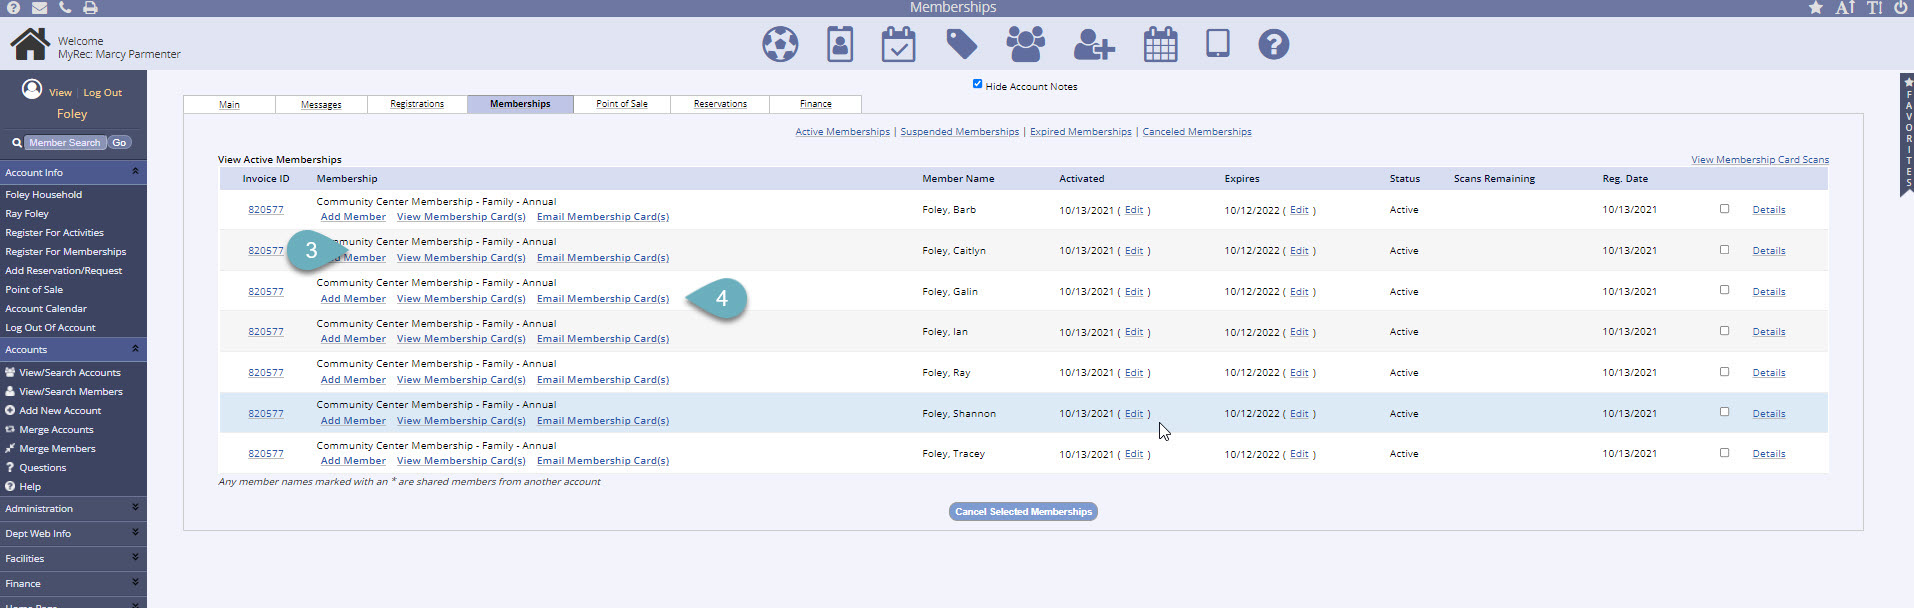
-
Email Membership Card by clicking the link
- Enter one or more email addresses in the fields provided
- Add a brief message in the Additional Notes field if desired
- Select the green Email Membership Card(s) button to send

Using Both Digital and Physical Membership Cards
If a department intends to use both ordered, physical membership cards and digital cards simultaneously, they should plan ahead to accomplish this. Wait to establish the digital membership cards until the physical cards have been distributed and registered to the user's account, then follow the instructions above to set up the digital membership cards. This way, all of the digital cards will have the same ID number as the member's physical card barcode.
Alternatively, if a department distributes digital cards first, and someone requests a physical card, the department will need to update that person's membership ID number manually to match the physical card. See the Membership Card Guide for those steps. The digital card will update in the system, and both cards will be in sync. The digital membership card will always be up-to-date with the membership card ID number.