
A Management Side Reservation Request can be used by departments to create a reservation request on behalf of a member, instead of the member using the public site. The difference between a Management Side Reservation Request and a Management Side Reservation is that the request still must be approved before the reservation is booked, instead of immediately being booked like it would for a Management Side reservation. This would be helpful in a scenario where the member was not able to make the request at home, but the request still requires board approval, so the staff cannot process the reservation at that time.
To Enable Reservation Request
A MyRec.com staff member must turn a setting on in the advanced settings for facility options. Please ask a MyRec.com representative to turn this feature on for you.
The facility or facility area must be set to Allow Staff Reservation Requests. This can be done in a new facility or by editing Rental Info on an existing facility. The Allow Rental box must be checked to make this setting available.
To Create a Management Side Reservation Request
- Click Accounts in the left-hand navigation
- Select View or Search Accounts to locate the account
- Click the name of the member that will be making a reservation
- In left navigation bar, under Account Info, click Add Reservations/ Requests
- At the Select Reservation/Request screen, click Start a Reservation Request
- On the Facility Reservation Request form, select a facility in the dropdown
- If you wish to see availability information, you can click View Calendar to see the calendar, select the location
- You can choose the date in two ways
- Click on the calendar to select date and time for reservations without blocks, and date for reservations with set or flexible blocks
- Select the View Availability link and select date of interest
- Select a block of time to populate the schedule
- You can choose the date in two ways
After the facility is selected, the information required will depend on if there is a rental restriction.
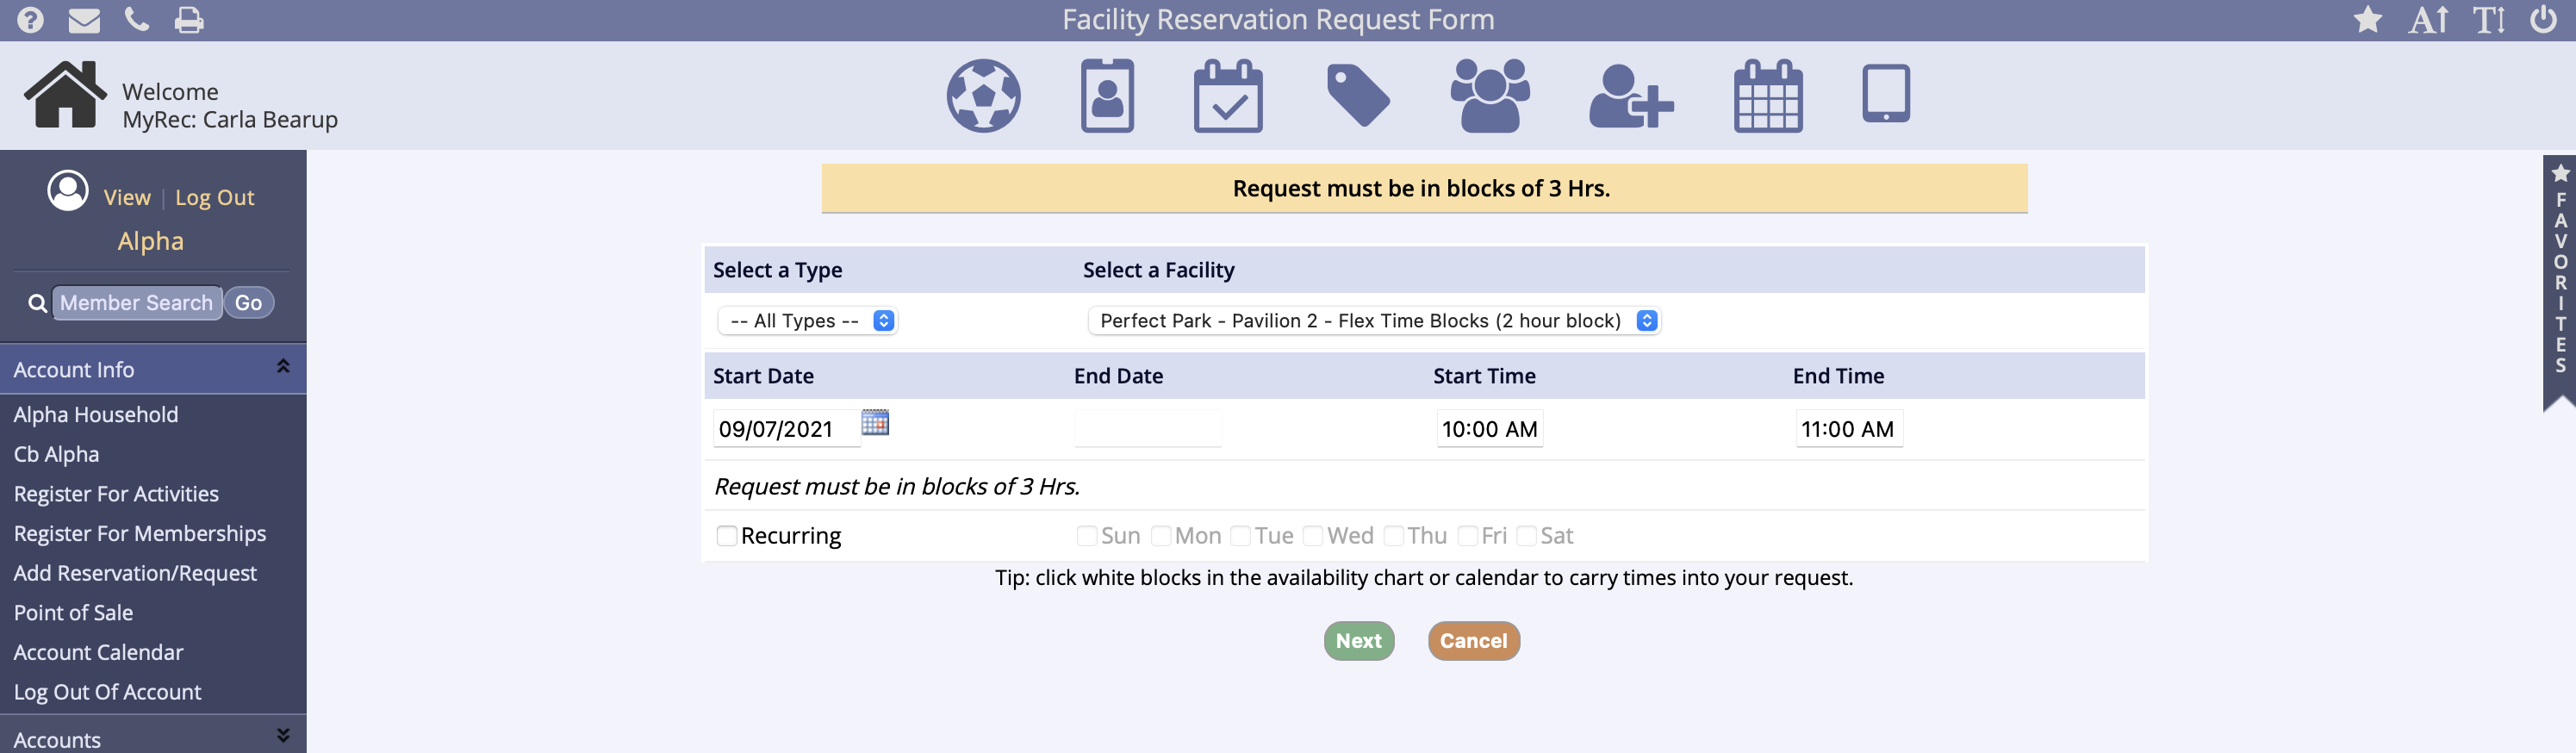
- First, enter the Start date, and the appropriate information for start and end times, then follow the next steps based on any rental restrictions
- If there are no blocks, any time period within the facilities operating hours can be selected just by filling in the start and end time fields
- If needed, enter a number in the buffer fields to denote minutes needed for setup or breakdown outside of the times entered in schedule
- These boxes will pre-fill if you have buffers set on the facility

- Enter the start and end times with the appropriate amounts of time
- You can enter more than one block if necessary (Ex. If the block is 2 hours, you can enter a block of time that is 4 or 6 hours, just enter start and end times accordingly)
- If the facility has set blocks, the blocks of time will appear on form
- Check off which block you wish to schedule
- You can schedule more than one block if necessary by checking off the appropriate blocks
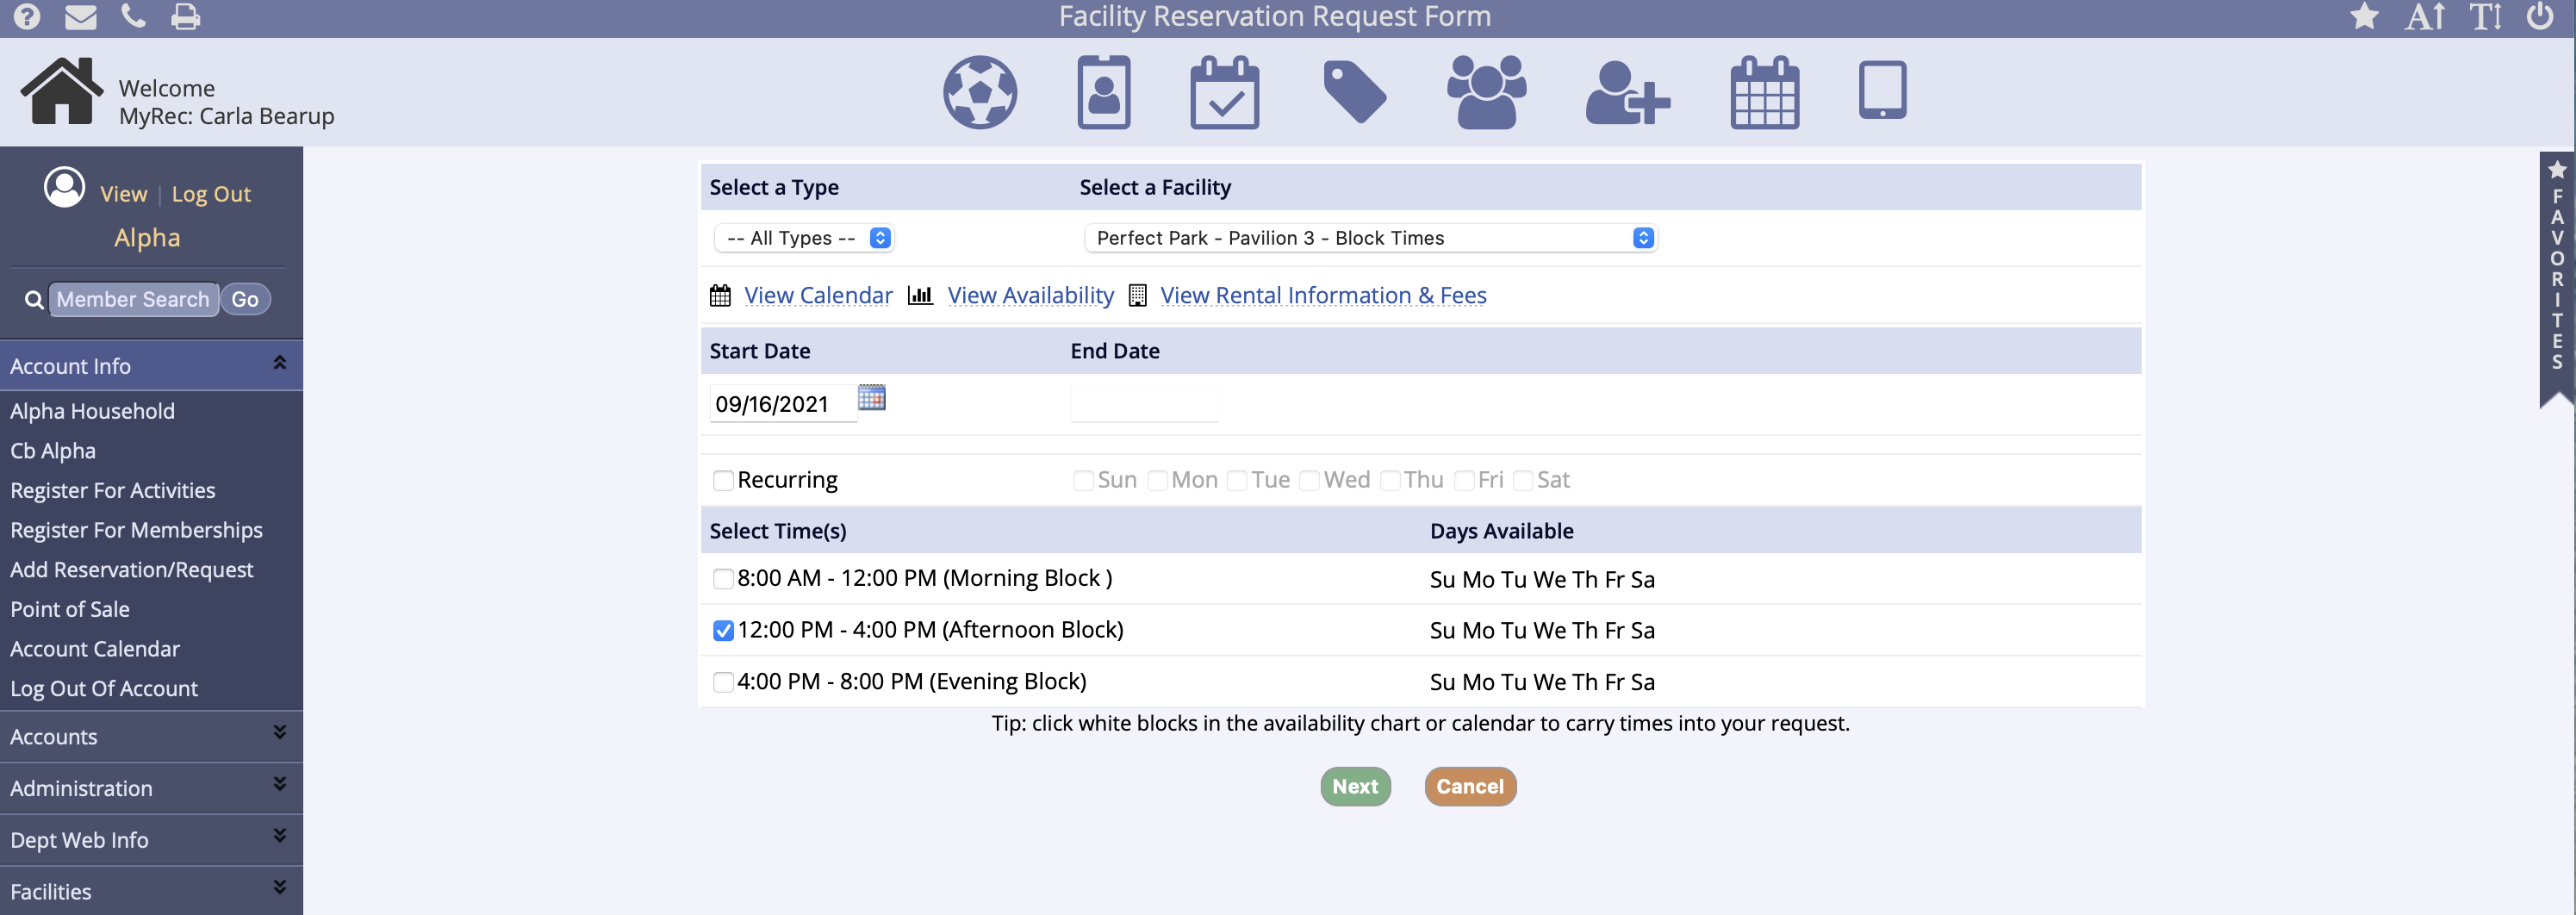
- If you are scheduling recurring dates, check Recurring, enter end date, and check days of week
- Click Next
- The selected dates will be verified and if there are any conflicts, it will be indicated at the top of the screen
- You can click the conflict link to view, edit, or delete conflicts
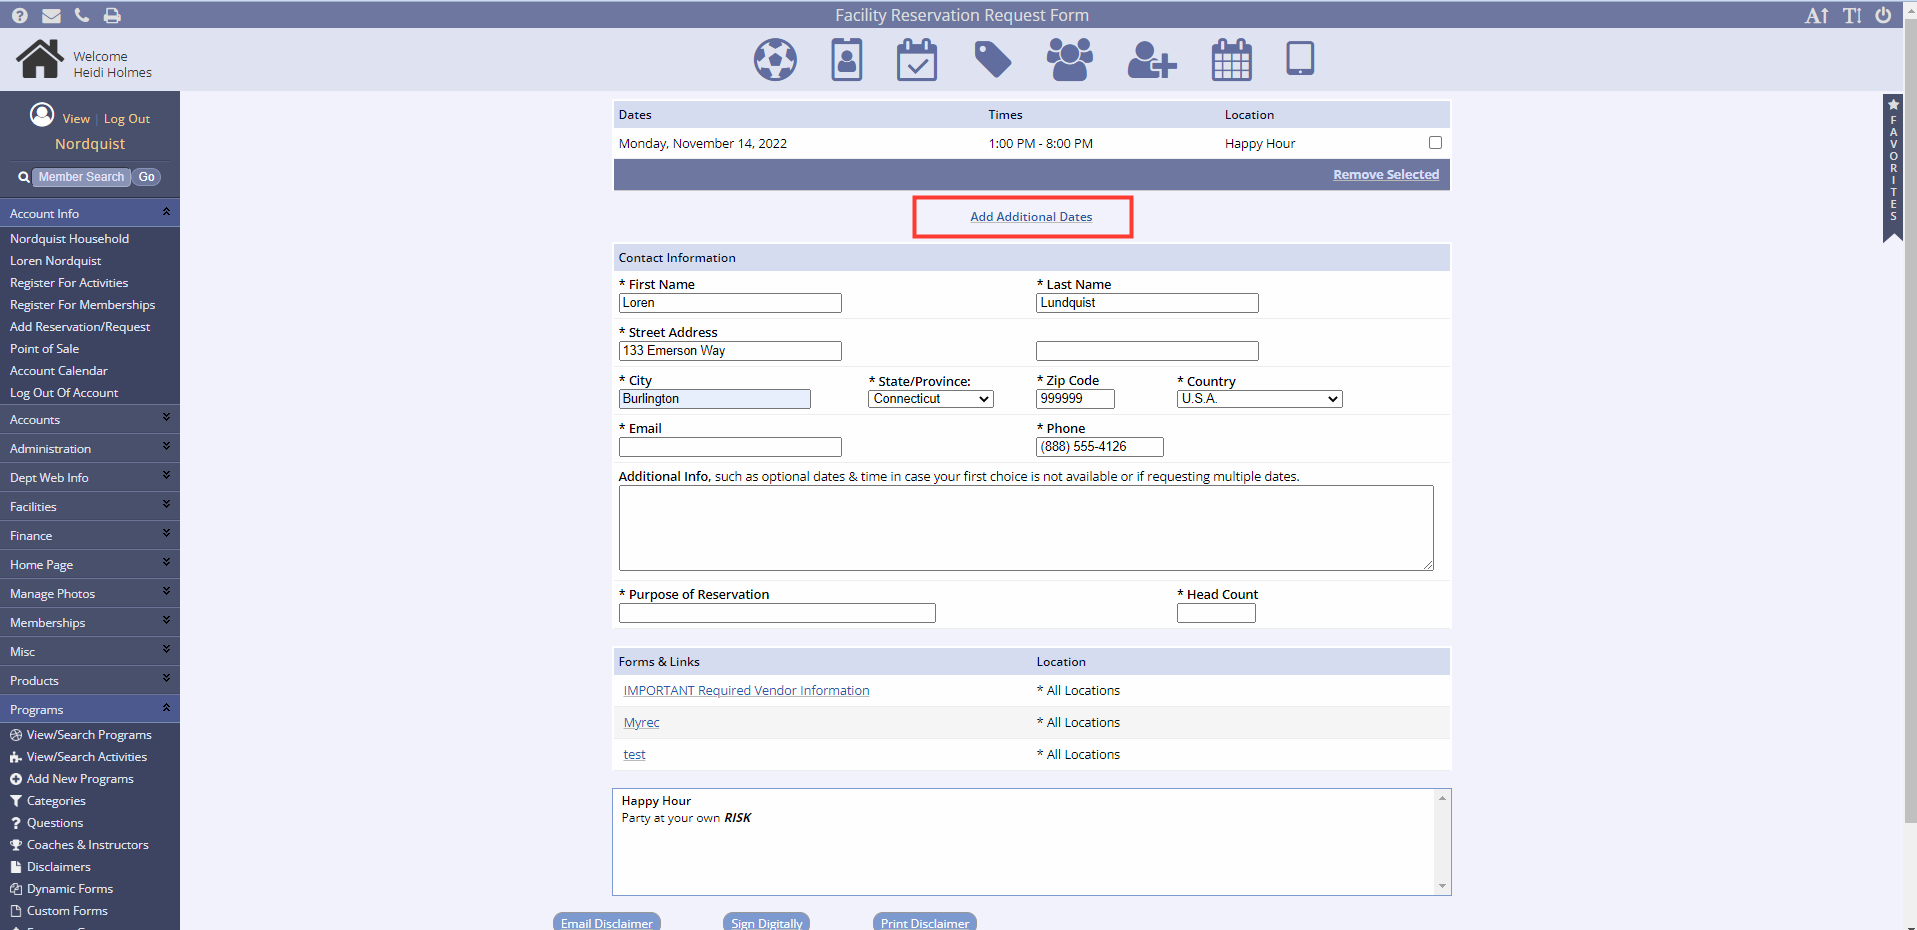
- You can also add more dates by clicking Add Additional Dates
- You can remove dates by clicking the checkbox next to the location and clicking Remove Selected
- Enter Contact Information
- The required information including purpose of reservation is denoted with an asterisk (*)
- Click Submit
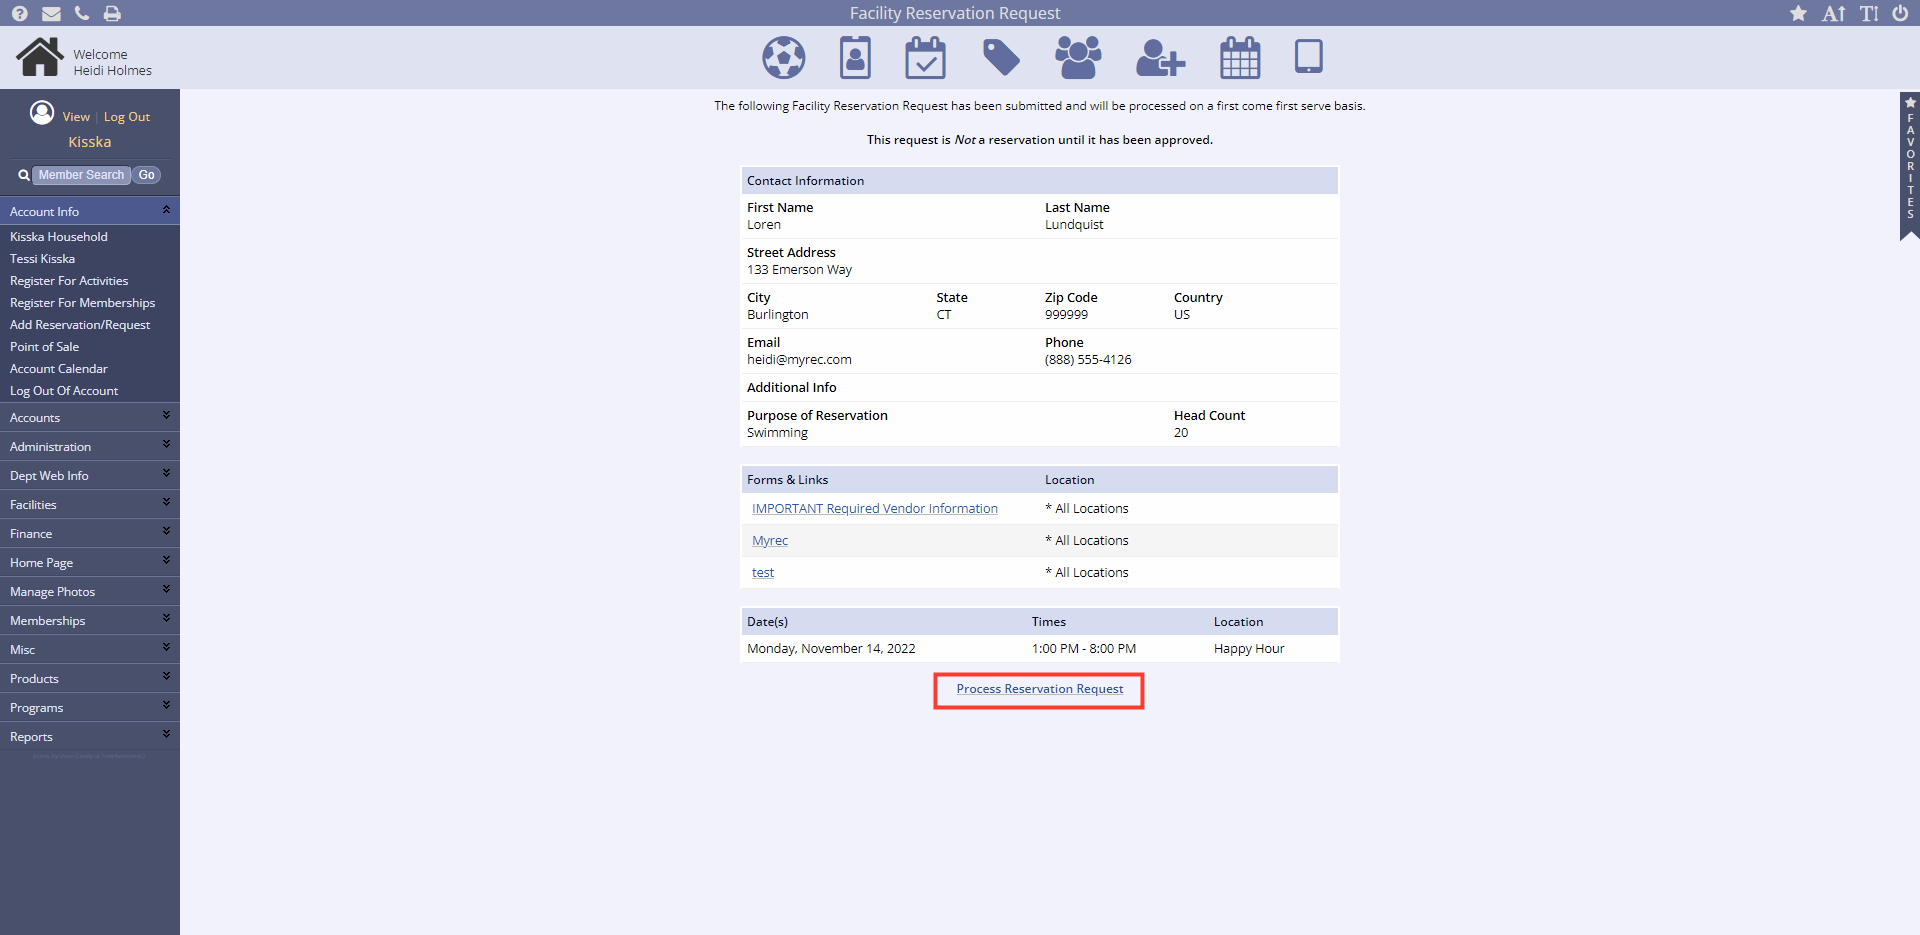
The facility reservation may require or recommend documents. If so, you will see a link to Click Here to view/Upload these documents at the top of the page.
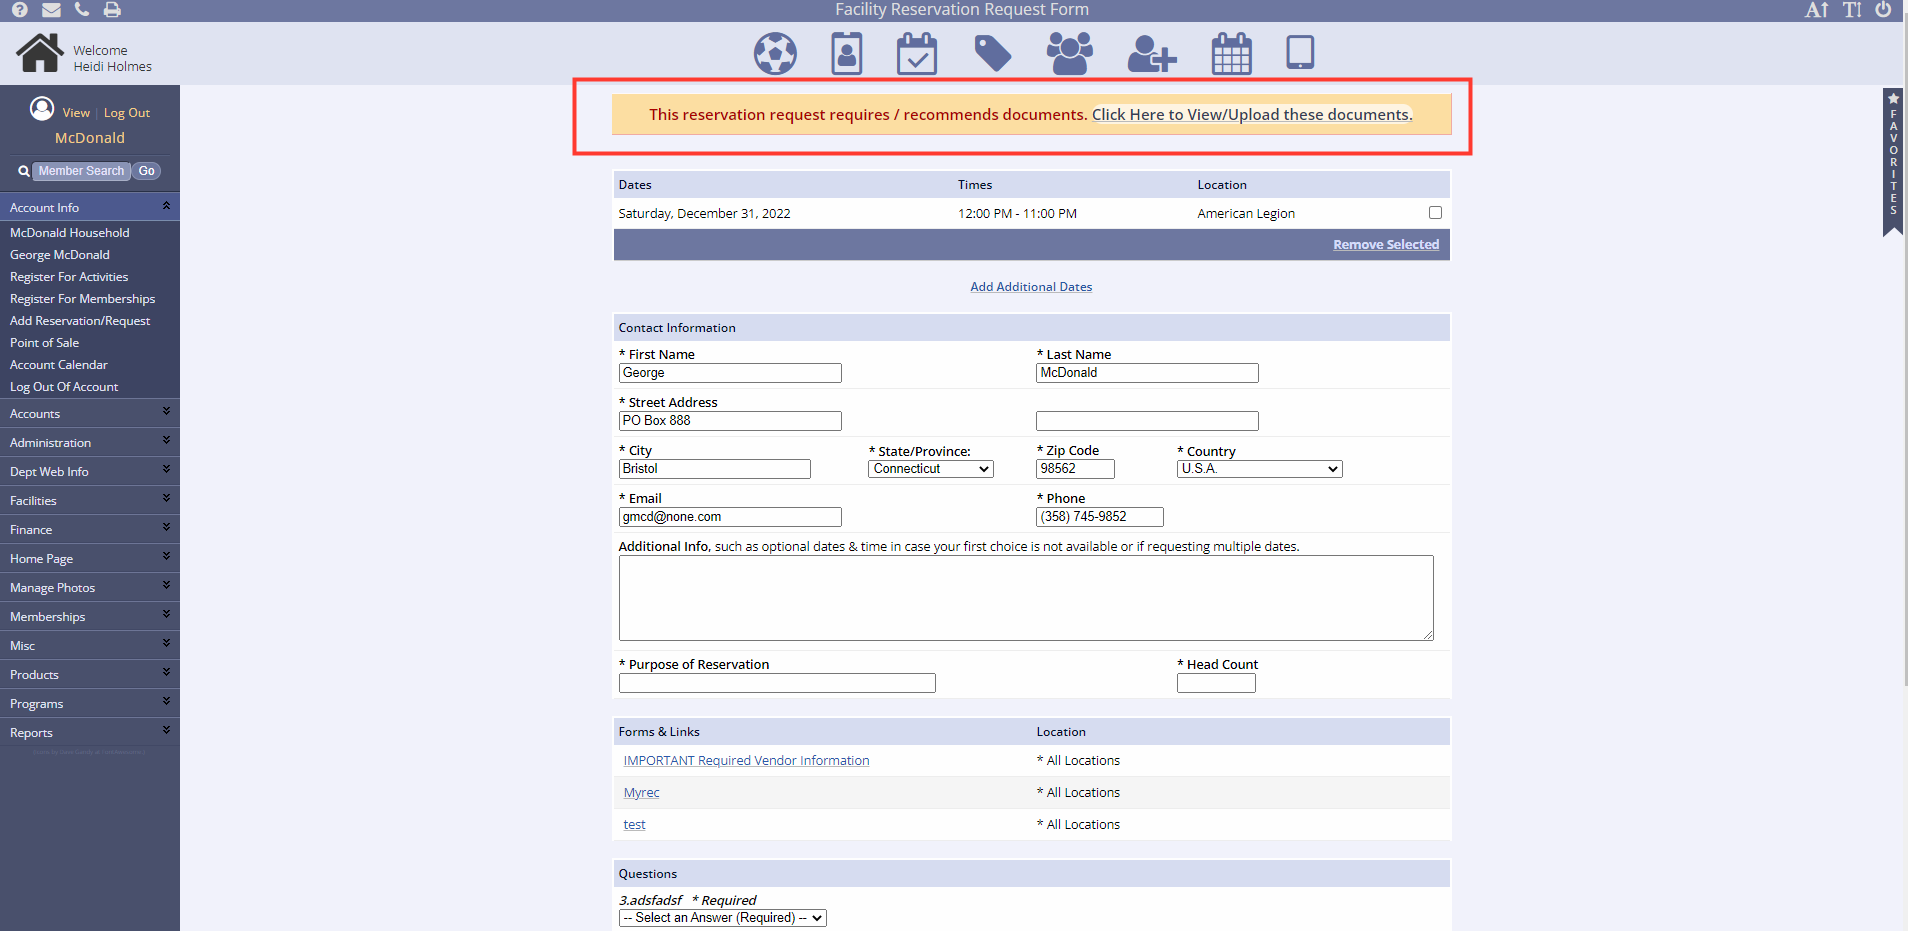
If you wish to hold the dates and approve the reservation request, there will be a link to the request Process Reservation Request. If you wish to do this at a later time, it will be listed on the main page under Needs Attention Facility Requests.
Processing Reservation Requests
How to View Reservation Requests
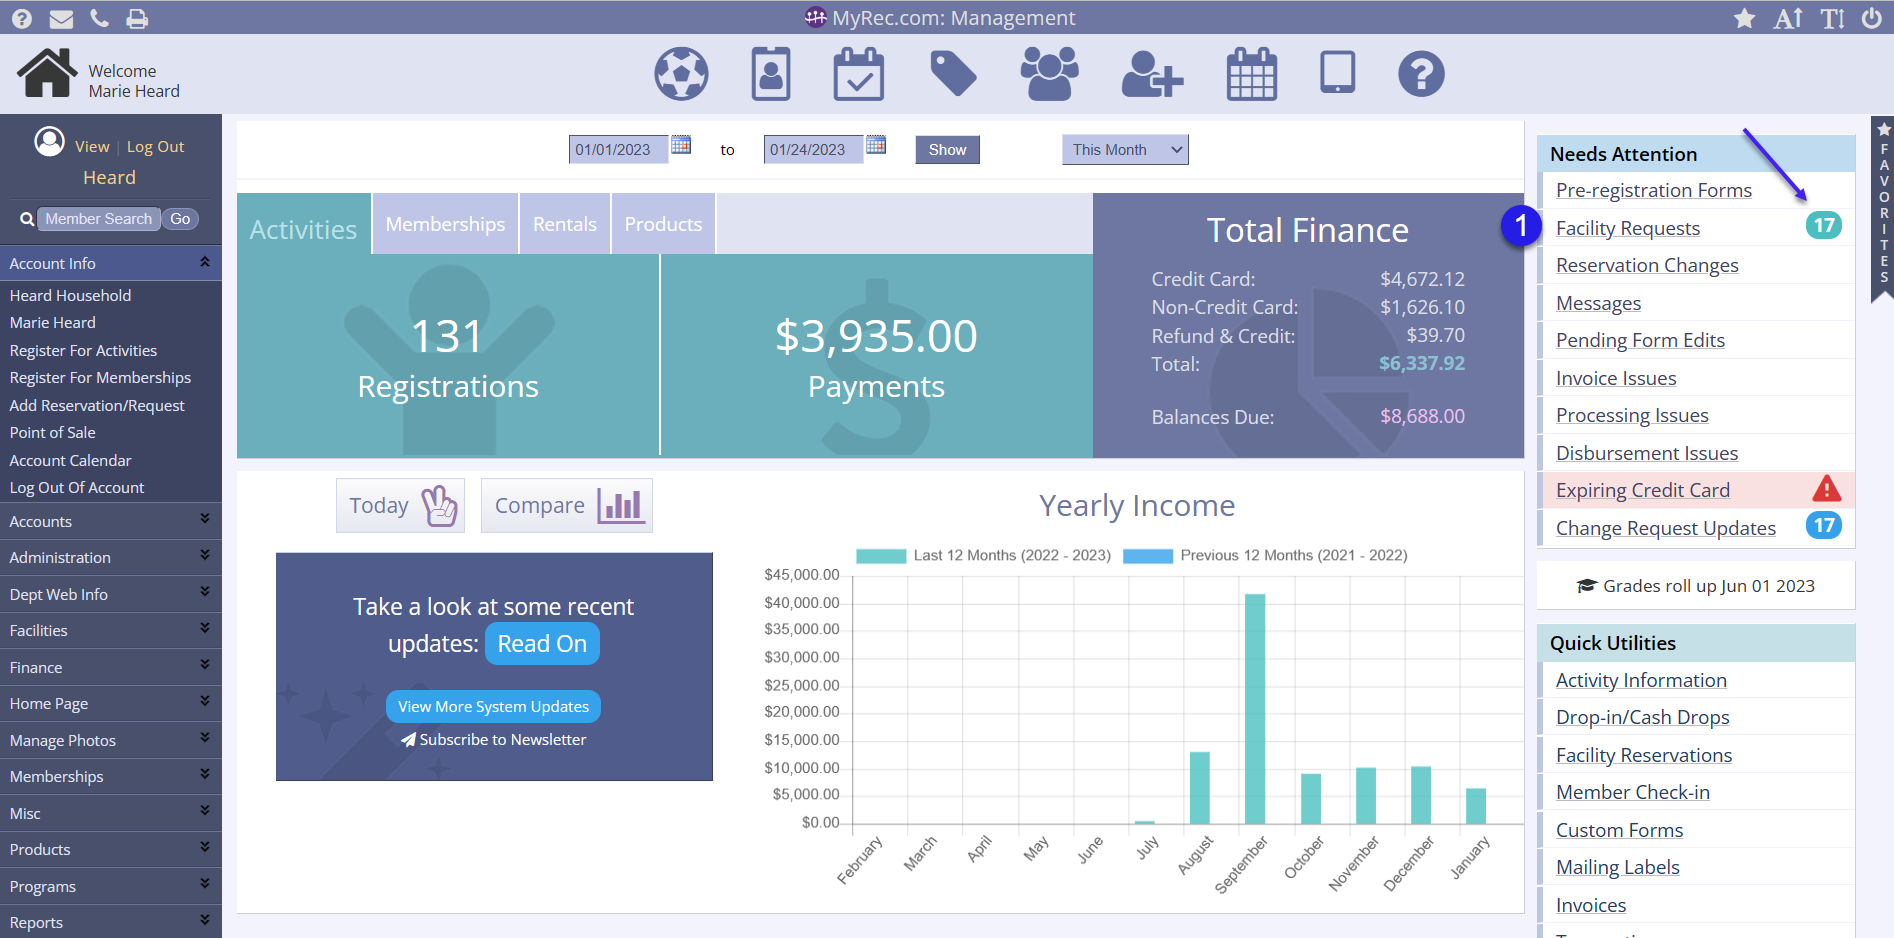
You can view all current Facility Requests from the Management homepage. On the right side of the screen, in the Needs Attention box, there is a shortcut to the Facility Requests page.
- Click Facility Requests
- The number to the right of the Facility Requests shortcut indicates how many current Facility Requests are waiting for management processing
- If there is no number to the right of the link, there are no requests to be processed
You can also access Facility Requests by expanding the Facilities menu on the leftside navigation menu and clicking Reservation Requests.
If your department is using Facility Requests, your staff should be checking the Needs Attention area regularly.
Processing Reservation Requests
On the Facility Reservation Requests page, all of the pending requests will be displayed. You can change the display by selecting from the Status dropdown. You can also sort results by selecting from the Location dropdown. The checkbox on the right side of the screen will add facility details to the results displayed.
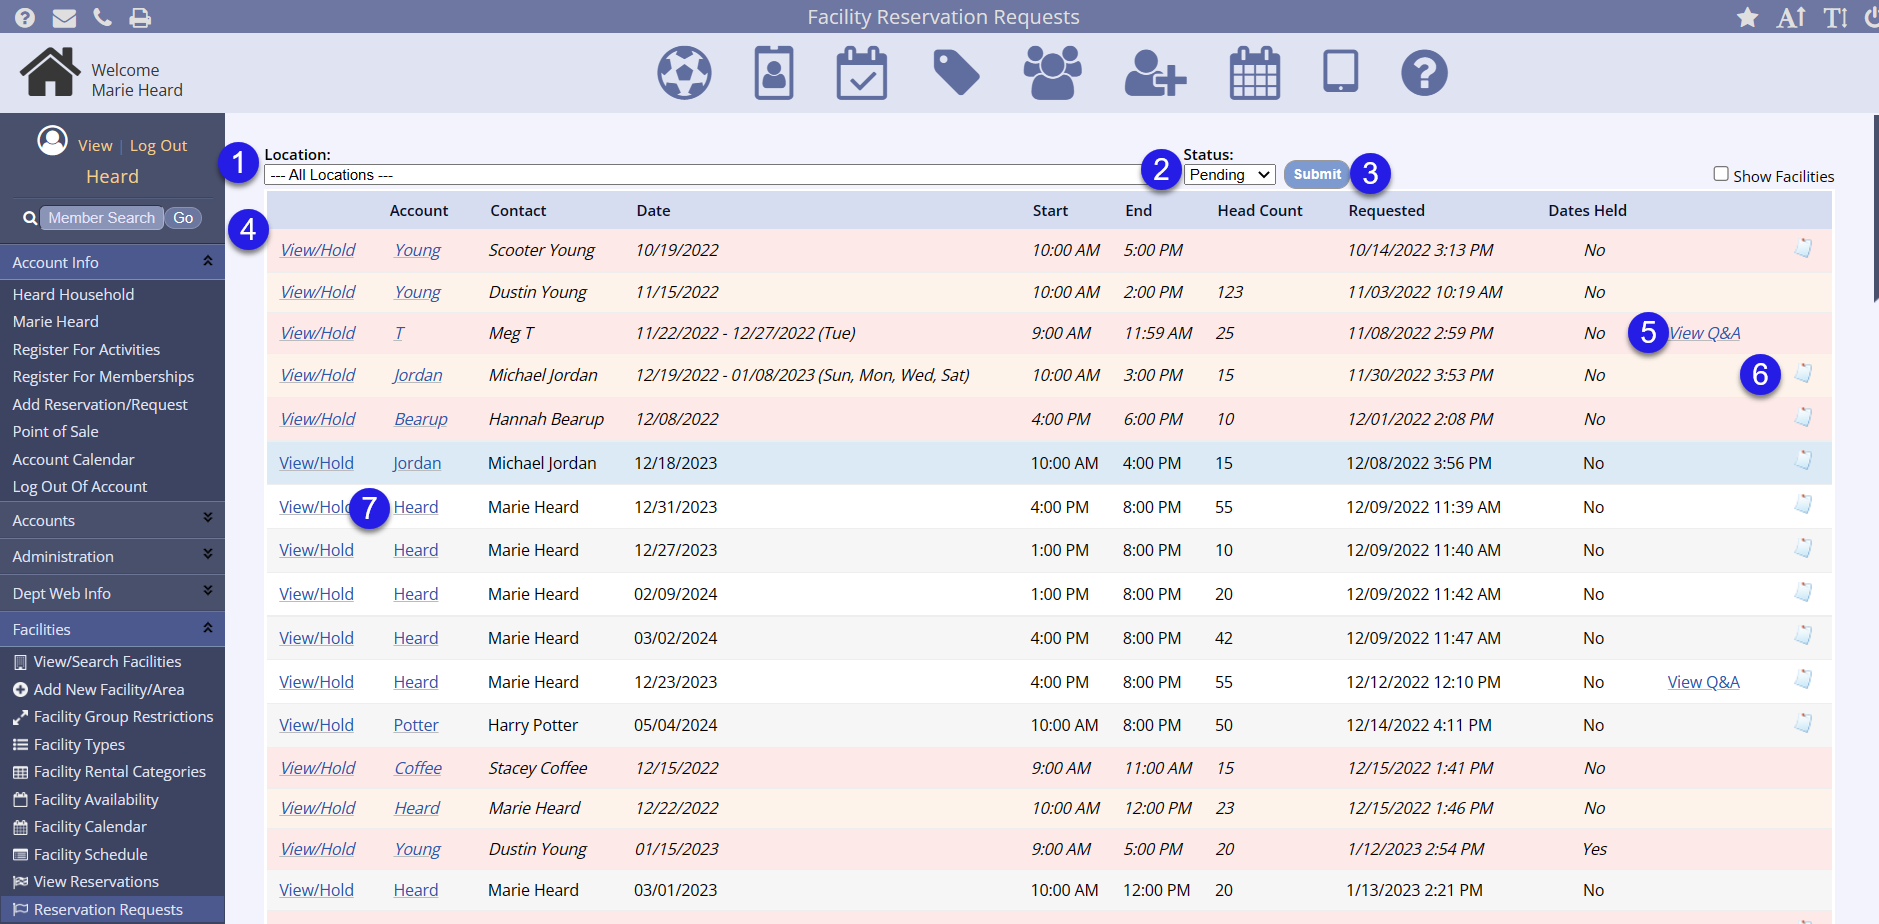
- Select the location from the dropdown, if necessary
- Select the status from the dropdown, if necessary
- Click Submit
- Results show the Account, Contact, Date, Start and End Times, Head Count when provided/required, the date the request was made, whether the dates are being held, and any questions or disclaimers required on the request
- If a result is italicized, that means the date of the request has passed and the request is still pending staff processing
- Click View Q&A or the Disclaimer icon to view that information, when present
- Click View/Hold for the request you want to process
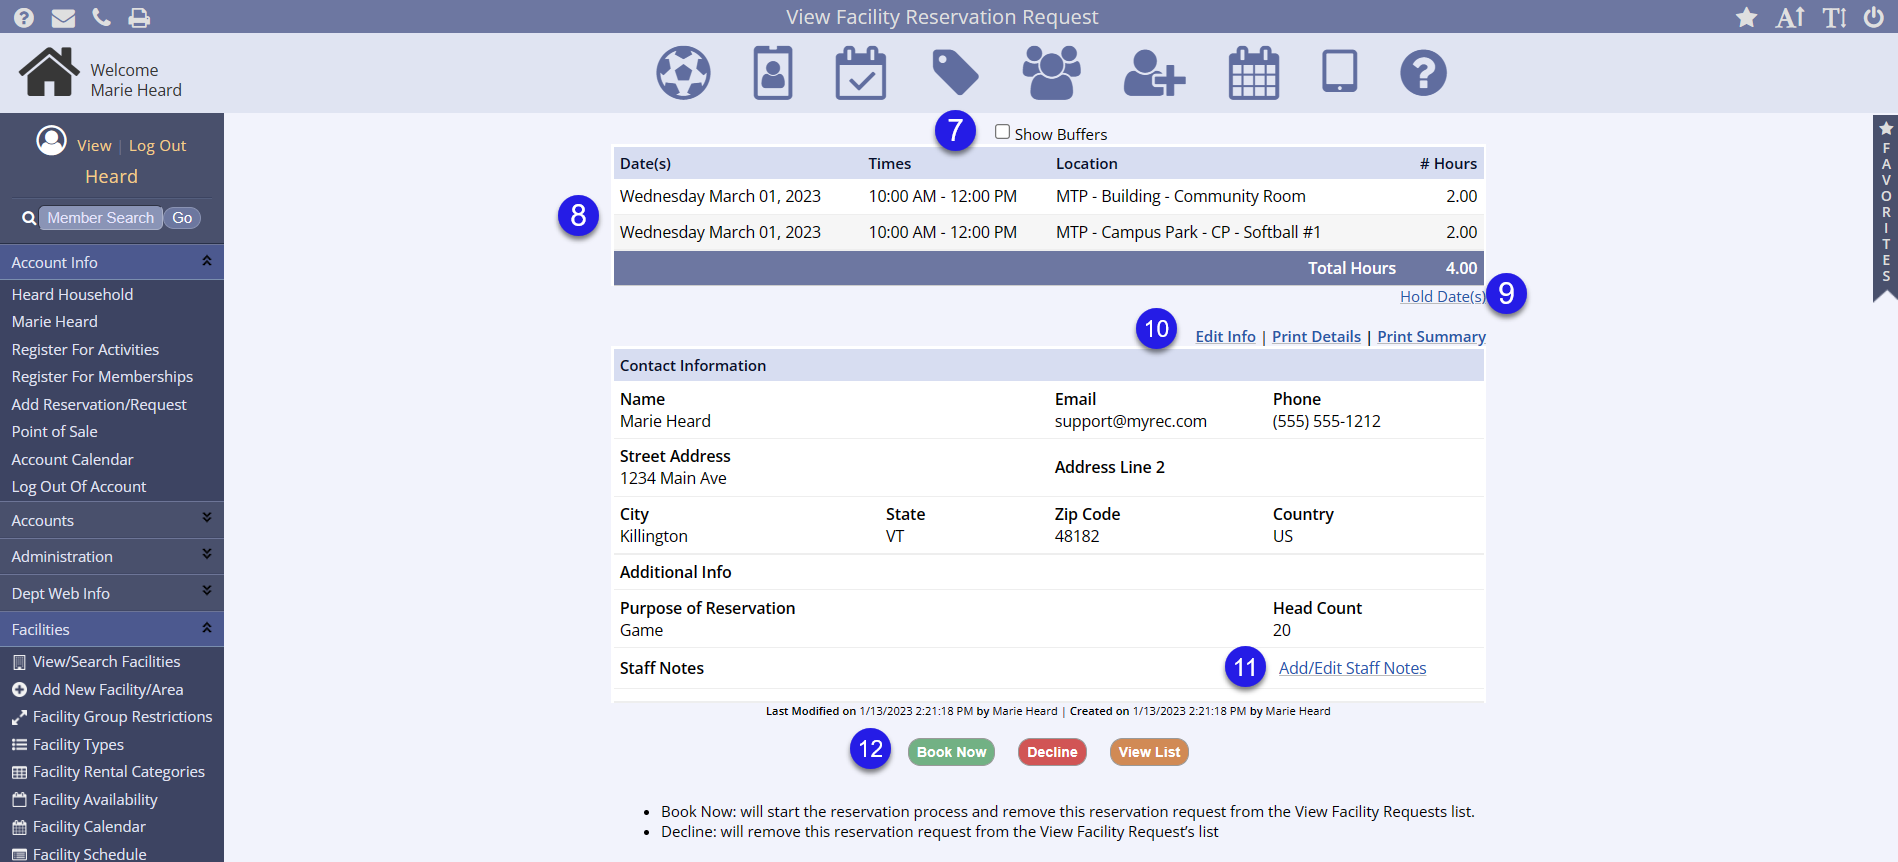
- Check Show Buffers if you have buffers applied in facilities
- View the requested reservation information
- In the example above, you can see the request is for two different locations at the same date and time
- Click Hold Date(s) if you would like to disallow others from using the date, time, and location for this request until you can properly process it
- This may apply if you have a board that must approve facility use prior to your staff booking or declining the request
- If you need to edit or print, you can link on the links provided
- If there are any notes you need to add for the staff, you can click Add/Edit Staff Notes
- Click Book Now or Decline to process the request
- Once a request has been processed, it will no longer be in the Reservation Request list nor appear on any request reports
- It can now be found as a reservation and in reservation reports
- Click View List to return to the request list without processing this request
- Once a request has been processed, it will no longer be in the Reservation Request list nor appear on any request reports
Booking a Reservation Request
You will now go through the process of making the reservation from the management side. For more information and a helpful video on management reservations, please review our Creating a Reservation article.

- After clicking Book Now, you will assign the fee type from the dropdown
- If there is a fee matrix in place for the facility, the fee will be automatically calculated when you select the per hour or per day option and a message will appear below the line
- If you select Flat Fee, you will enter the Rental Fee in the blank field to the right
- Click Next
- The next screen will give you the opportunity add, edit, or remove dates/times/locations from the reservation request
- Click Continue after making changes or if no changes are necessary
- Please see the next part of the process in Completing the Reservation (scroll down in the article)
- Continue to Checkout to apply payment or click Continue with No Payment to process and create a balance due
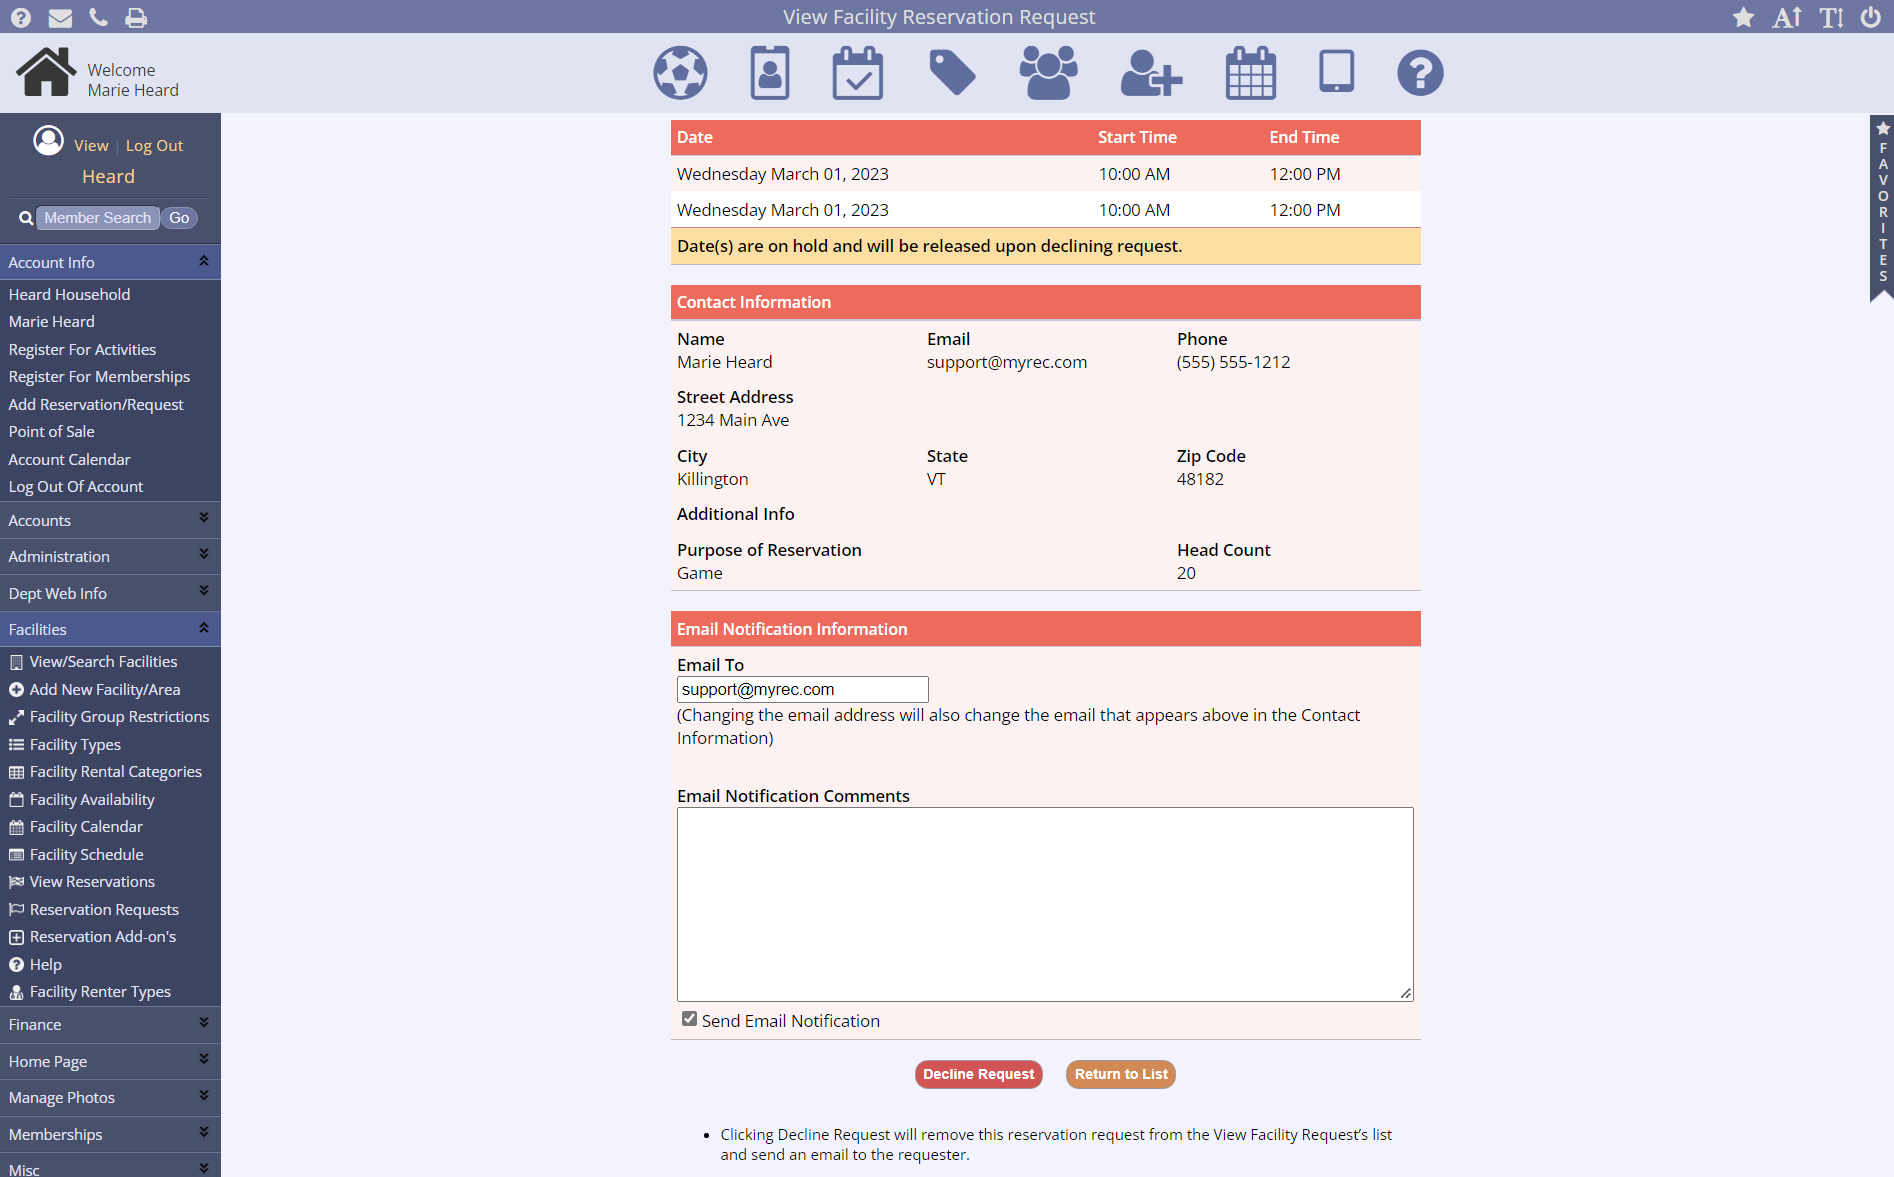
Declining a Reservation Request
When you click Decline while processing a request, you have the option to include a message to the user.
- Verify the email address in the Email To field
- Type the content of your email
- This might be a reason for the decline like the facility is closed for cleaning, the headcount is too large, etc…
- Be sure Send Email Notification is checked below the message box
- Uncheck this box if you do not wish to send an email when you decline the request
- Click Decline Request or Return to List to go back to the request list without processing the request
Viewing Required Documents
If a facility has a required document, like a certificate of insurance or alcohol permit, you can view those documents in the Reports menu>Facility Reports>Requirement section>Required Documents by Request.

You can view, approve, or modify a document on the member page at the bottom of the screen.
