
You can export your facility calendar to the Musco Lighting software, which controls lighting automatically through a schedule. You must have your Musco Control-Link software account and facility information, including Musco Facility IDs and Field IDs, and usercode/password, which is different than your MyRec.com username/password and different from your Musco portal credentials. After receiving this information from Musco, have them turn on the ability to receive data from us.
Daytime Lighting
If lighting is needed in the daytime, please let Musco know that there is a setting that they will need to update.
Setup
In order to enable the Musco Calendar Export, please contact MyRec.com customer service. You will need to give them your department’s Musco usercode and password.
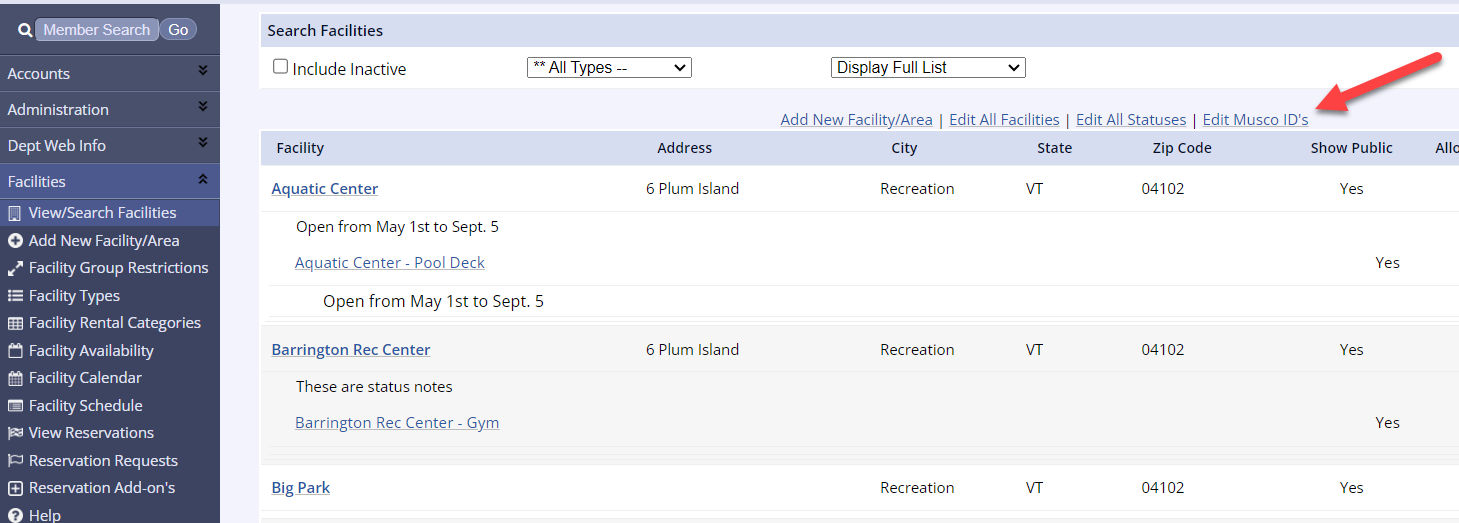
- On the MyRec.com Management side, go to the Facilities tab in the left-hand navigation menu, then select View/Search Facilities
- Click the Edit Musco ID’s link at the top of the screen
- You will need to enter the Musco Facility ID (for the parent facility) in the Musco Facility ID box, and the Musco Field ID (for the facility area) in the Musco Field ID box.
- If you want to schedule an entire facility in Musco, you must provide both the Musco Facility ID and the Musco Field ID for the parent facility. If not scheduling the entire facility, the Musco Field ID for the parent facility can be left blank.

- When you are done entering the Musco Facility ID and Musco Field IDs, click Update
- The Musco ID's can also be added or edited within the facility itself by going to the Facility Info tab and clicking Edit. There will be a field for both the facility and field ID on this page.
Sending Schedule to Musco
- Go to the Management Calendar
- Click Print Calendar List
- If not using the defaults, select the Location and/or start and end dates
- On the list, you will see a checkbox in front of any entry in the schedule that has a Musco Facility ID and Musco Field ID that is available to schedule to Musco
-
Check any items that you wish to send or Select All Dates
- This will only select dates that have the Musco information
- If there was a previously sent schedule, any unchecked items will be removed, so any items you wish to remain on the schedule should be checked
- The default for scheduled items must be within non-daylight hours, the Musco schedule will not accept the item if it is in daylight hours, and it will not stay checked in our system
- Reminder: contact Musco to change a setting to allow lighting during daylight hours
- After making selections, click Send Schedule to Musco
Once you send the initial schedule for the selected time period, if you go back into the Calendar list any items that were already sent will be checked. If you wish to make changes to send to Musco, check or uncheck applicable boxes, and send the schedule again.