Accessing the System Settings
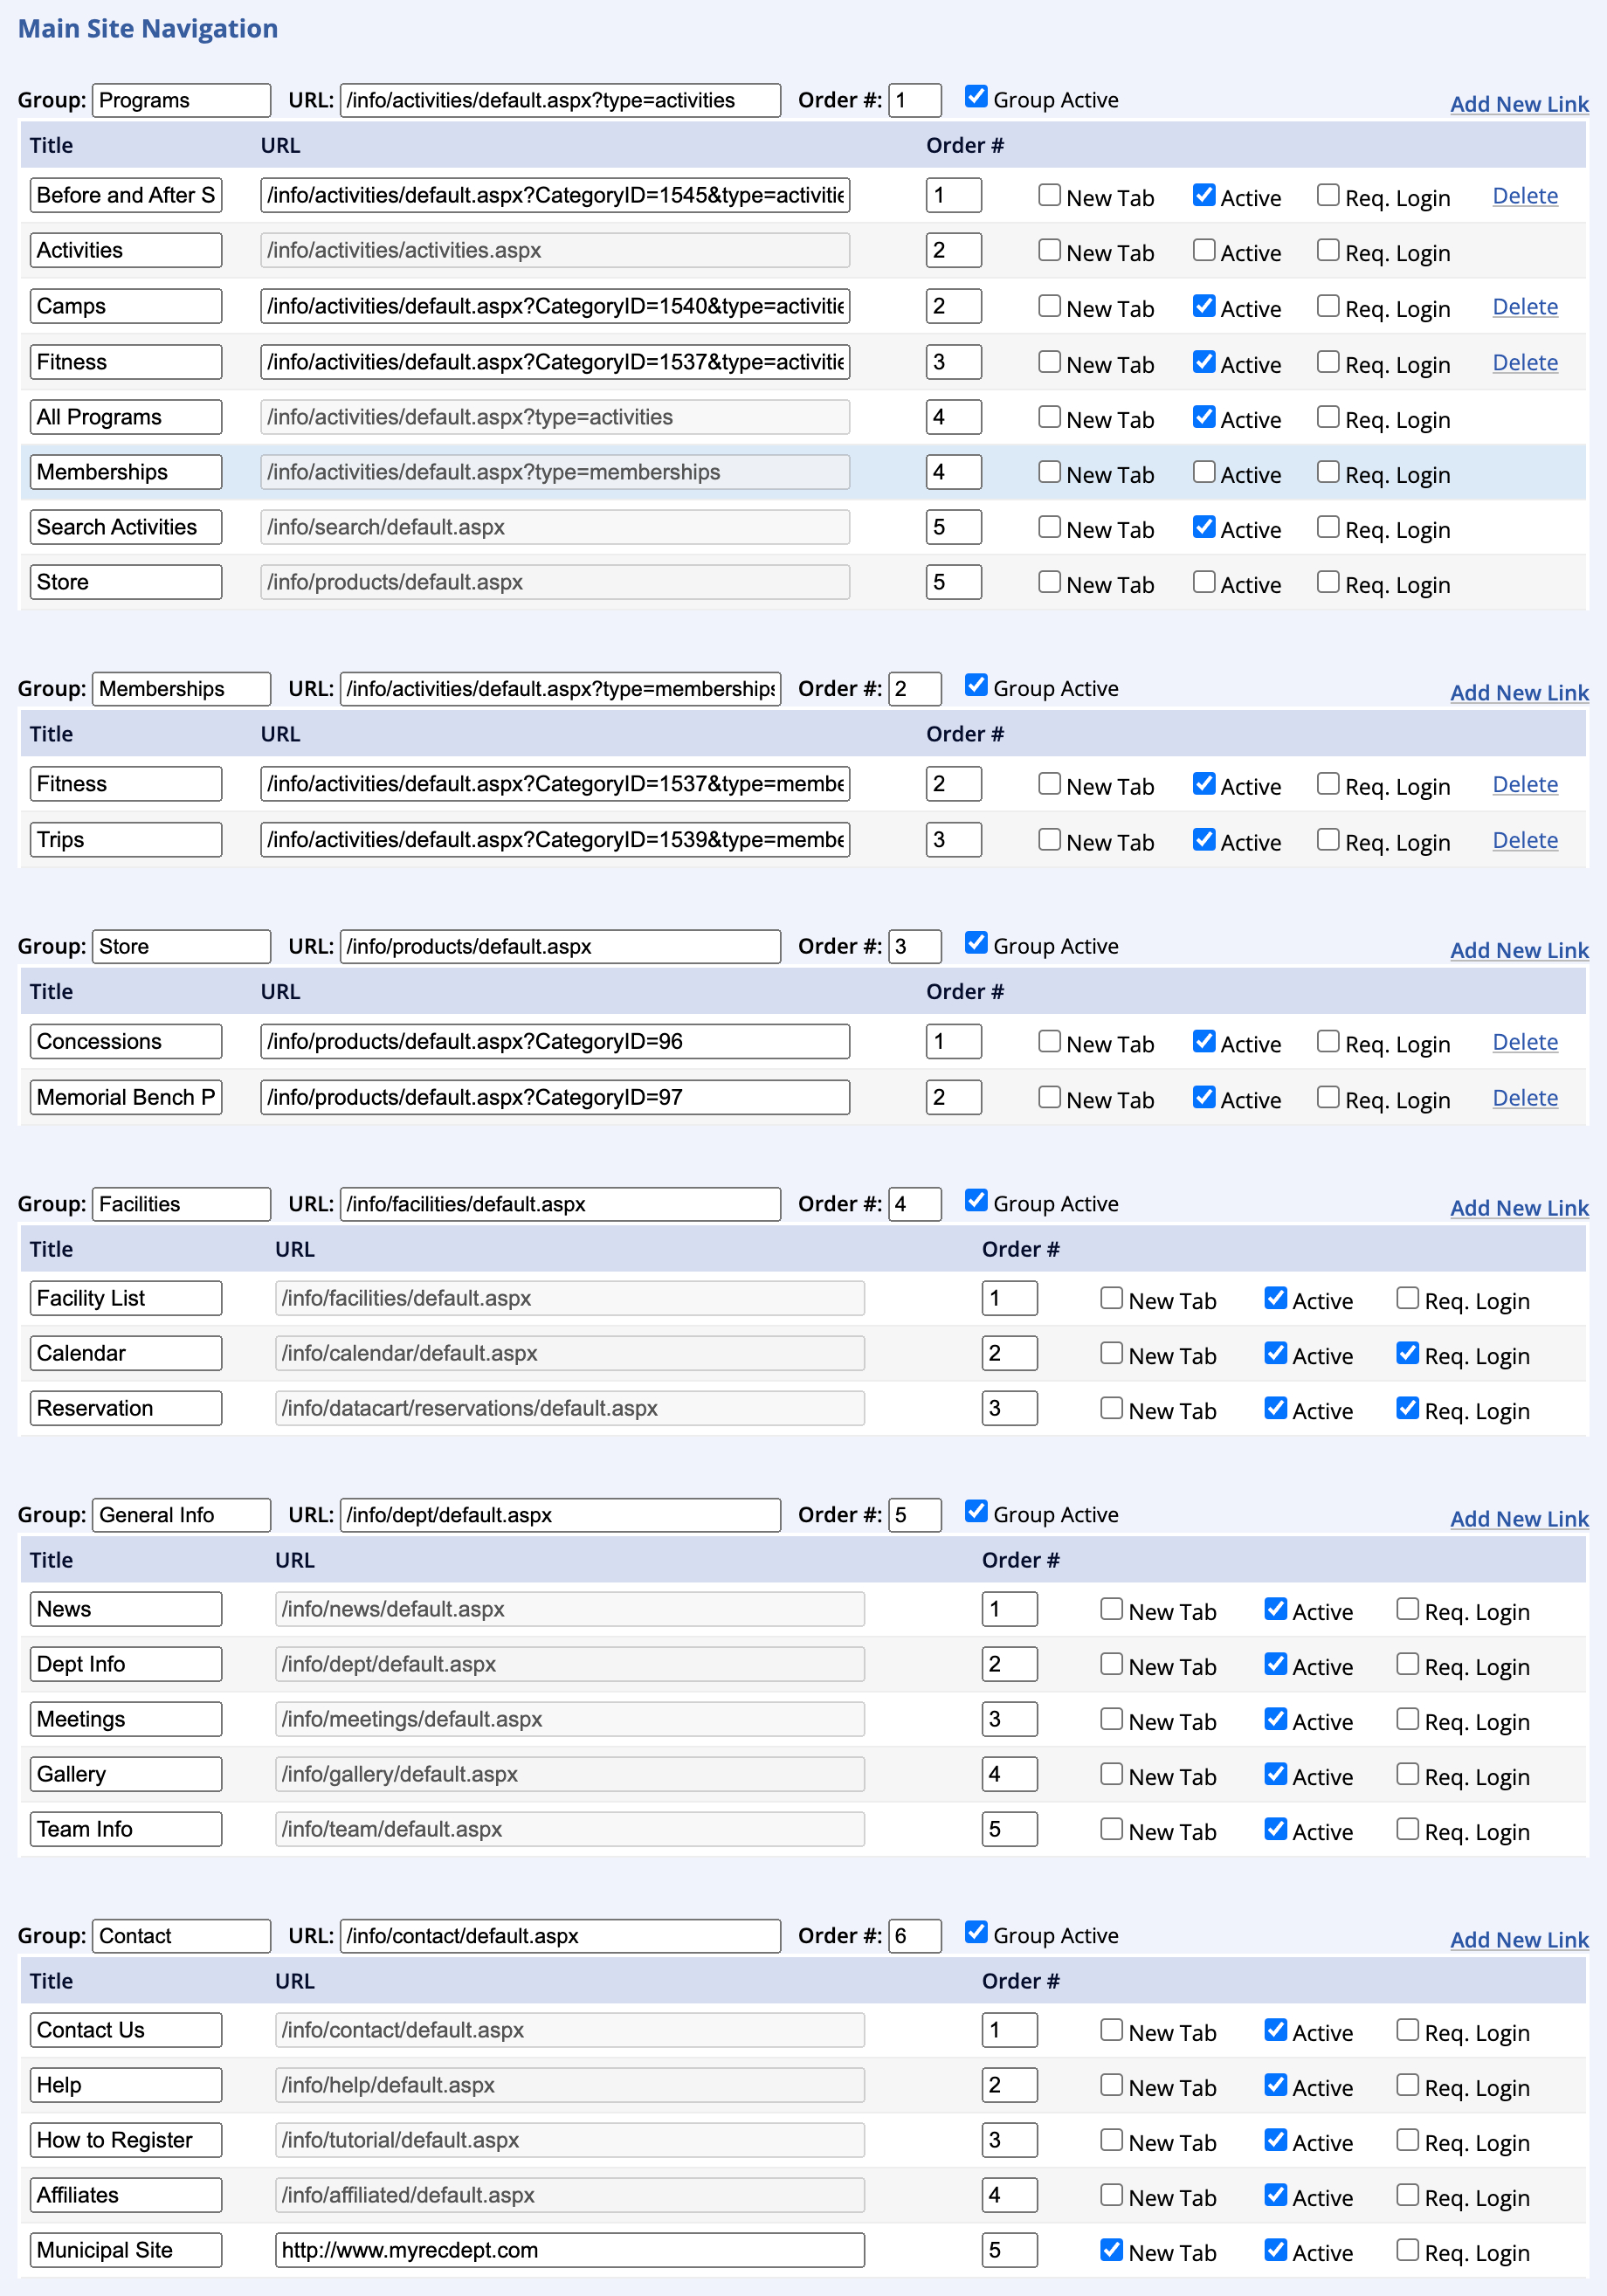
- Open the Administration tab on the leftside navigation menu
- Select the Settings option
Department Info Settings
Department Information Settings
The Department Information settings will have been setup when your site was creat...
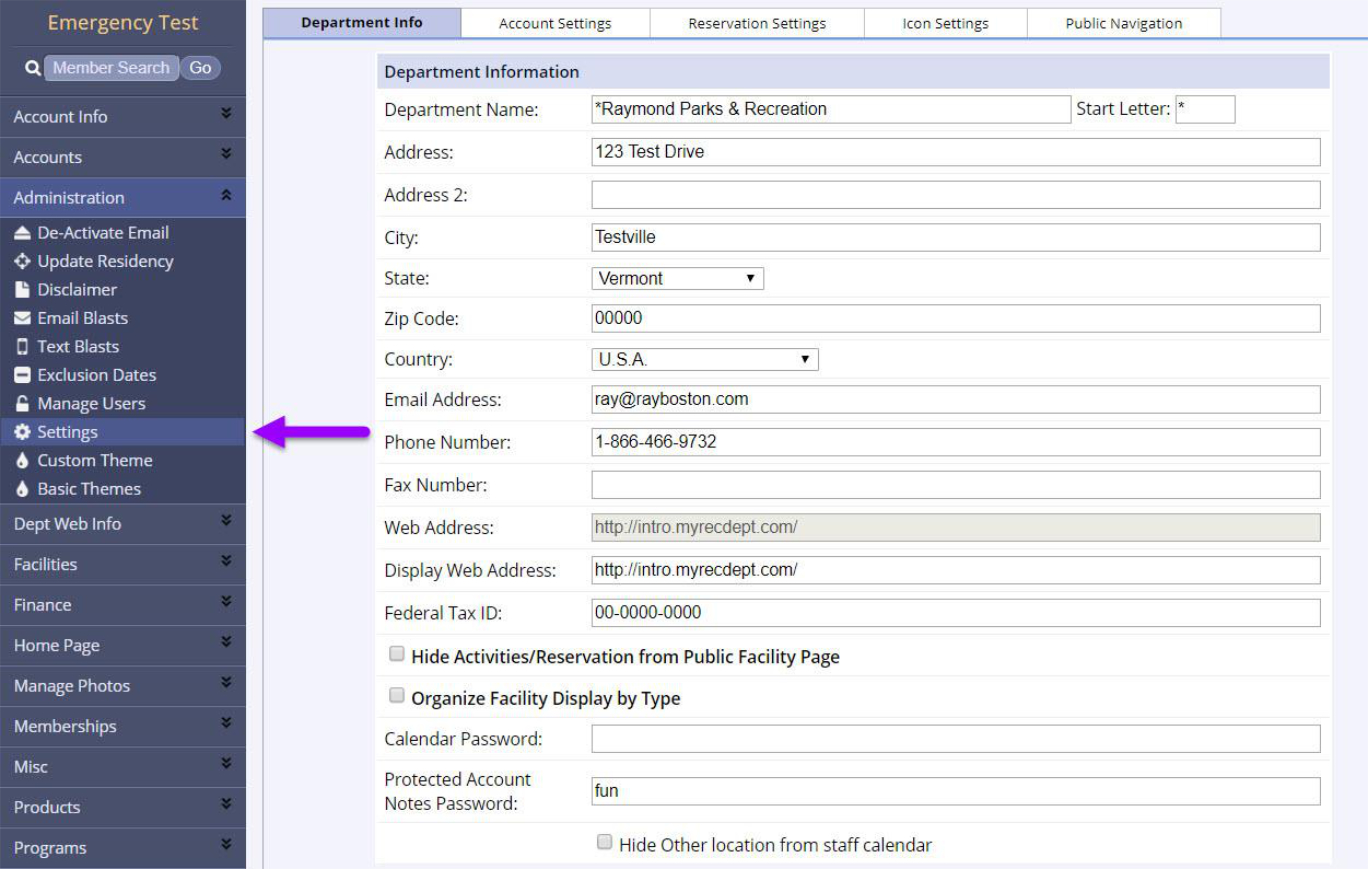
Access the Department Info Settings
- Open the Administration tab on the leftside navigation menu
- Select the Settings option
- Click Submit
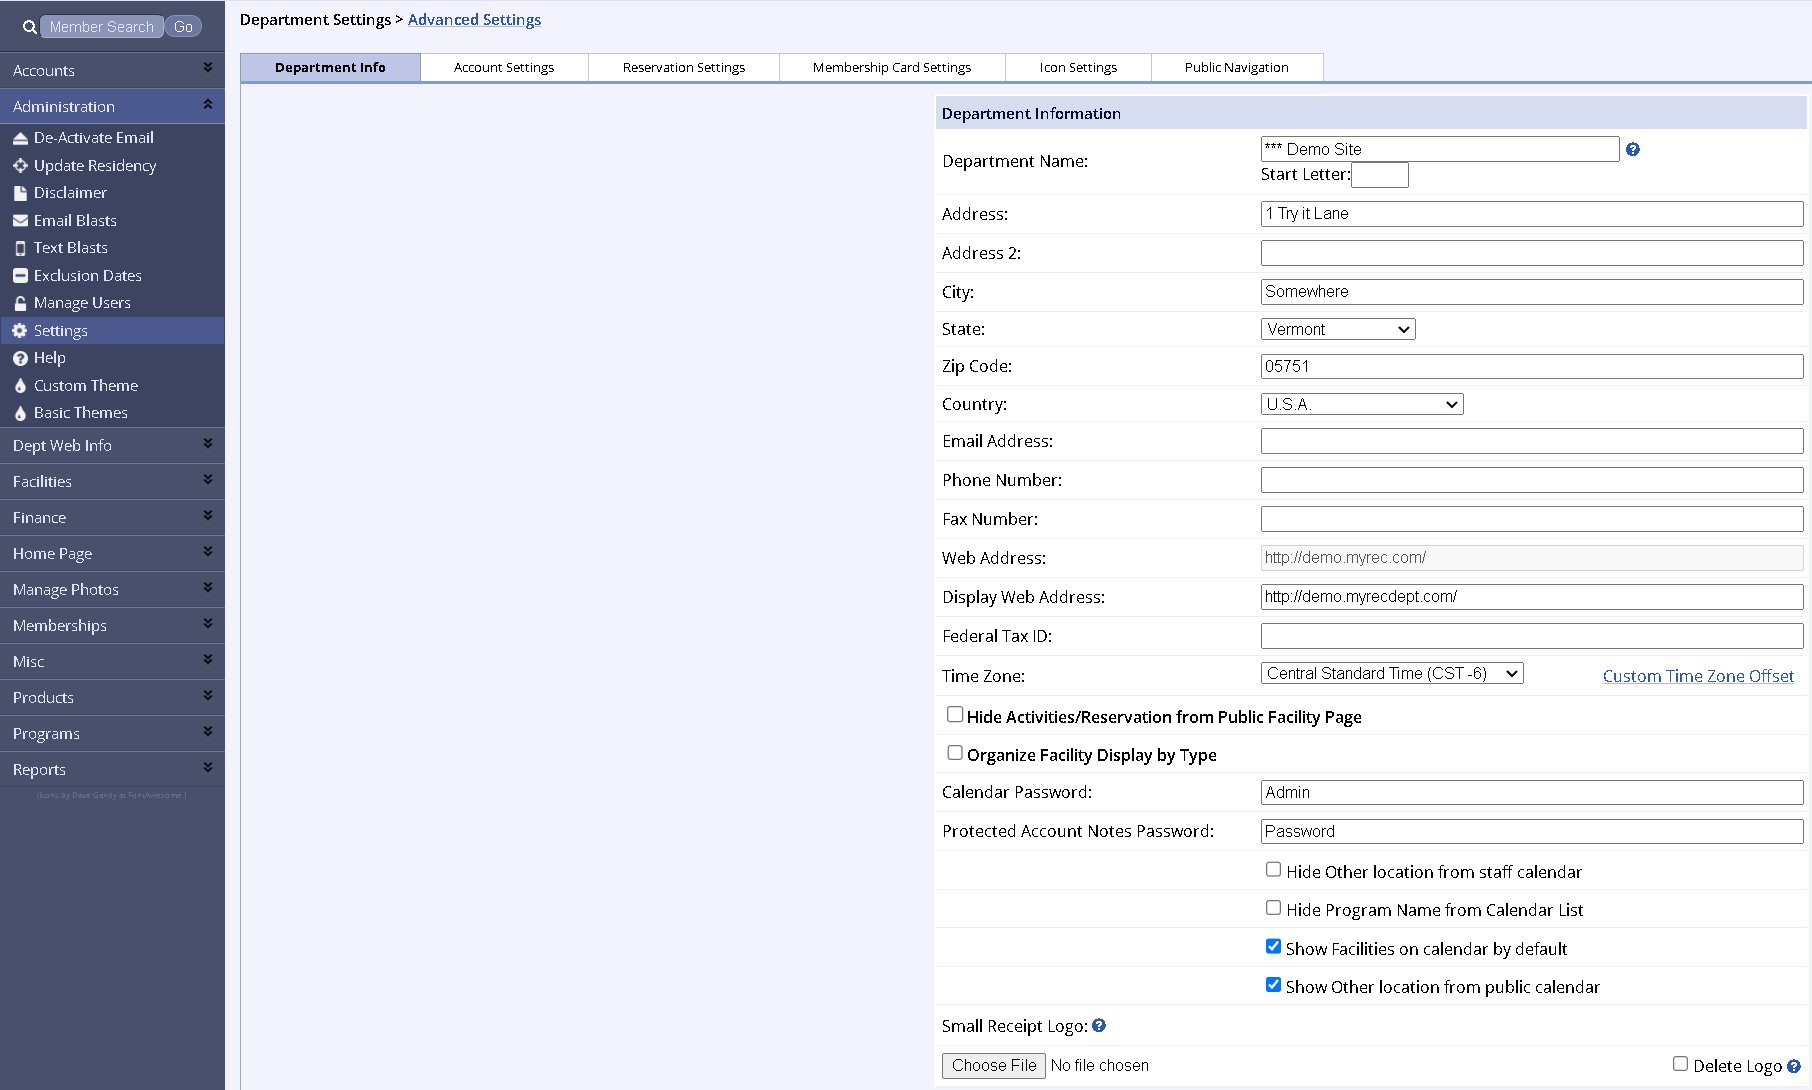
- The Department Information settings contain address and contact information for the Department and largely will remain static information
- Department contact information is pulled from this location to show in several locations including, public site Contact Page, public site footer, receipt headers and email blast headers
Settings under the Department Information tab
- Calendar Password: Set a password that when entered on the public site calendar shows the management side calendar in Read Access only
- Protected Account Notes Password: Password for accessing protected account notes on any account from management site
- Hide Other Location From Staff Calendar: Allows you to hide all programs using the Other Location
- Small Receipt Logo: Upload logo that will print on small receipts from POS
- Check Out Content: This is the text that the public sees upon checkout
- Payment Choice Page Text: Instructional text that appears to the public when both Online check out and Pre-Registration Form is an option
- Pre-Registration Form Instructions: Instructional text that appears to the public when the Pre-Registration Form option is used online and should tell the user how to complete their registration
- Default Invoice Text: Text that will appear on every invoice
- Move from Waitlist Email Message: Text box for custom message on the auto email generated when a registrant is moved from the waitlist into an activity
- Facility List Text: Appears on the public side Facility List if entered in this text box
- This could be used to give more information about your facilities to the public. If this is not needed leave text box blank
- Additional Contact Info: This can be used to add additional information to the Contact Info page
- Hours of Operation: Allows you to list the hours that your office is open
- Add/Edit Facility Links and Forms: Allows you to add any Links or Forms you may need for your Facilities
Account Settings
Account Settings
Under the Administration tab-->Settings link--> Account Settings tab, you w...
Access the Account Settings
- Open the Administration tab on the leftside navigation menu
- Select the Settings option
- Click the Account Settings tab
Resident Status
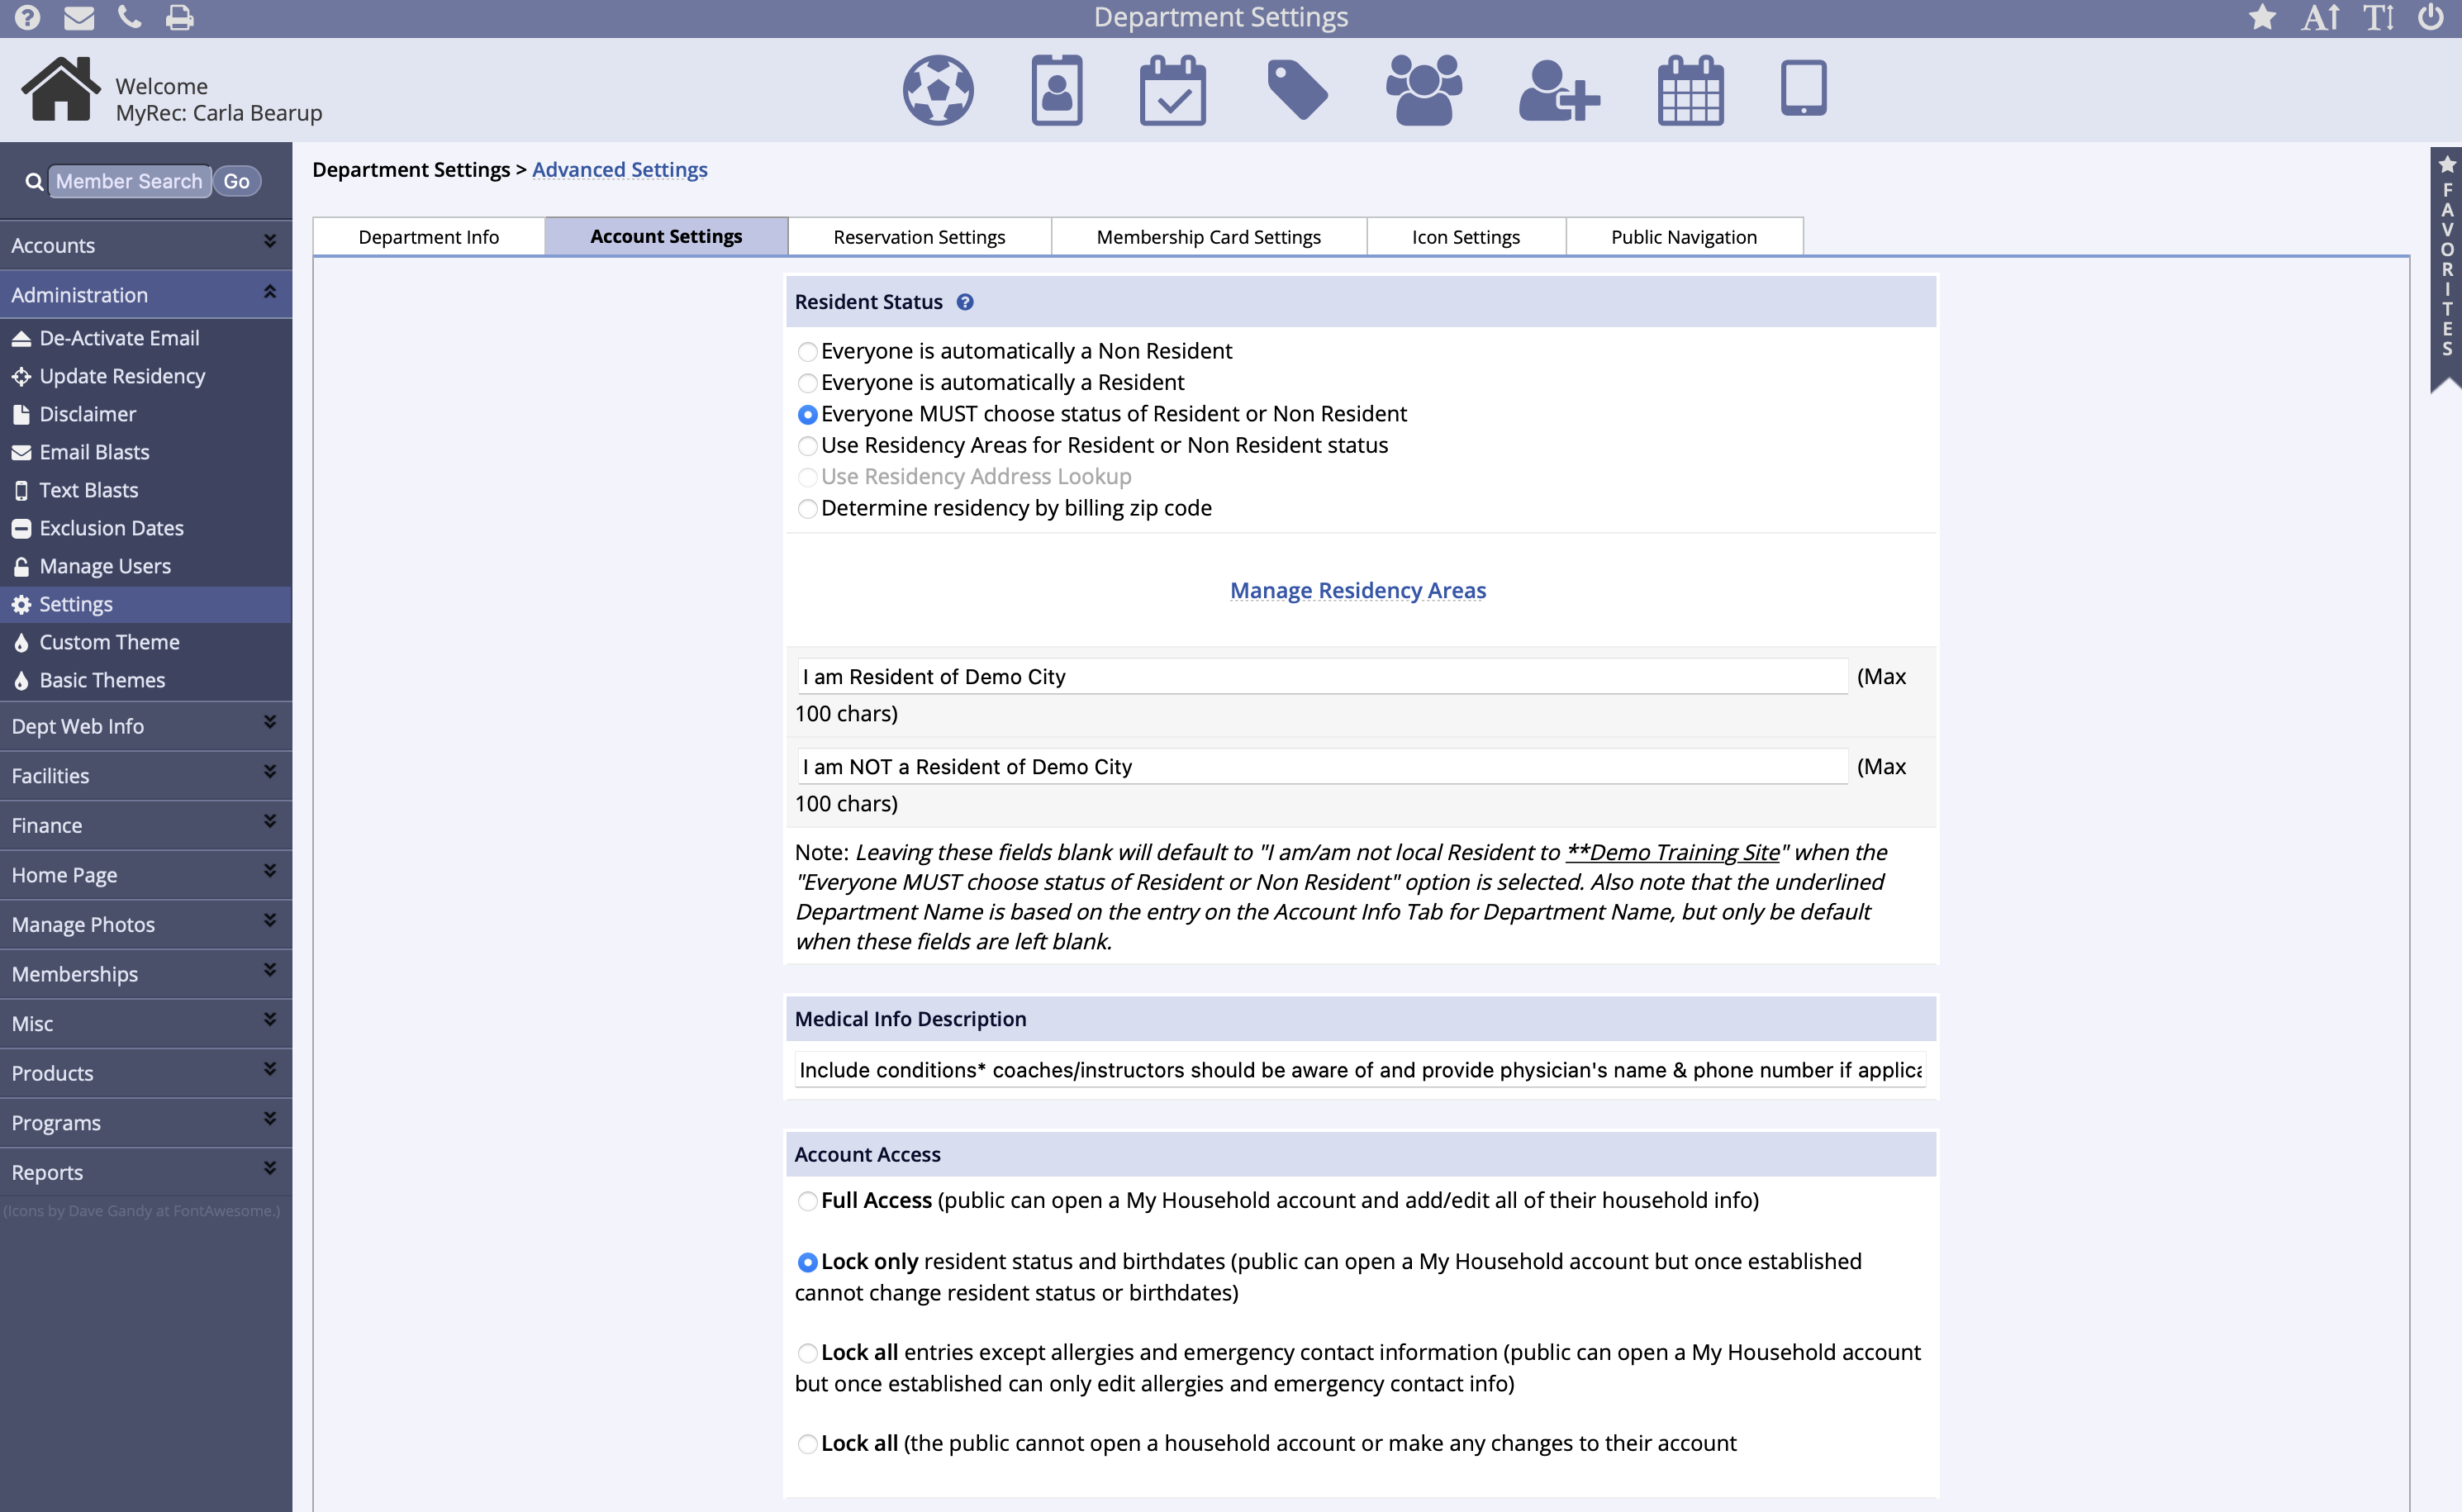
- Everyone is automatically a Non-Resident: Upon account creation all accounts are marked as non-residents
- Everyone is automatically a Resident: Upon account creation all accounts are marked as residents
- Everyone MUST choose status of Resident or Non Resident: Ask the question are you a resident of XYZ city, state or no during account creation and the customer can answer either way which marks the residency
- Use Residency Areas for Resident or Non Resident status: Upon account creation member will be given the option of selecting between two residency options with the wording being set in the Manage Residency Areas text box
- Use Residency Address Lookup (requires MyRec.com staff activation) to compare residency status to a list uploaded under Upload
- A template (under the Upload Residency Addresses link) is provided to input all the resident addresses in your municipality (usually obtained from assessor or your GIS)
- This is uploaded into the system and when customers input address it checks against the upload
- If the address exists in the upload, then it marks them as a resident
- You should download the Residency Address Template and make sure your file matches the information in the template
- A template (under the Upload Residency Addresses link) is provided to input all the resident addresses in your municipality (usually obtained from assessor or your GIS)
- Use Determine residency by billing zip code: Determines residency based on list of zip codes listed under Manage Zip Codes where upon account creation, status is checked against the list based on entered account zip code
Medical Info Description
- Medical Info Description: Enter a description for the medical info box to be displayed upon member creation
Account Access
- Account Access refers to control over account information after creation
- Full Access: public can open a My Household account and add/edit all of their household info
- Lock only resident status and birthdates: public can open a My Household account but once established cannot change resident status or birthdates
- Lock all entries except allergies and emergency contact information: public can open a My Household account but once established can only edit allergies and emergency contact info
- Lock all: the public cannot open a household account or make any changes to their account
- This will result in a public-facing message to contact the department
- Lock new accounts until approved: Accounts can be created by the public but cannot make transactions until management side has approved their account
- Lock new members until approved: Applies to when a new member is created inside an account on the public side and cannot make any transactions until management side has approved the new account member
- Lock medical field: After initial entry, the medical field cannot be altered by the public side
- Allow member discounts: Allows the ability to apply a discount to an individual member that applies to all their transactions and is useful for applying employee discounts, senior or veteran discounts that apply to all transactions for that member
- Show Admin notes popup: This function will make any administrative account note pop-up on the management side upon entry into the account where the user will have to click out of the pop-up to proceed
- Require Grade for ages _ to _: Toggling this option requires that grades are inputted for members between the ages entered
- Emergency Contact Required for Adults: Toggling this option requires an emergency contact to be added when setting up an adult accoun
- Auto Show Accounts & Members on Search/Account & Members Pages: Toggling this option makes accounts and members load when you click on their corresponding links and turning this option off is recommended for clients with very slow internet connections
- Show Team Info Icons in Accounts: This allows households to access team info directly from their accounts
- Public Account Creation Text: An area to enter additional text explaining/welcoming new members during the account creation process
- Public Account Creation Confirmation Text: An area to enter text that shows on account overview page immediately after account creation
- Public Account Overview Text: An area to add text to the public side account overview page
- Public Member List Text: An area to add text to the public side account members list page
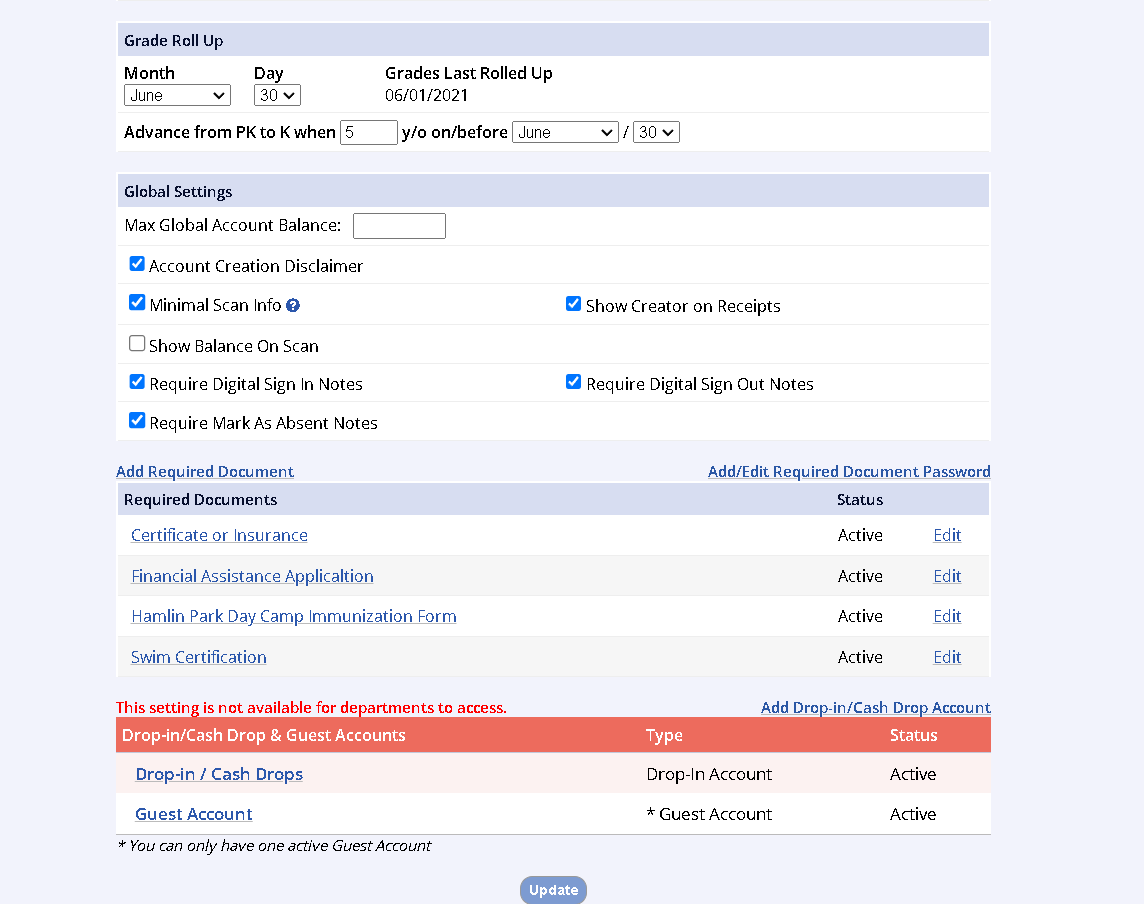
Grade Roll Up
- Grade Roll Up Date: All grades will change up to next on this date
- Advance from PK to K _ y/o on/before __ / ___: Choose age and date to advance PK graded children to K
Double Roll Up
Avoid changing a roll up date for the year after the grades have already rolled up since this will result in a double roll up that can only be fixed by manually editing all member grade levels.
i.e. If you set a June 1 grade roll up date, then on June 10 decide to change it to June 23, the children will have already rolled up on June 1 and will again on June 23.
Global Settings
- Max Global Account Balance: This will restrict anyone who has that amount of money owed on account from enrolling or reserving until the balance is paid
- Account Creation Disclaimer: Checking this box will require accounts created on the public side to agree to the disclaimer in order to proceed
- Minimal Scan Info: If checked, a membership scan will not show the birthdate, phone number, and address in the Member Info
- Show Balance On Scan: When a membership is scanned the system will display the account balance associated with that member
- Require Digital Sign in / out Notes: When using the Digital Sign In/Out Sheet, the sign in notes field will appear as open
- Require Mark as Absent Notes: When using the Digital Sign In / Out Sheet and registrant is marked as absent will required notes to be entered
- Show Creator on Receipts: Checking this box will record who created a receipt, whether it be a household or a management user
Add Required Documents
- Add Required Documents: If you have additional forms that must be completed at the time of registration, they are added here so they are available to be applied to activities
Reservation Settings
Reservation Settings
Public Reservation Budget Group: Set global budget group for all public reservati...
Access Reservation Settings
Setting up a facility for reservation
- Open the Administration tab on the leftside navigation menu
- Select the Settings option
- Click the Reservation Settings tab
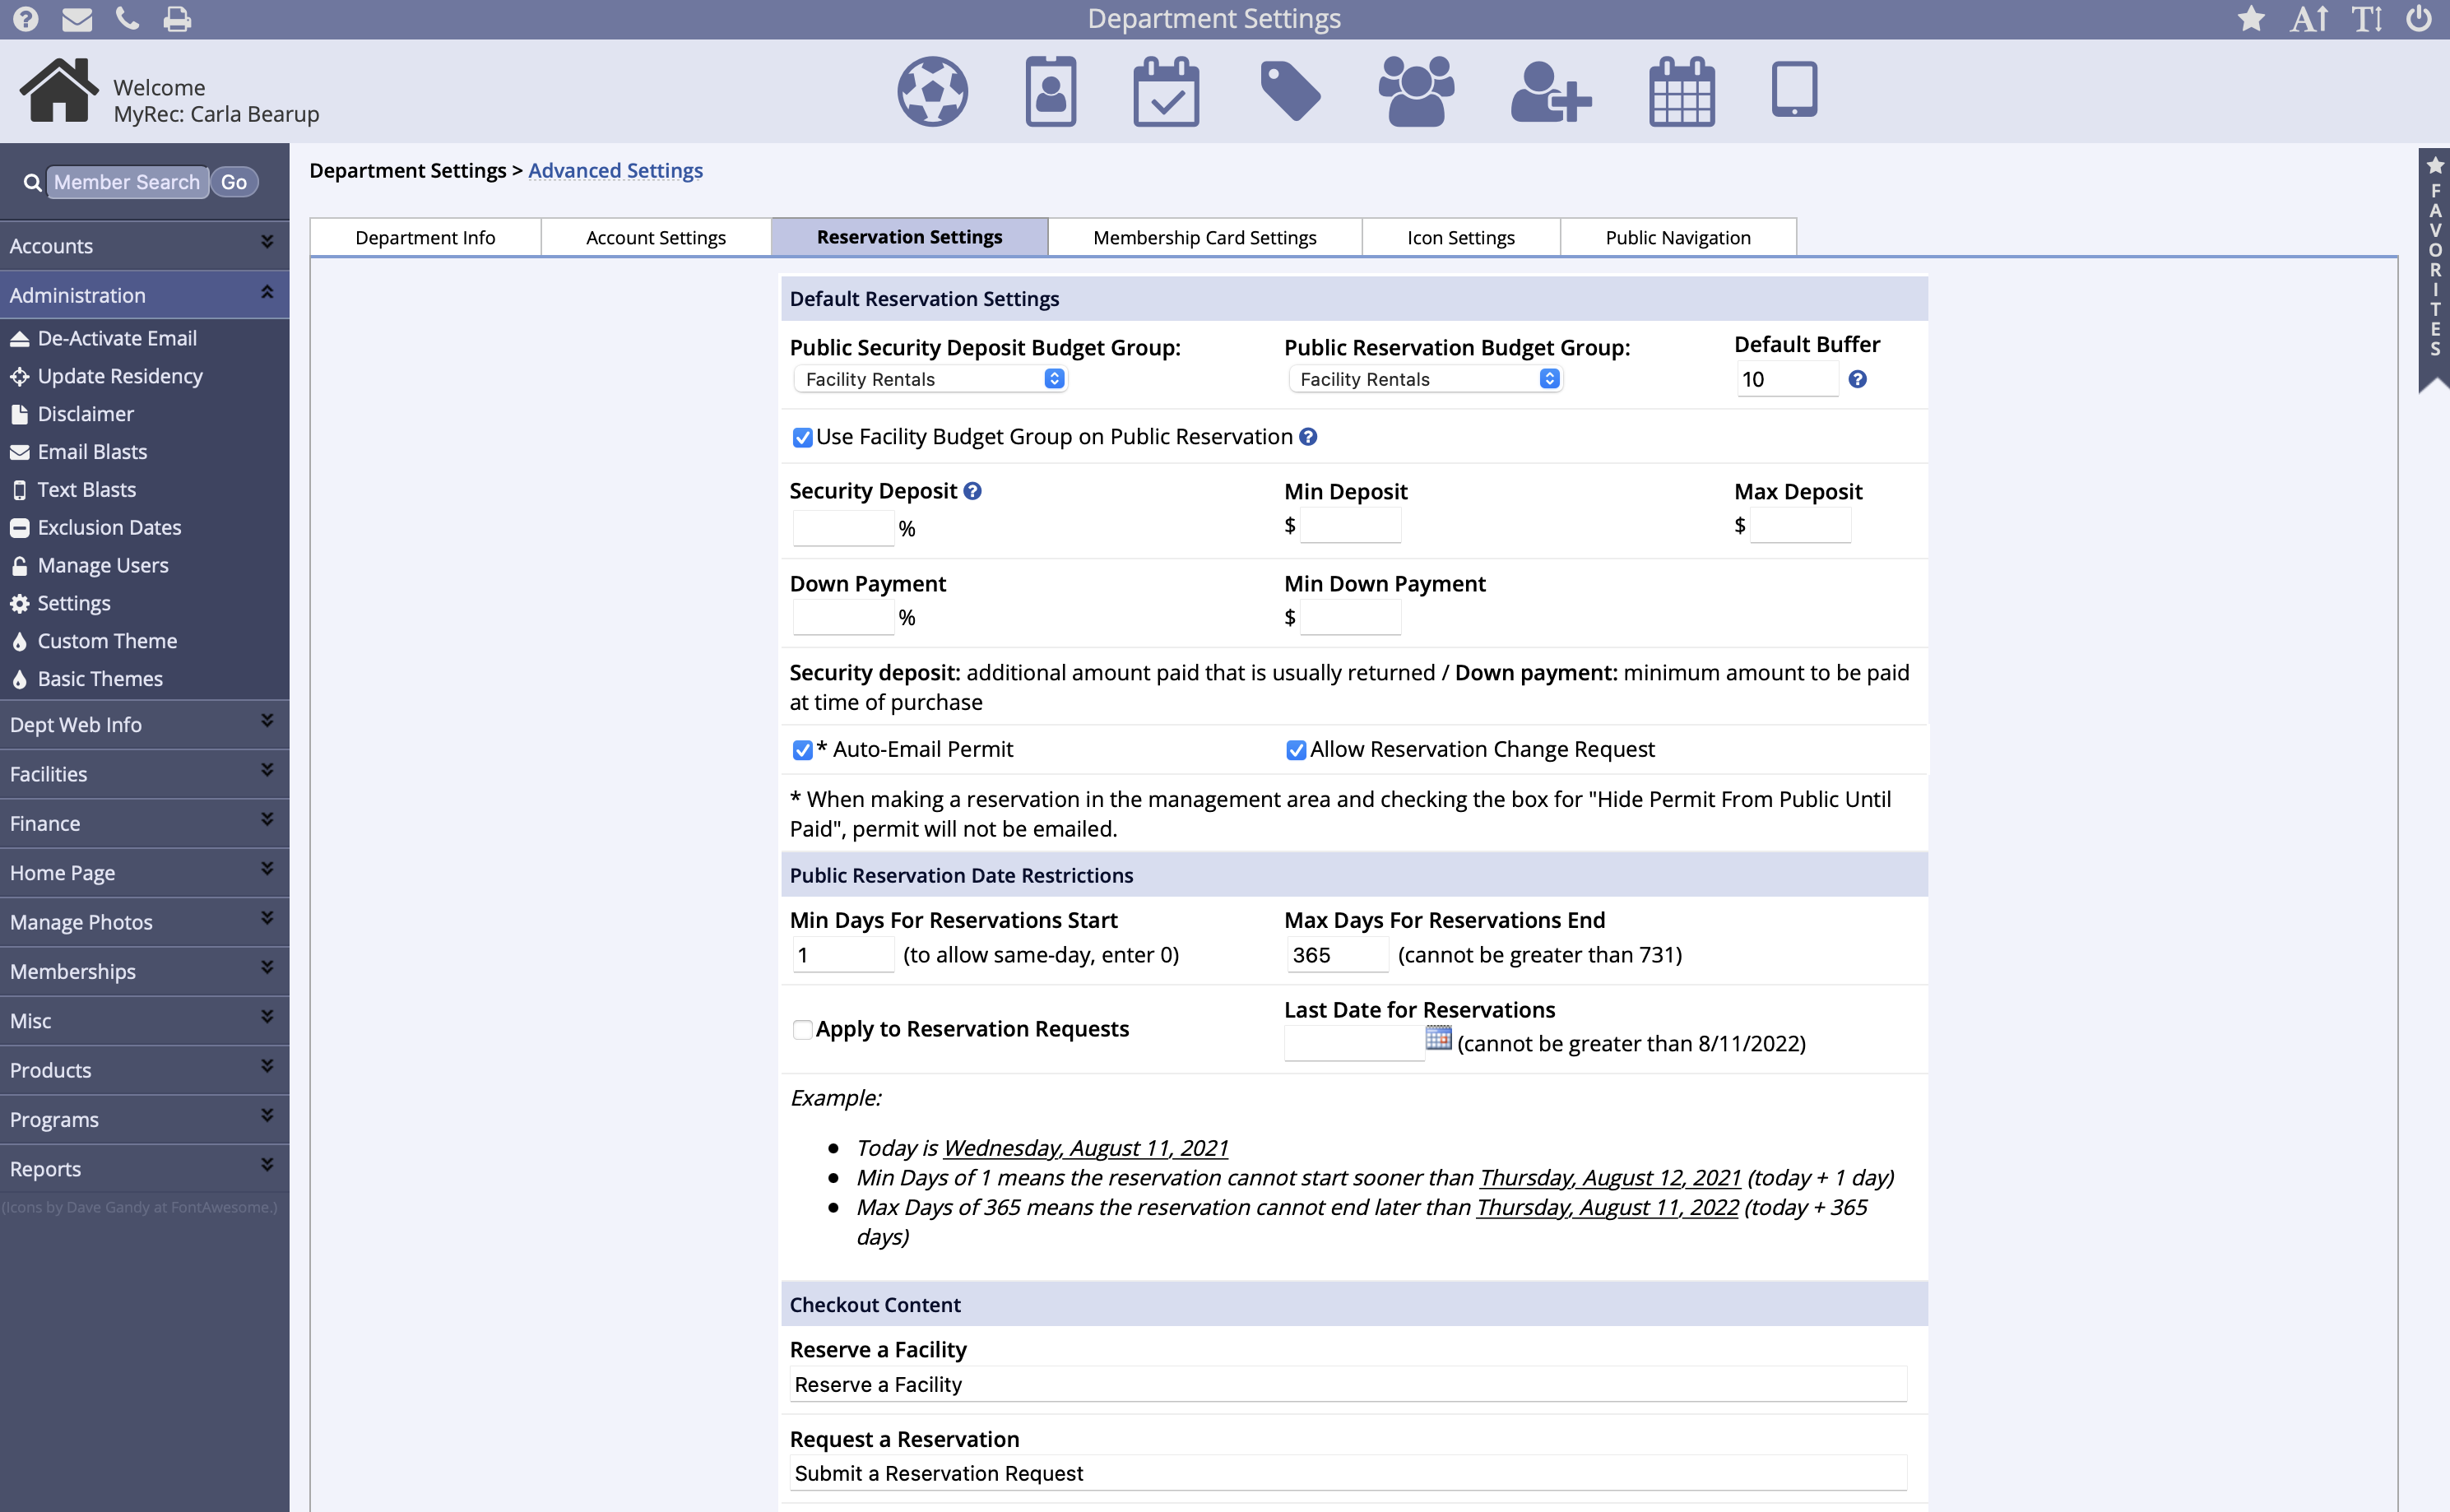
- Apply the settings from the default reservation settings, public reservation date restriction settings, and checkout content settings
Default Reservation Settings
- Public Reservation Budget Group: Set global budget group for all public reservations / security deposits
- Default Buffer: Blocks off this amount of time before and after reservations by default
- Use Facility Budget Group on Public Reservation: Will restrict public reservations to one facility at a time
- Security Deposit: Security deposit will apply a percentage-based deposit to public reservations. Min and Max Deposit are fixed dollar amounts and can be set the same so all public reservations have the same deposit amount. Min and Max Deposit settings take precedence over Security Deposit settings
- Down Payment: Set a minimum amount to be paid at time of purchase
- Auto-Email Permit: When checked auto-emails permit to renter upon permit creation with the exception of when making a reservation in the management area and checking the box for Hide Permit From Public Until Paid, permit will not be emailed
- Allow Reservation Change Request: When checked allows the renter to request a reservation date cancel or change via their public account Reservation change requests appear in the Homepage Needs Attention box on your management dashboard
Public Reservation Date Restriction Settings
- Min / Max Days for Reservation Start / End: Set date restrictions for public reservations from the minimum days from the start of a reservation to the maximum days out which can also be applied to public reservation requests
- Last Date for Reservation: Set a date for which the last reservation can be made via public reservations and will need to be updated each year
Checkout Content
- Reservation/Request Description: Add additional text to the choice page for public reservation or public request
- Permit Prefix: Permit numbers can be generated with a custom prefix
- Skip Dates/Fees Review: You can toggle on/off whether you want to see these review screens during the reservation process
- Global Permit Notes: Text that applies to all permits goes here
- Reservation Invoice Notes: Text that applies to all reservation receipts is entered here
- Click Submit
Membership Card Settings
Membership Card Settings
Access the Membership Card Settings Open the Administration tab on the leftside n...
Access the Membership Card Settings
- Open the Administration tab on the leftside navigation menu
- Select the Settings option
- Click the Membership Card Settingstab
- Use the three links below the tabs to add, preview, or generate numbers for membership cards

- Click Add New Membership Card Template
- Add your Membership Card Title, a front image, as well as 3 lines for text of your choice
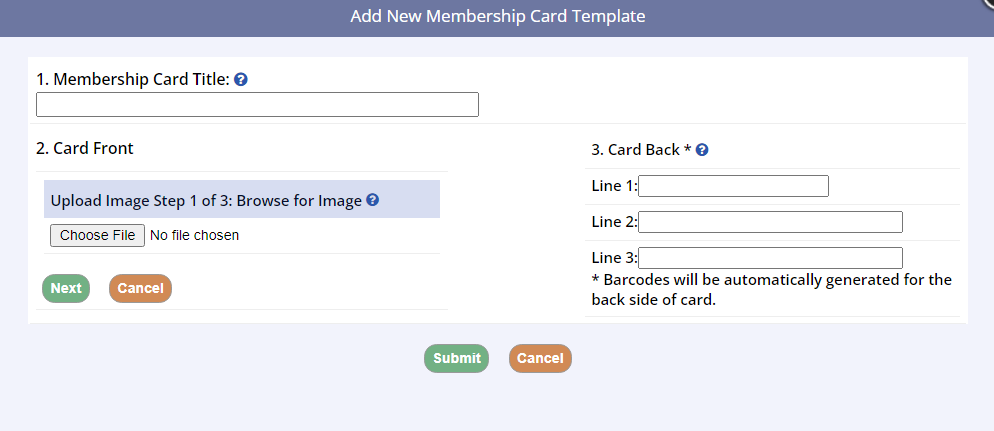
- Add your Membership Card Title, a front image, as well as 3 lines for text of your choice
- Click Preview Membership Card
- You are able to Print and Preview all of your Membership Cards one at a time or all together

- You are able to Print and Preview all of your Membership Cards one at a time or all together
- Click Generate New Membership Card Numbers
- Allows two options of Overwrite all previous Membership Card numbers or to Keep all Existing Numbers, and only generate numbers for those without existing membership card numbers, or to
- Overwrite All Previous Membership Card Numbers - will generate card numbers for all account members including overwriting those that already have card numbers
- Keep all Existing Numbers - will only generate numbers for those without existing membership card numbers

- Allows two options of Overwrite all previous Membership Card numbers or to Keep all Existing Numbers, and only generate numbers for those without existing membership card numbers, or to
- If a membership card is currently in use by a membership, you will notice that the Delete option on the right side of each row is replaced by In Use

- If the template has been deleted, the Basic Info tab of the Membership will display a message to let you know that the template is not available as a result
Icon Settings
Icon Settings
Access the Icon Settings
- Open the Administration tab on the leftside navigation menu
- Select the Settings option
- Click the Icon Settings tab
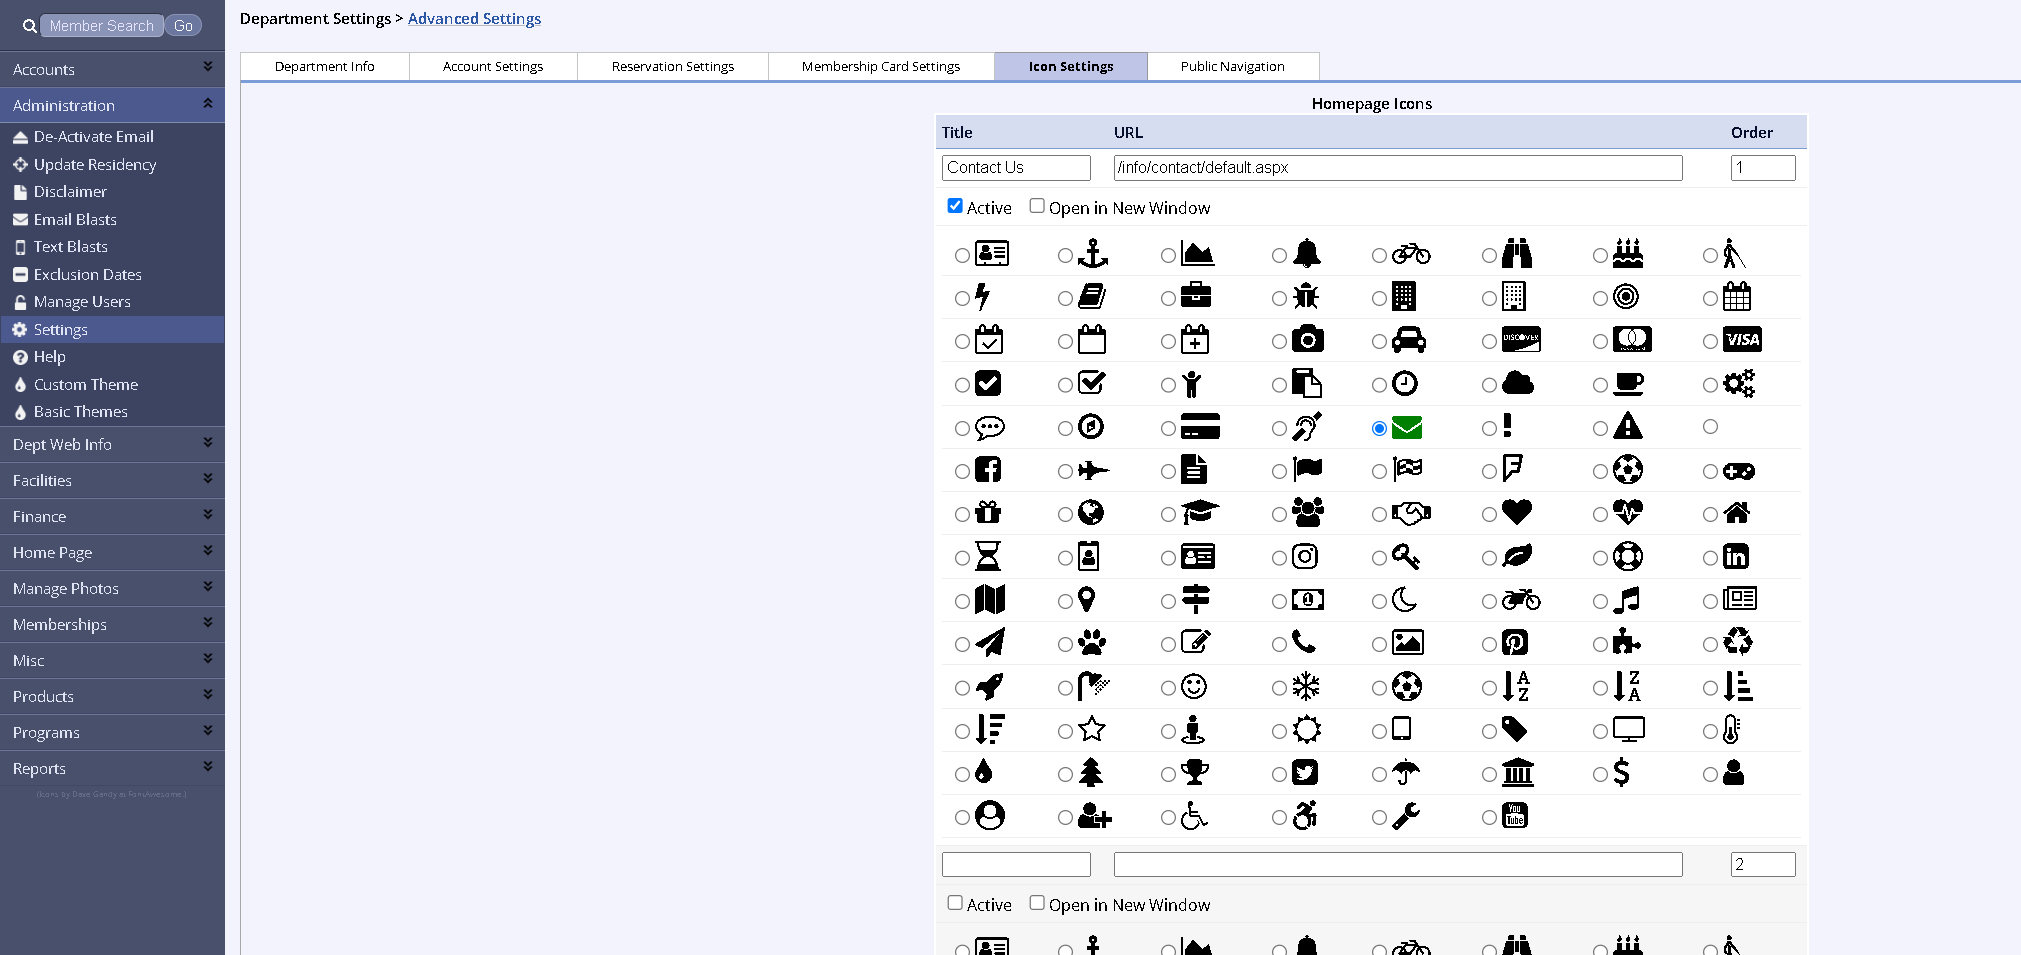
- Add your Title, URL, Order Number, and select an Icon to display
- Select the Active option to make your icon active
- Click Update at the very bottom of the page
Public Navigation
Public Navigation
Access the Public Navigation
- Open the Administration tab on the leftside navigation menu
- Select the Settings option
- Click the Public Navigation tab

- Enter a title for the Group
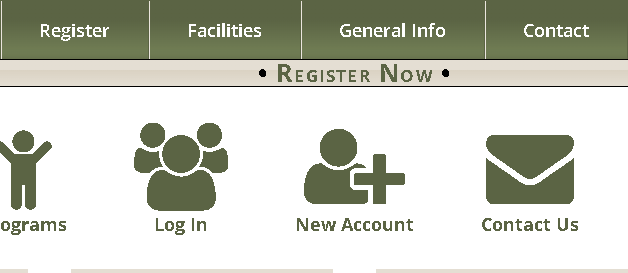
- "Groups" are the main tabs that will show at all times on your Public Site
- Paste the page URL into the field
- Set the order number and check the Group Active box
- Add options below each Group that will be displayed on the pub
- The links within each grouping include a title, URL destination, and order number
- These links can be set to Open in a New Tab, Active, and Require Login
- Click the Submit button at the bottom of the screen
Enabling and Editing the New Groups
- On the management side, navigate to Administration > Settings, and click the Public Navigation tab.
- The Administration area is only available to administrator-level users
- If you do not see the Public Navigation tab, Contact Us and we can make it available on your site
- Scroll to the bottom of the page, and you will see the two new groups
- Click the checkbox next to Group Active to enable them

- Make any adjustments to the settings to suit your needs
- Group changes the name of the group
- URL changes the link the user will be taken to when clicked
- Order # specifies the order in which the groups should appear on the public side
- Select the checkbox next to Group Active to enable the group to display on the public side
- Click Add New Link to add a link that will appear while hovering over the group title on the public side
- Scroll to the bottom of the page and click Update
Adding Category Links
- On the Public Navigation tab, click Add New Link next to the desired group
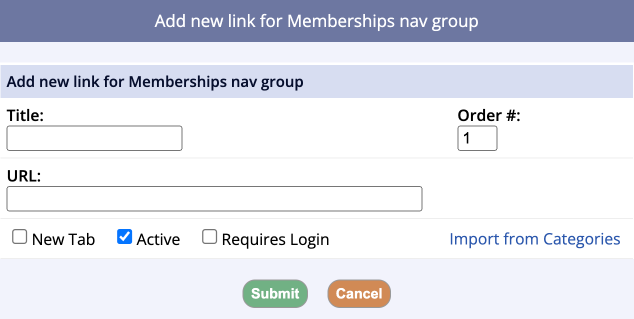
- In the bottom right-hand corner of the pop-up window, click Import from Categories. Some new fields will appear.
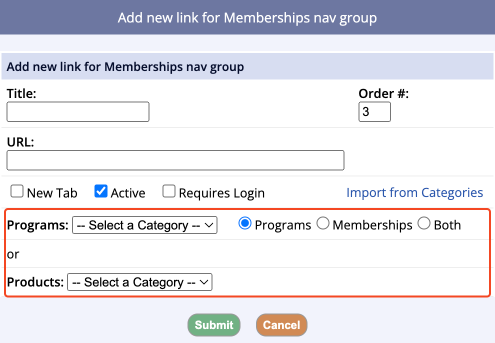
- If adding a Program or Membership category, you can select the type of category you'd like to add – Programs, Memberships, or Both. Select the desired category from the drop-down menu
- If adding a Product category, select the desired category from the drop-down menu
- The Title and URL fields will automatically populate with the name of the category and the link to view the associated programs, memberships, or products
- You can use the Order # field to change the order in which each link appears on the public side
- Click Submit to finish
Recommended Navigation Setup
The screenshot below outlines an example of how we suggest using the new navigation features to organize your site.
