
Access Basic Email Blasts
Email blasts allow you to send an email targeted to specified account members. You can also upload images or documents to the email blast. Only Administrative access users can send email blasts unless they have given user permissions to other users.
What's a Global Recipient?
Before creating a new email blast, you can add Additional Global Recipients, which is an email address that all email blasts could be sent to. This might be useful if you have a staff or board member who needs to receive the email blasts.
To Add Global Recipients
- Click on Additional Global Recipient in the upper right corner
- Select Add Recipients
- Add the name and email address
- Click Submit
Sending an Email Blast
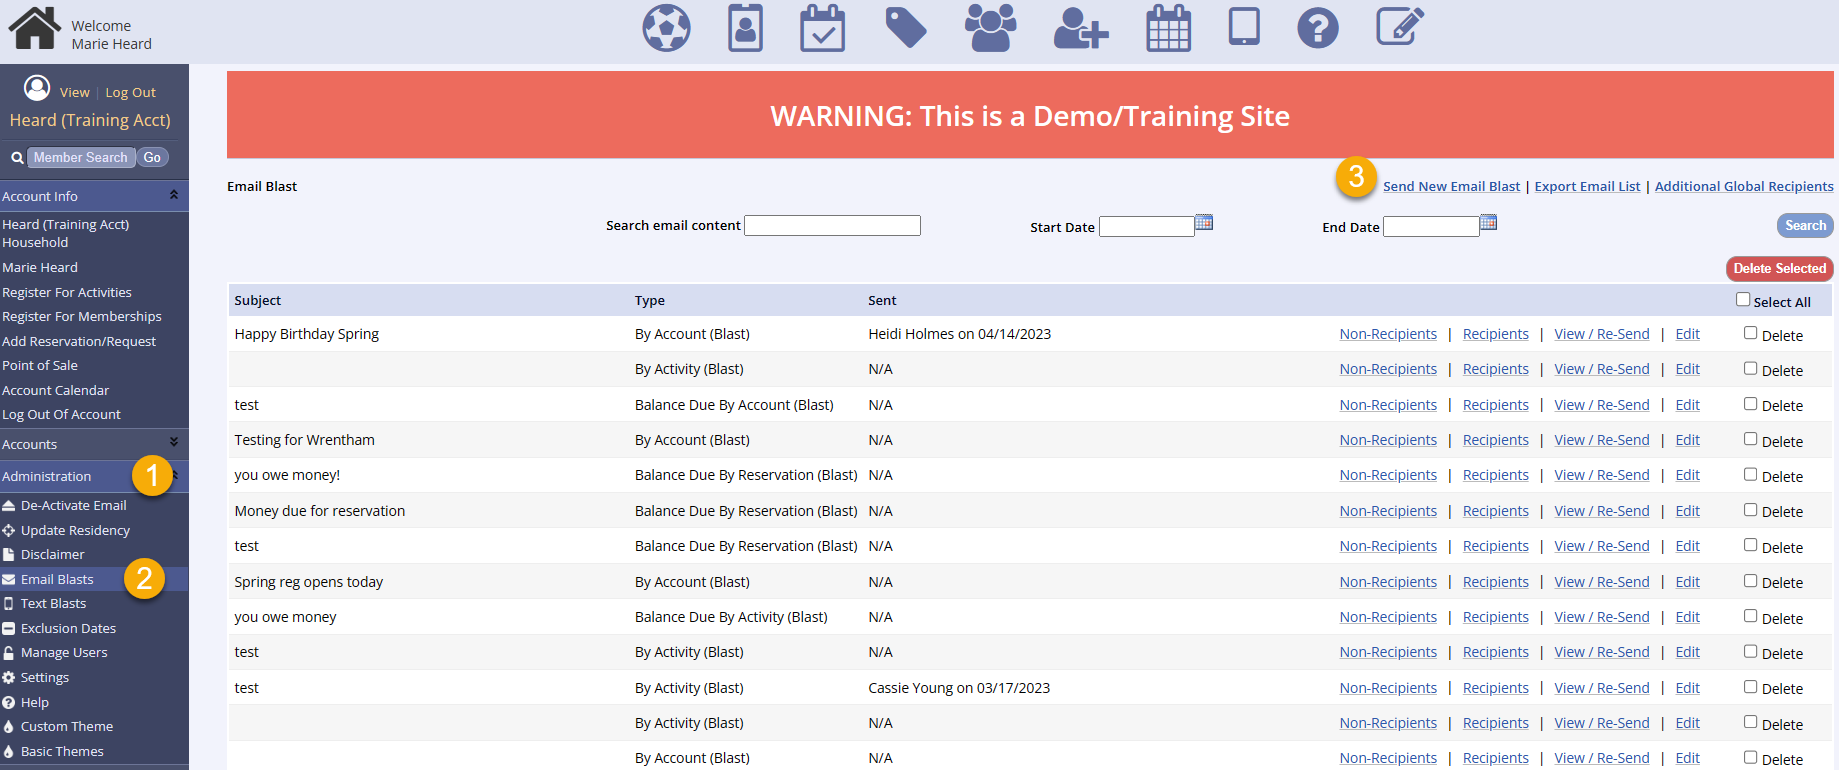
- Open the Administration tab on the leftside navigation menu
- If you cannot see the Administration tab, you need to get access from one of your department's admin users or have them send the blast
- Select Email Blasts
- All previously sent email blasts can be viewed, edited, or resent if necessary
- Click the Send New Email Blast link in the upper right corner
- Click the link for the target audience
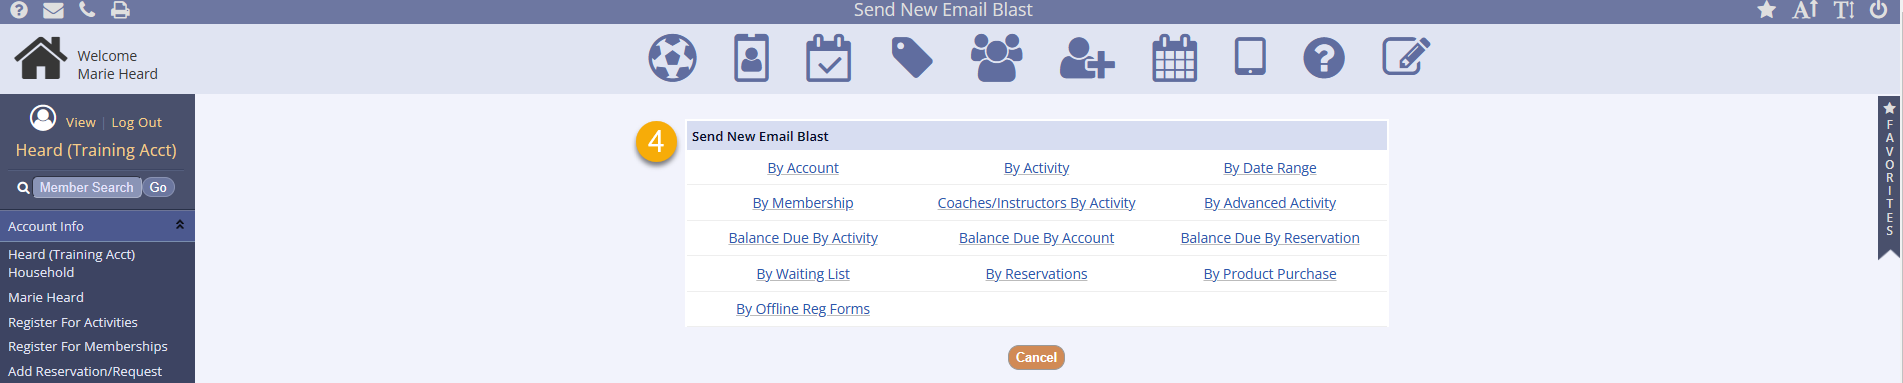
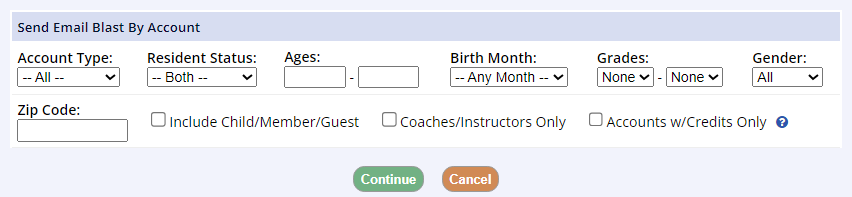
- By Account: allows you to send to all accounts or to choose members based on age, birth month, grade, resident status or gender
- This option also allows you to send emails targeted to coaches/instructors and accounts that currently have account credits
- By Activity: allows you to send an email to a specific activity by choosing from Status of registered, cancelled or transferred registrants for filtering as well as Residency Status
- By Date Range: allows you to send an email to members registered for activities within a specified date range and by location

- By Membership: allows you to send for members of a specific membership by searching for the membership
- Coach/Instructors By Activity: Send to coach/instructor of selected programs or activities
- By Advanced Activity: Search for advanced activities between certain dates
- Balance Due By Account: This will send an email to accounts that have a balance due
- Balance Due by Activity: This allows you to send an email to a specific activity to the registrants who have balances due
- Balance Due By Reservation: allows you to send an email to permit holders who have balances due by reservation date range
- By Waiting List: Send to registrants on a waiting list for a specific activity
- By Reservations: Send to permit holders for reservations within specific date range
- By Products Purchased: Send email blast to those account members that have purchased a certain product within a date range
- By Offline Reg Forms: Search for those with offline Pre-registration forms for activities that are between certain dates
Note: Email blasts within the system are designed to be “blasted” to a group of account members as identified by the selection above. It is not a feature intended for individual emails to singular recipients. Your department email is the best option for individual emails.
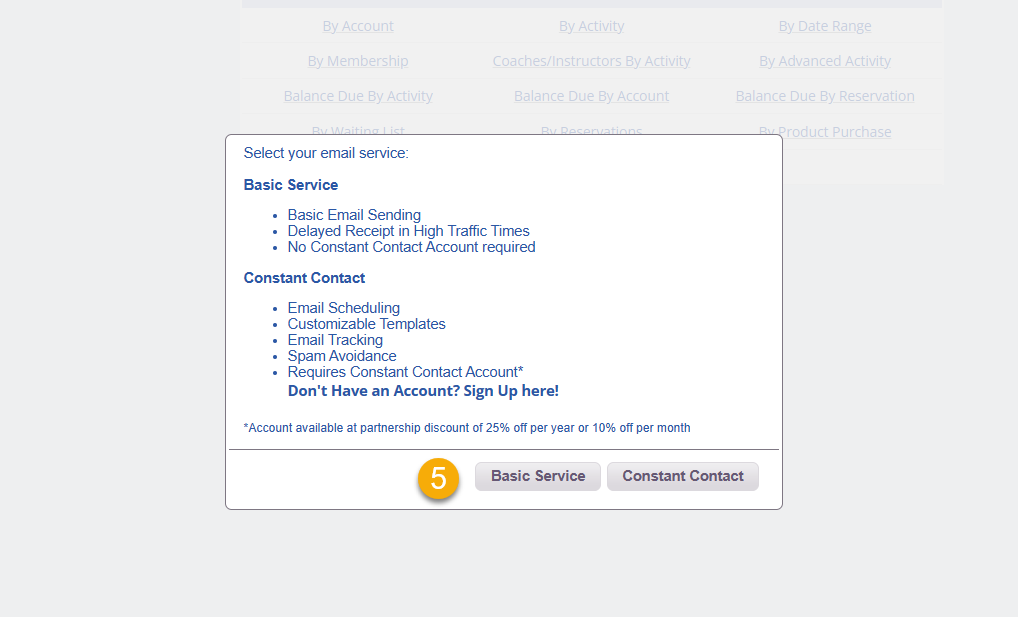
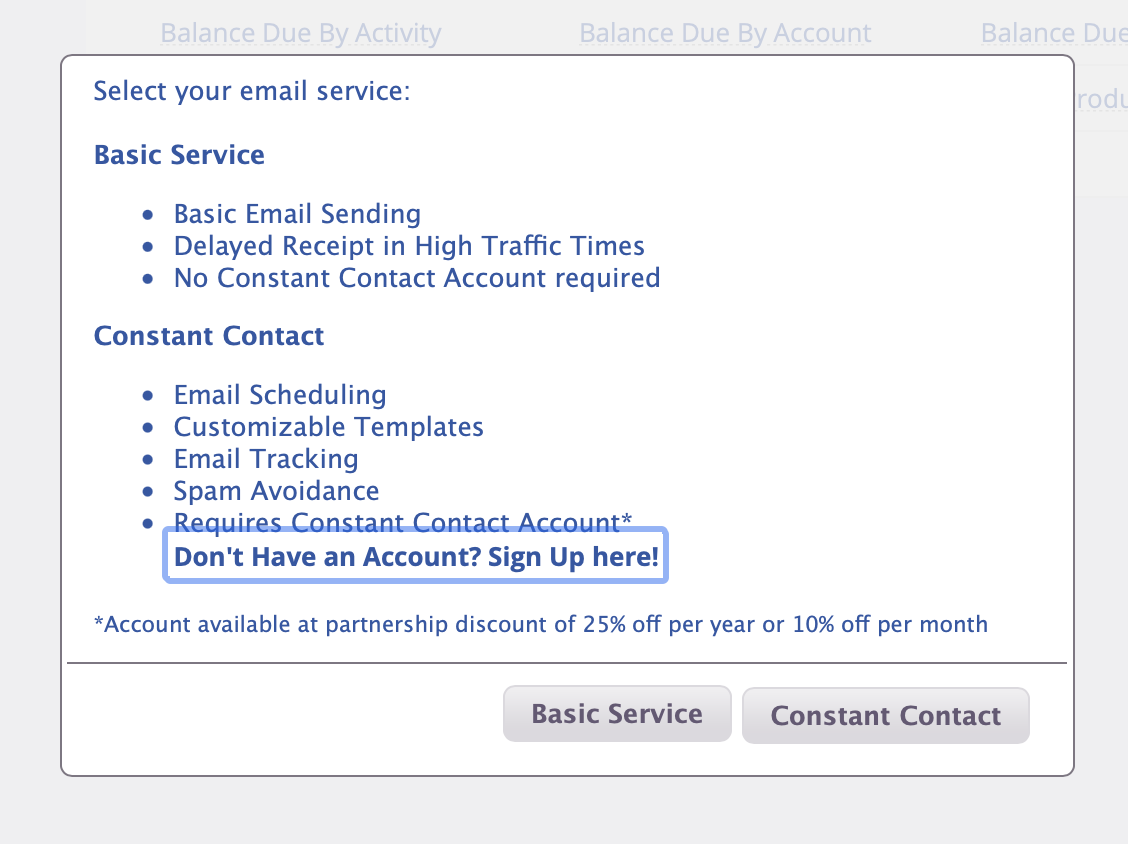
- Select the email service you are going to use by clicking Basic Service or Constant Contact, if you have a subscription
Email Blasts Using Constant Contact
Access Email Blast Using Constant Contact
- Open the Administration tab on the leftside navigation menu
- Click Email Blasts
- Select the Send New Email Blast
- In Send New Email Blasts, click the type of email blast and a popup will appear with a choice
- Note: Balance Due by Account & Balance Due by Activity email blasts cannot be sent via Constant Contact as the MyRec.com system needs to populate balances into the email body
- On the popup, if you have a Constant Contact account, click Constant Contact
- If you don't have a Constant Contact account, click Don't Have an Account? Sign Up Here!
- You will land on the login page of Constant Contact if you are not logged in already
- Enter your Constant Contact username and password, and click Login
- If already logged in, you will skip this step
- After being returned to the MyRec.com system, select your criteria for the email blast as you normally would
- When done, click Continue
- Enter the Opt-In type (either Cancellations or General) and click Continue
- You will then be directed to Constant Contact, where you can create an email blast by clicking Create > Email > select template > compose message > Continue > select list based on type of blast and date in the name of the list > Schedule
- Note: On your first visit, follow the instructions in the middle of the Constant Contact page to complete your account setup as needed before you click Create
- After sending, you can view your recipient list either in your Constant Contact account or within the MyRec.com system
- For the latter, go to Administration
- Click Email Blasts
- Any email blasts sent through Constant Contact will have a subject of Constant Contact Email
- Click on the Recipients or Non-Recipients links to view the list that was uploaded to Constant Contact
- The content of these emails can be viewed within Constant Contact
You can view recipients first or start emails in Constant Contact & use previous recipient lists that contain contacts. This is under Contacts > Email Lists. Select a list after reviewing its type of email blast & date. The maximum number of lists is 1000. Lists can be removed, but there should be one left.

- Type in the search criteria i.e. the name of the activity in the above example
- Add start and end dates, if applicable
Additional options:
- Check the boxes for inclusion options
- Choose residency status from the dropdown
- Make a selection from the Status dropdown
- Select from Required Document Status dropdown
- Select from Custom Form Status dropdown
- Click Search
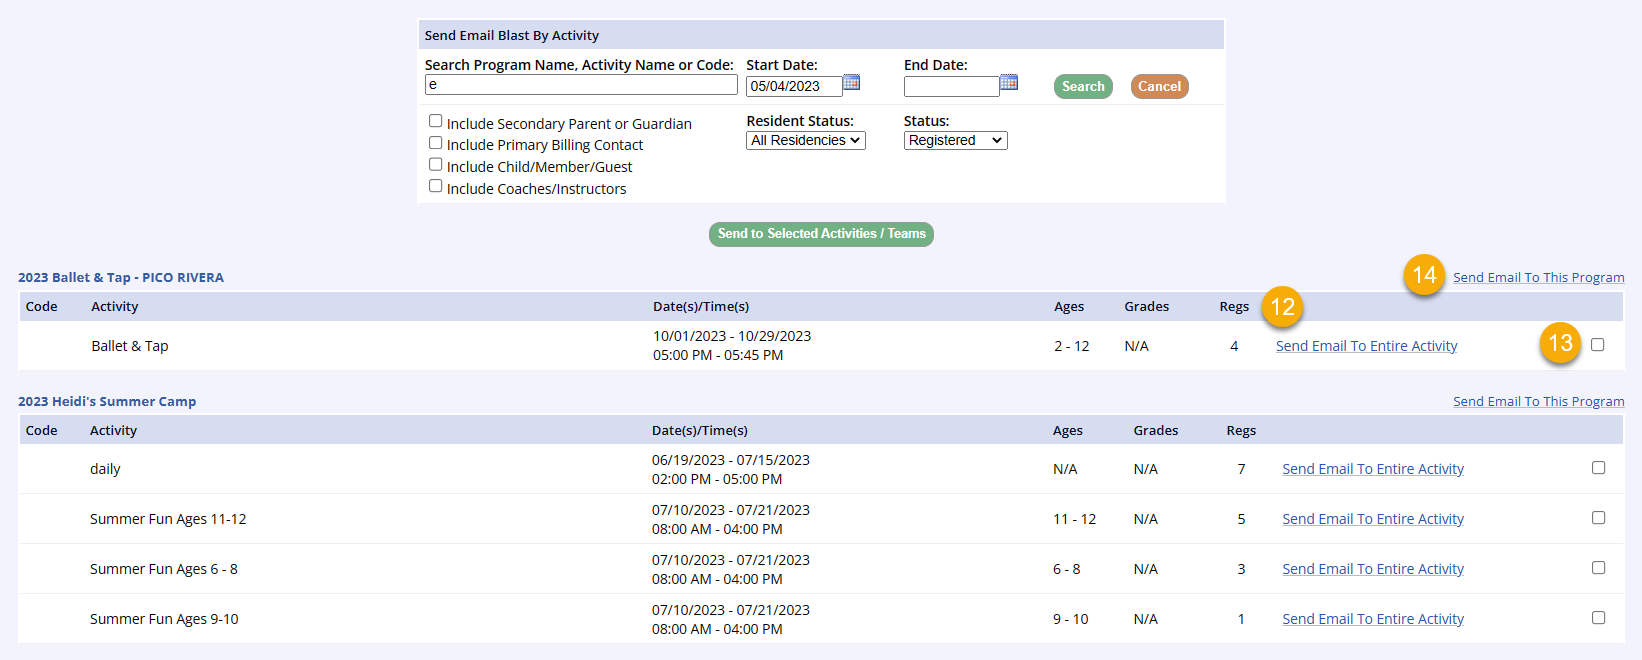
- Depending on the target audience, like the by Activity screenshot above, you can choose to send the blast to a single activity, multiple activities, or an entire program
- Click Send Email to Entire Activity to send to all receipients in the activity
- Fill the checkboxes for multiple activities and click Send to Selected Activities
- Click the link Send Email to this Program to send to all activities within the program
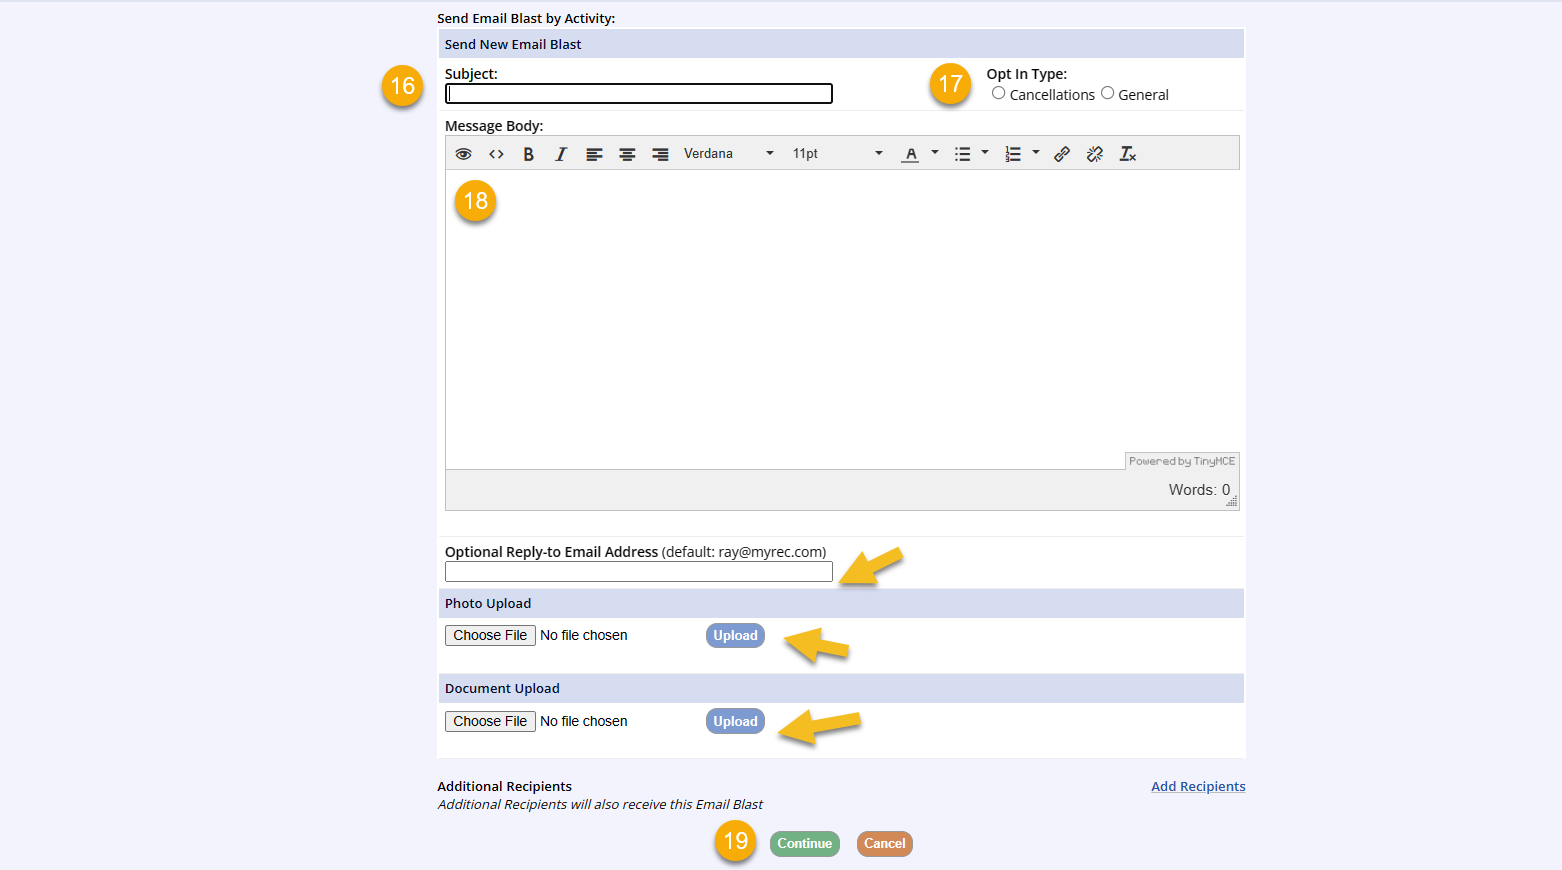
- Type in the Email Subject
- Select the Opt-In Type
- Remember that blasts only go to participants who have opted in to notifications
- Type your message body in the space provided
- Formatting features are available in the toolbar
- Optional Reply-to Email Address is for recipient of replies for this specific email blast and system email
- This field will only support a single Reply-to address
- If you add multiple email addresses to this field, the email will not send successfully
- This field will only support a single Reply-to address
- Choose File for Photo Upload, if desired
- This is for image files to be included in the email blast
- Click select photo from your computer and then click Upload to attach an image to the Email Blast
- This is for image files to be included in the email blast
- Choose File for Document Upload, if desired
- This is for documents to be included in the email blast
- Click select file from your computer and then click Upload to attach a document to the Email Blast
- Click Add Recipients to add additional recipients to this email blast
- This is for documents to be included in the email blast
- In the next screen, you will view a sample email that is to be sent
- Review email
- You can check the criteria, view recipients, and view the message body
- You can click on any links to see if they work correctly
- If you find any problems, click Edit Email Blast and fix the problem before sending
- Review email
- After checking the email blast, select your Send Type
- Scheduled email blasts will start sending at 3:30am EST on the selected date
- Standard send type will immediately queue the email blast for delivery
Issues with Images
If you are experiencing issues when replacing an existing image in an email blast, it is likely caused by a device caching or cookie issue. For instance, you're resending last month's blast and replacing the old image with this month's programming image, but the original image is what viewers see instead.
Canva users have reported that images don't always update in an email blast once it is sent out if the image file has the same name as the old file. You can avoid this issue by using new and clear naming conventions for your files. Instead of updating image "Brochure.jpg" and simply reattaching it with the existing file name, name your new image “MarchBrochure.jpg” or “Brochure3.jpg” before attaching it. This will circumvent these issues with cached versions of old images on your users' devices.
For more assistance, reach out to support@myrec.com