Access the Account Settings
- Open the Administration tab on the leftside navigation menu
- Select the Settings option
- Click the Account Settings tab

Resident Status
- Everyone is automatically a Non-Resident: Upon account creation all accounts are marked as non-residents
- Everyone is automatically a Resident: Upon account creation all accounts are marked as residents
- Everyone MUST choose status of Resident or Non Resident: Ask the question are you a resident of XYZ city, state or no during account creation and the customer can answer either way which marks the residency
- Use Residency Areas for Resident or Non Resident status: Upon account creation member will be given the option of selecting between two residency options with the wording being set in the Manage Residency Areas text box
- Use Residency Address Lookup (requires MyRec.com staff activation) to compare residency status to a list uploaded under Upload
- A template (under the Upload Residency Addresses link) is provided to input all the resident addresses in your municipality (usually obtained from assessor or your GIS)
- This is uploaded into the system and when customers input address it checks against the upload
- If the address exists in the upload, then it marks them as a resident
- You should download the Residency Address Template and make sure your file matches the information in the template
- A template (under the Upload Residency Addresses link) is provided to input all the resident addresses in your municipality (usually obtained from assessor or your GIS)
- Use Determine residency by billing zip code: Determines residency based on list of zip codes listed under Manage Zip Codes where upon account creation, status is checked against the list based on entered account zip code
Medical Info Description
- Medical Info Description: Enter a description for the medical info box to be displayed upon member creation
Account Access
- Account Access refers to control over account information after creation
- Full Access: public can open a My Household account and add/edit all of their household info
- Lock only resident status and birthdates: public can open a My Household account but once established cannot change resident status or birthdates
- Lock all entries except allergies and emergency contact information: public can open a My Household account but once established can only edit allergies and emergency contact info
- Lock all: the public cannot open a household account or make any changes to their account
- This will result in a public-facing message to contact the department
- Lock new accounts until approved: Accounts can be created by the public but cannot make transactions until management side has approved their account
- Lock new members until approved: Applies to when a new member is created inside an account on the public side and cannot make any transactions until management side has approved the new account member
Management Timestamp
If you are referring to the timestamp on the account or member page to determine who on staff approved a new submission, keep in mind that only the most recent change to the account or member is stamped.
- Lock medical field: After initial entry, the medical field cannot be altered by the public side
- Allow member discounts: Allows the ability to apply a discount to an individual member that applies to all their transactions and is useful for applying employee discounts, senior or veteran discounts that apply to all transactions for that member
- Show Admin notes popup: This function will make any administrative account note pop-up on the management side upon entry into the account where the user will have to click out of the pop-up to proceed
- Require Grade for ages _ to _: Toggling this option requires that grades are inputted for members between the ages entered
- If a grade is not required for minor members of a certain age, i.e. ages 0-4, those members will have to be manually updated with the PreK or K grade designation by staff to begin moving them in the annual, automated roll-up
- You may find that running an annual search for the age group is helpful to manually update their member info when they are, in fact, preK members
- If a grade is not required for minor members of a certain age, i.e. ages 0-4, those members will have to be manually updated with the PreK or K grade designation by staff to begin moving them in the annual, automated roll-up
- Emergency Contact Required for Adults: Toggling this option requires an emergency contact to be added when setting up an adult account
- Auto Show Accounts & Members on Search/Account & Members Pages: Toggling this option makes accounts and members load when you click on their corresponding links and turning this option off is recommended for clients with very slow internet connections
- Show Team Info Icons in Accounts: This allows households to access team info directly from their accounts
- Public Account Creation Text: An area to enter additional text explaining/welcoming new members during the account creation process
- Public Account Creation Confirmation Text: An area to enter text that shows on account overview page immediately after account creation
- Public Account Overview Text: An area to add text to the public side account overview page
- Public Member List Text: An area to add text to the public side account members list page
- Departments can opt to "Display at top of Account Members page" by checking that box
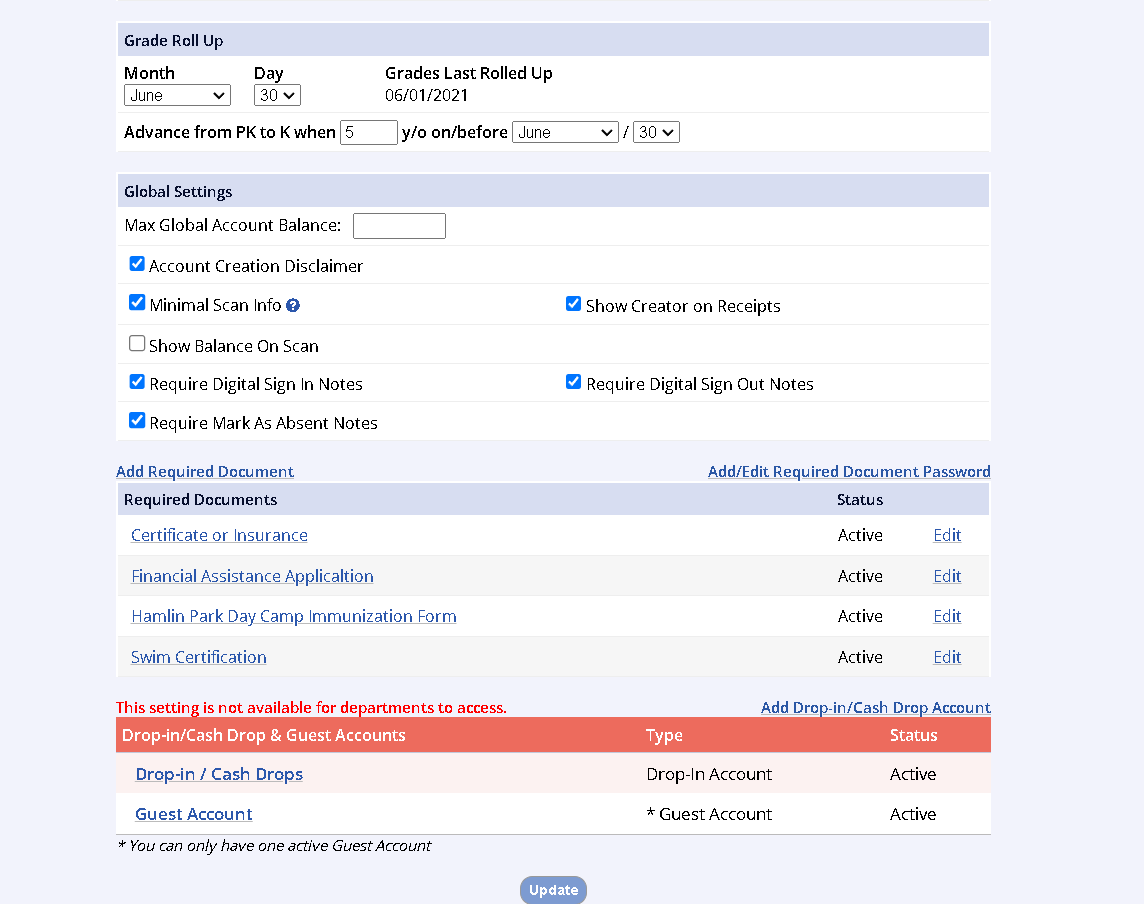
Grade Roll Up
- Grade Roll Up Date: All grades will change up to next on this date
- Advance from PK to K _ y/o on/before __ / ___: Choose age and date to advance PK graded children to K
Double Roll Up
Avoid changing a roll up date for the year after the grades have already rolled up since this will result in a double roll up that can only be fixed by manually editing all member grade levels.
i.e. If you set a June 1 grade roll up date, then on June 10 decide to change it to June 23, the children will have already rolled up on June 1 and will again on June 23.
- If a child does not have a grade assignment because they were too young upon member creation, staff will need to update the member info manually to begin rolling up to the next grade each year – NOTE: the system does not know to automatically add a grade to a member who was not assigned a grade at creation
- Since this differs per community, you may choose to update all 4-year-olds manually to be in preK or all 5-year-olds to kindergarten
- If you do not manually assign a grade to a child who turns 3, then 4, then 5, then 6 – they will never join the grade roll up process and will continue to have no grade assigned until you do
- Since this differs per community, you may choose to update all 4-year-olds manually to be in preK or all 5-year-olds to kindergarten
- If a child does not have a grade assignment because they were too young upon member creation, staff will need to update the member info manually to begin rolling up to the next grade each year – NOTE: the system does not know to automatically add a grade to a member who was not assigned a grade at creation
Global Settings
- Max Global Account Balance: This will restrict anyone who has that amount of money owed on account from enrolling or reserving until the balance is paid
- Account Creation Disclaimer: Checking this box will require accounts created on the public side to agree to the disclaimer in order to proceed
- Minimal Scan Info: If checked, a membership scan will not show the birthdate, phone number, and address in the Member Info
- Show Balance On Scan: When a membership is scanned the system will display the account balance associated with that member
- Require Digital Sign in / out Notes: When using the Digital Sign In/Out Sheet, the sign in notes field will appear as open
- Require Mark as Absent Notes: When using the Digital Sign In / Out Sheet and registrant is marked as absent will required notes to be entered
- Show Creator on Receipts: Checking this box will record who created a receipt, whether it be a household or a management user
Add Required Documents
- Add Required Documents: If you have additional forms that must be completed at the time of registration, they are added here so they are available to be applied to activities