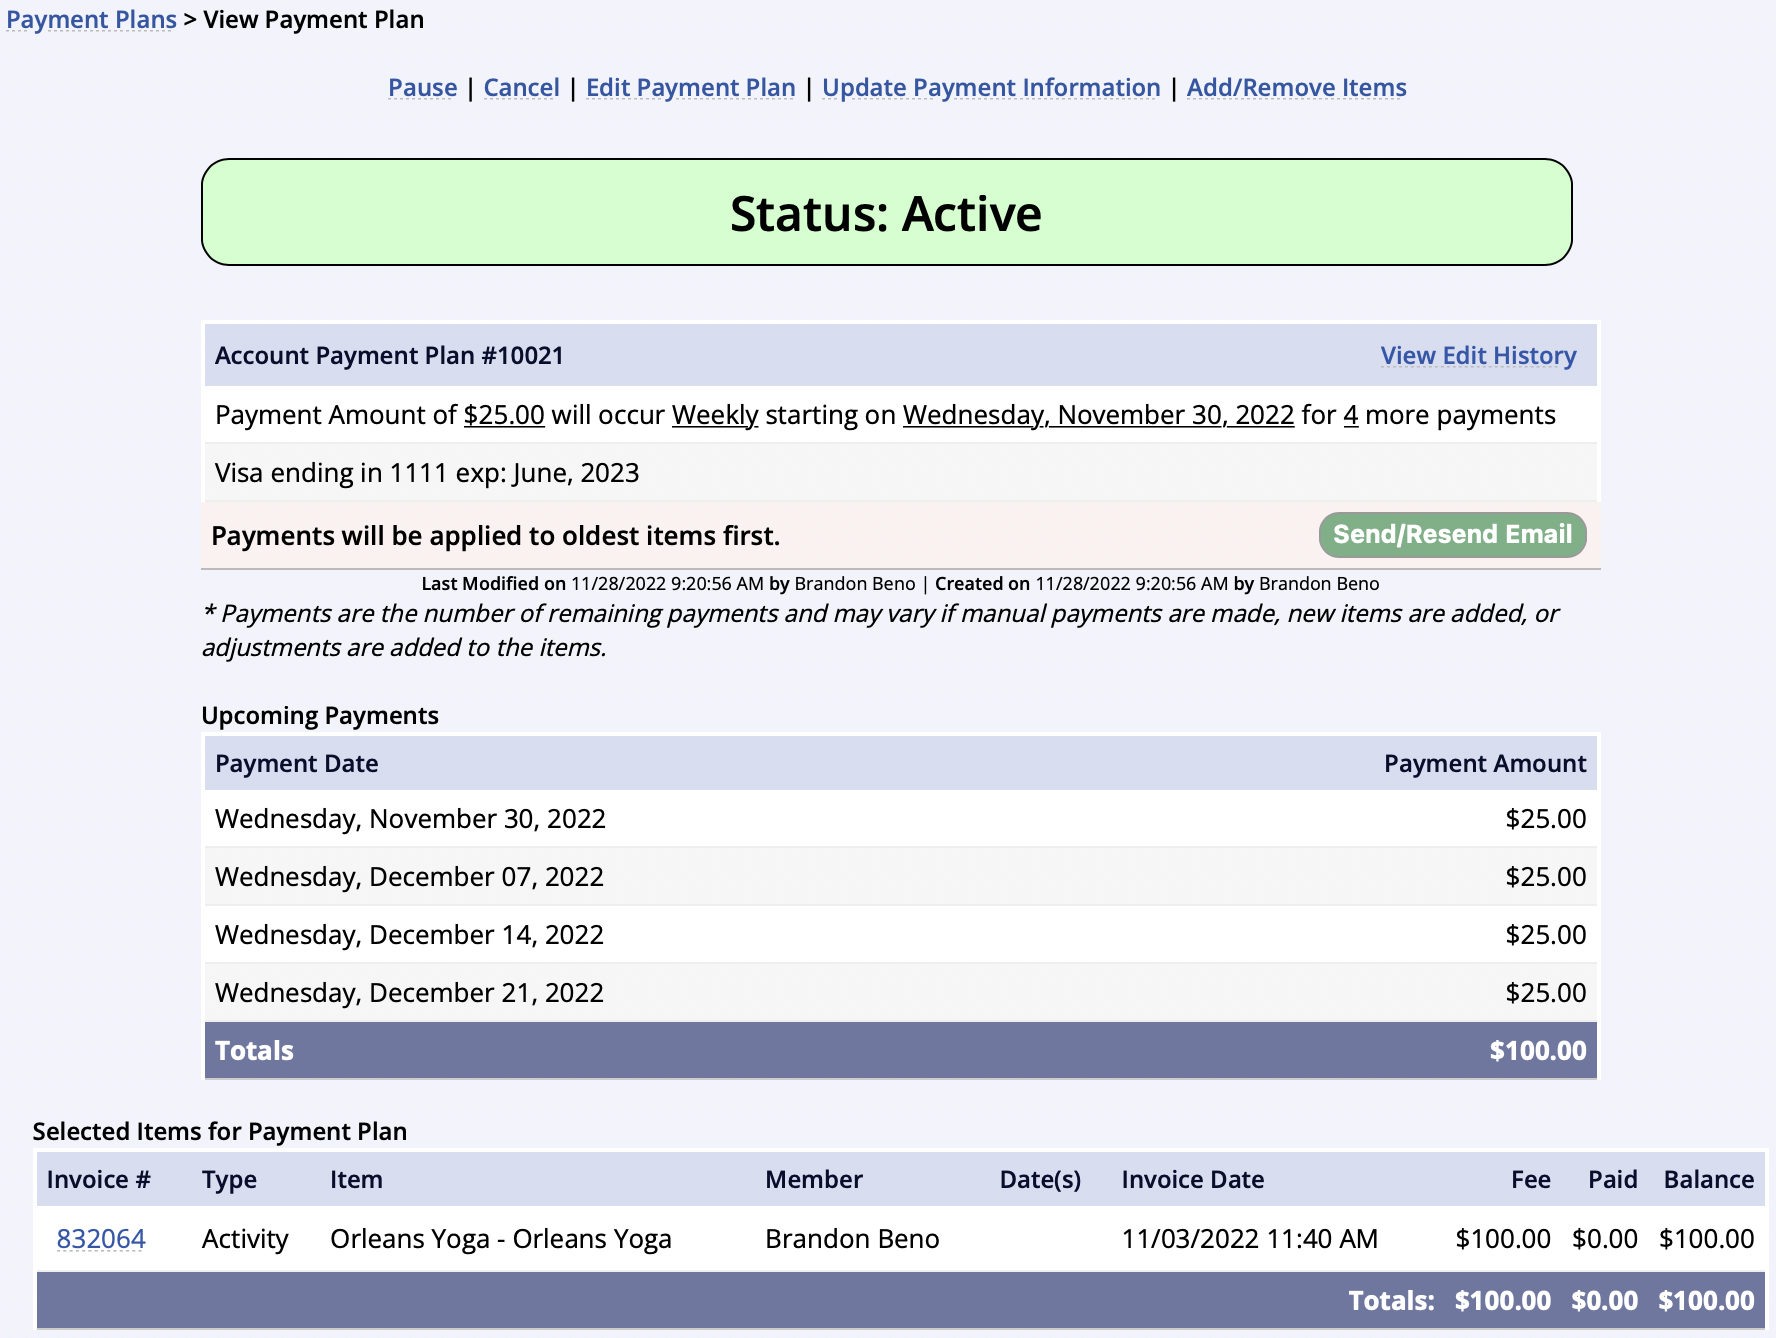
Account Payment Plans (APPs) allow members to pay on existing balances that are in their account. The frequency of account payment plans can be set by Week(s), Month(s) or Year(s). The member will be charged in accordance with the frequency of payments created in the account payment plan. Charges will be applied to the payment method that was selected or added at the time of account payment plan creation.
Conditions for Use
Departments must meet the following conditions in order to use payment plans
- Departments must be using Zeamster/Fortis, Authorize.net, or MX Merchant as their payment gateway
- Authorize.net departments must have activated CIM in the payment gateway and cc storage
- Payment Plans are not compatible with split fees
- ACH is not a payment option for MX Merchant clients
- In the eCommerce page, Allow Credit Card Storage, Allow Staff Credit Card Access and Enable Payment Plans must be activated by MyRec.com staff
Creating an Account Payment Plan (APP)
- Access the main tab of the household or organizational account
- Select the Create Payment Plan link just above the Balances Owed block
- Select the Items to include in the new account payment plan by checking the box to the left of the item
- Check the box at the top of the list next to the word “Item” to select all
- Balances already in an account payment plan or on subscription/auto-pay, cannot be included in a new account payment plan and will not be listed here
- Click Next

- Fill in the payment plan section according to the Total to Pay
- Amount to pay: the dollar amount of each individual payment
- Frequency of payments: choose Week(s), Month(s) or Year(s)
- Start Date: the day the first payment attempt is made
-
Send Payment Receipts: Sends the customer an email when payments are successful
- Declined payments emails will be sent whether this is checked or not
- Send Payment Plan Email sends the customer an email with account payment plan details upon creation of the APP

- Click Next once the Payment Plan is set up correctly
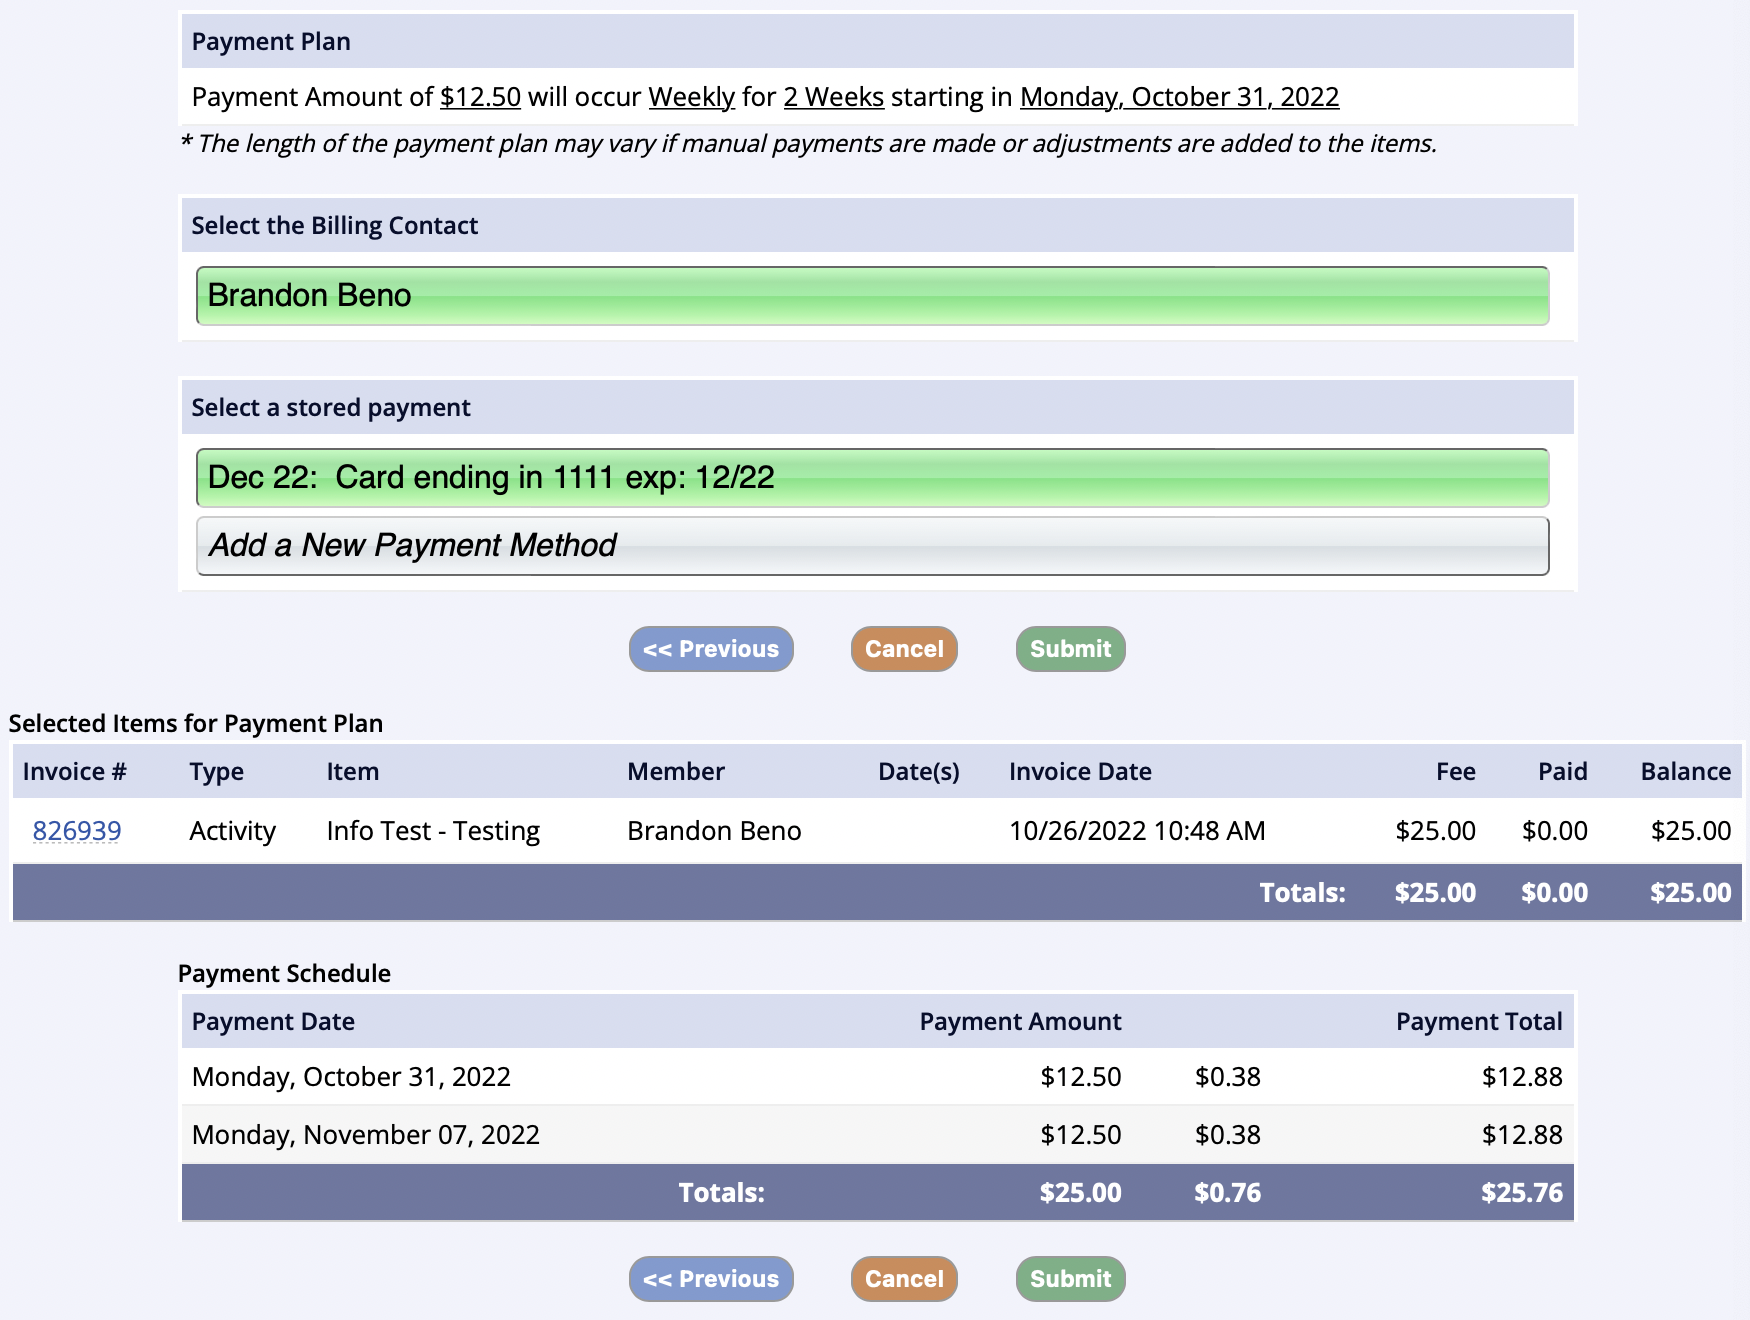
- Select the Billing Contact
-
Select a stored payment or Add a New Payment Method.
- If the member agreed to store their card in the gateway for the purpose of approved future payments, it will be listed as a card to select for this account payment plan
- If the member decides to add a new card for the payment plan, the staff can select Add a New Payment Plan
- If no card is stored, select the green button to continue to the payment screen
- Review the New Payment Plan details > Click Submit to set up the account payment plan (APP)
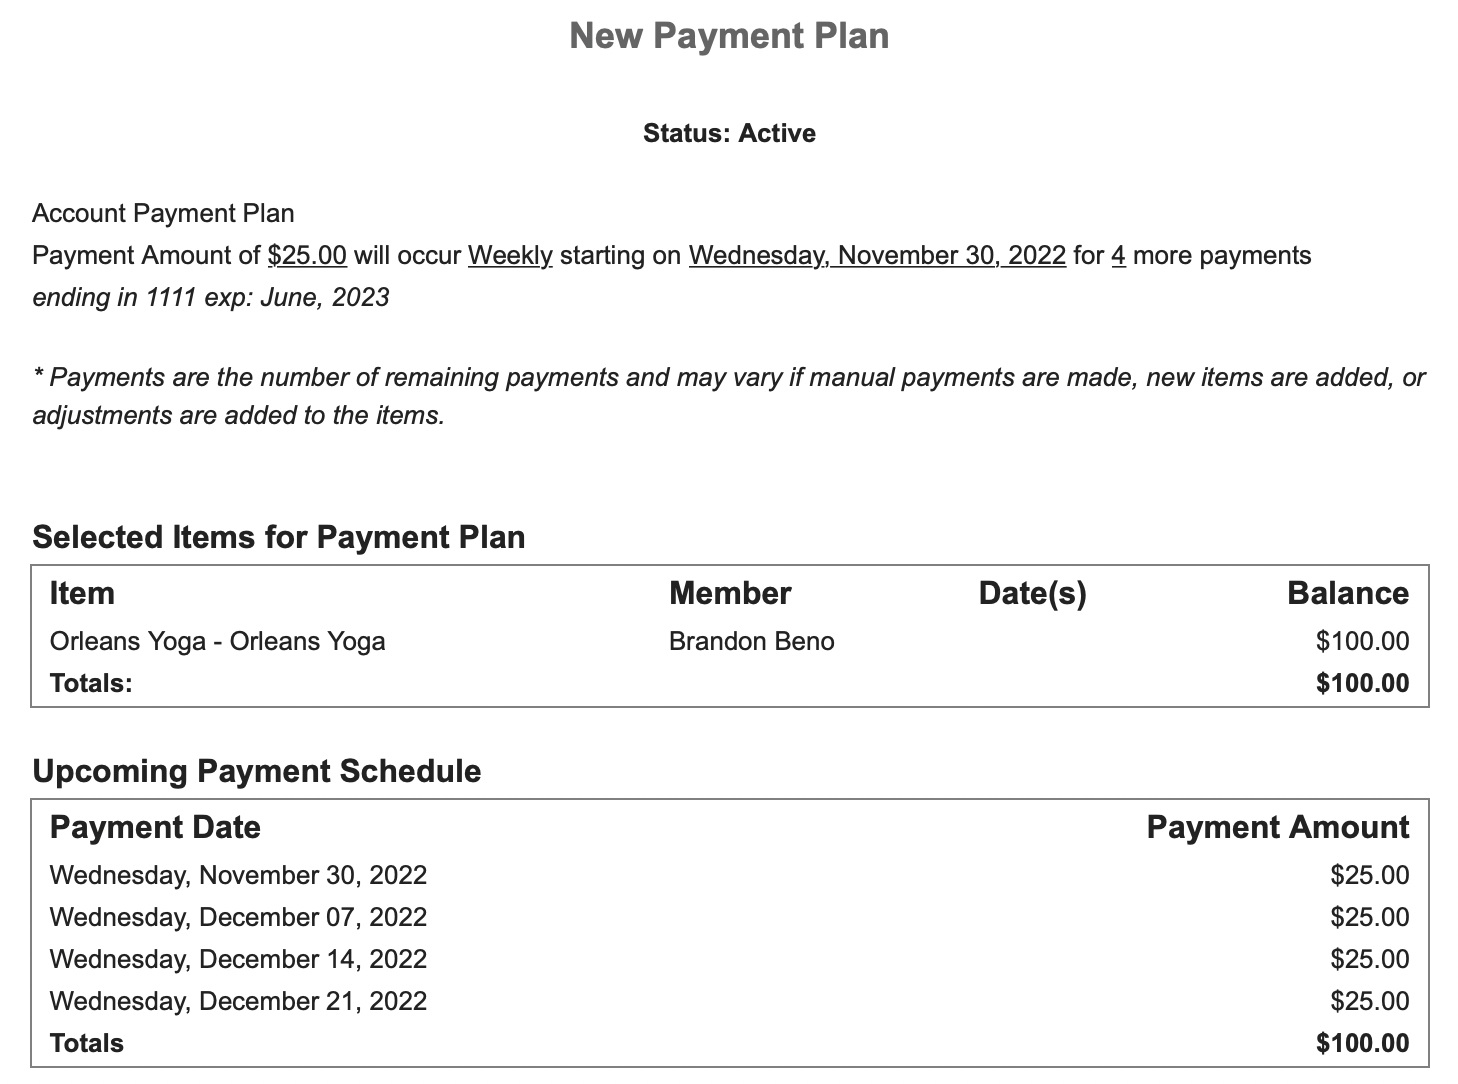
- Clicking Submit sends an automated email to the billing email of the account with the New Payment Plan
- The green Send/Resend button on the next screen allows the staff to send the email again, if necessary
- Staff does not need to click this button each time an Account Payment Plan is submitted
Sibling Registrations on Payment Plans?
If you are setting up an Account Payment Plan including multiple member registrations and want the payment installments to pay equally on each member's registration balance, you should set up a plan for each member's balance.
- For example, if you put the $500 childcare registrations for Child 1 and Child 2 into one payment plan where $100 is paid weekly, the plan will pay $100 on Child 1's registration balance for five weeks until it is paid in full, then the plan will move on to pay Child 2's balance due for the next five weeks
- Instead, set up a payment plan for Child 1 and another payment plan for Child 2 for $50 every week. Child 1 and Child 2 will have identical payments of $50 to their plans for the next ten weeks
- The 10-week duration for payment in full is the same, and each balance will be paid down equally on the same payment schedule
- Instead, set up a payment plan for Child 1 and another payment plan for Child 2 for $50 every week. Child 1 and Child 2 will have identical payments of $50 to their plans for the next ten weeks
If it doesn't matter in which order or when the balances are paid, you can create a single account payment plan, which will pay on the balances due in the order indicated in the payment plan schedule.
Editing Account Payment Plans - Management Side Only
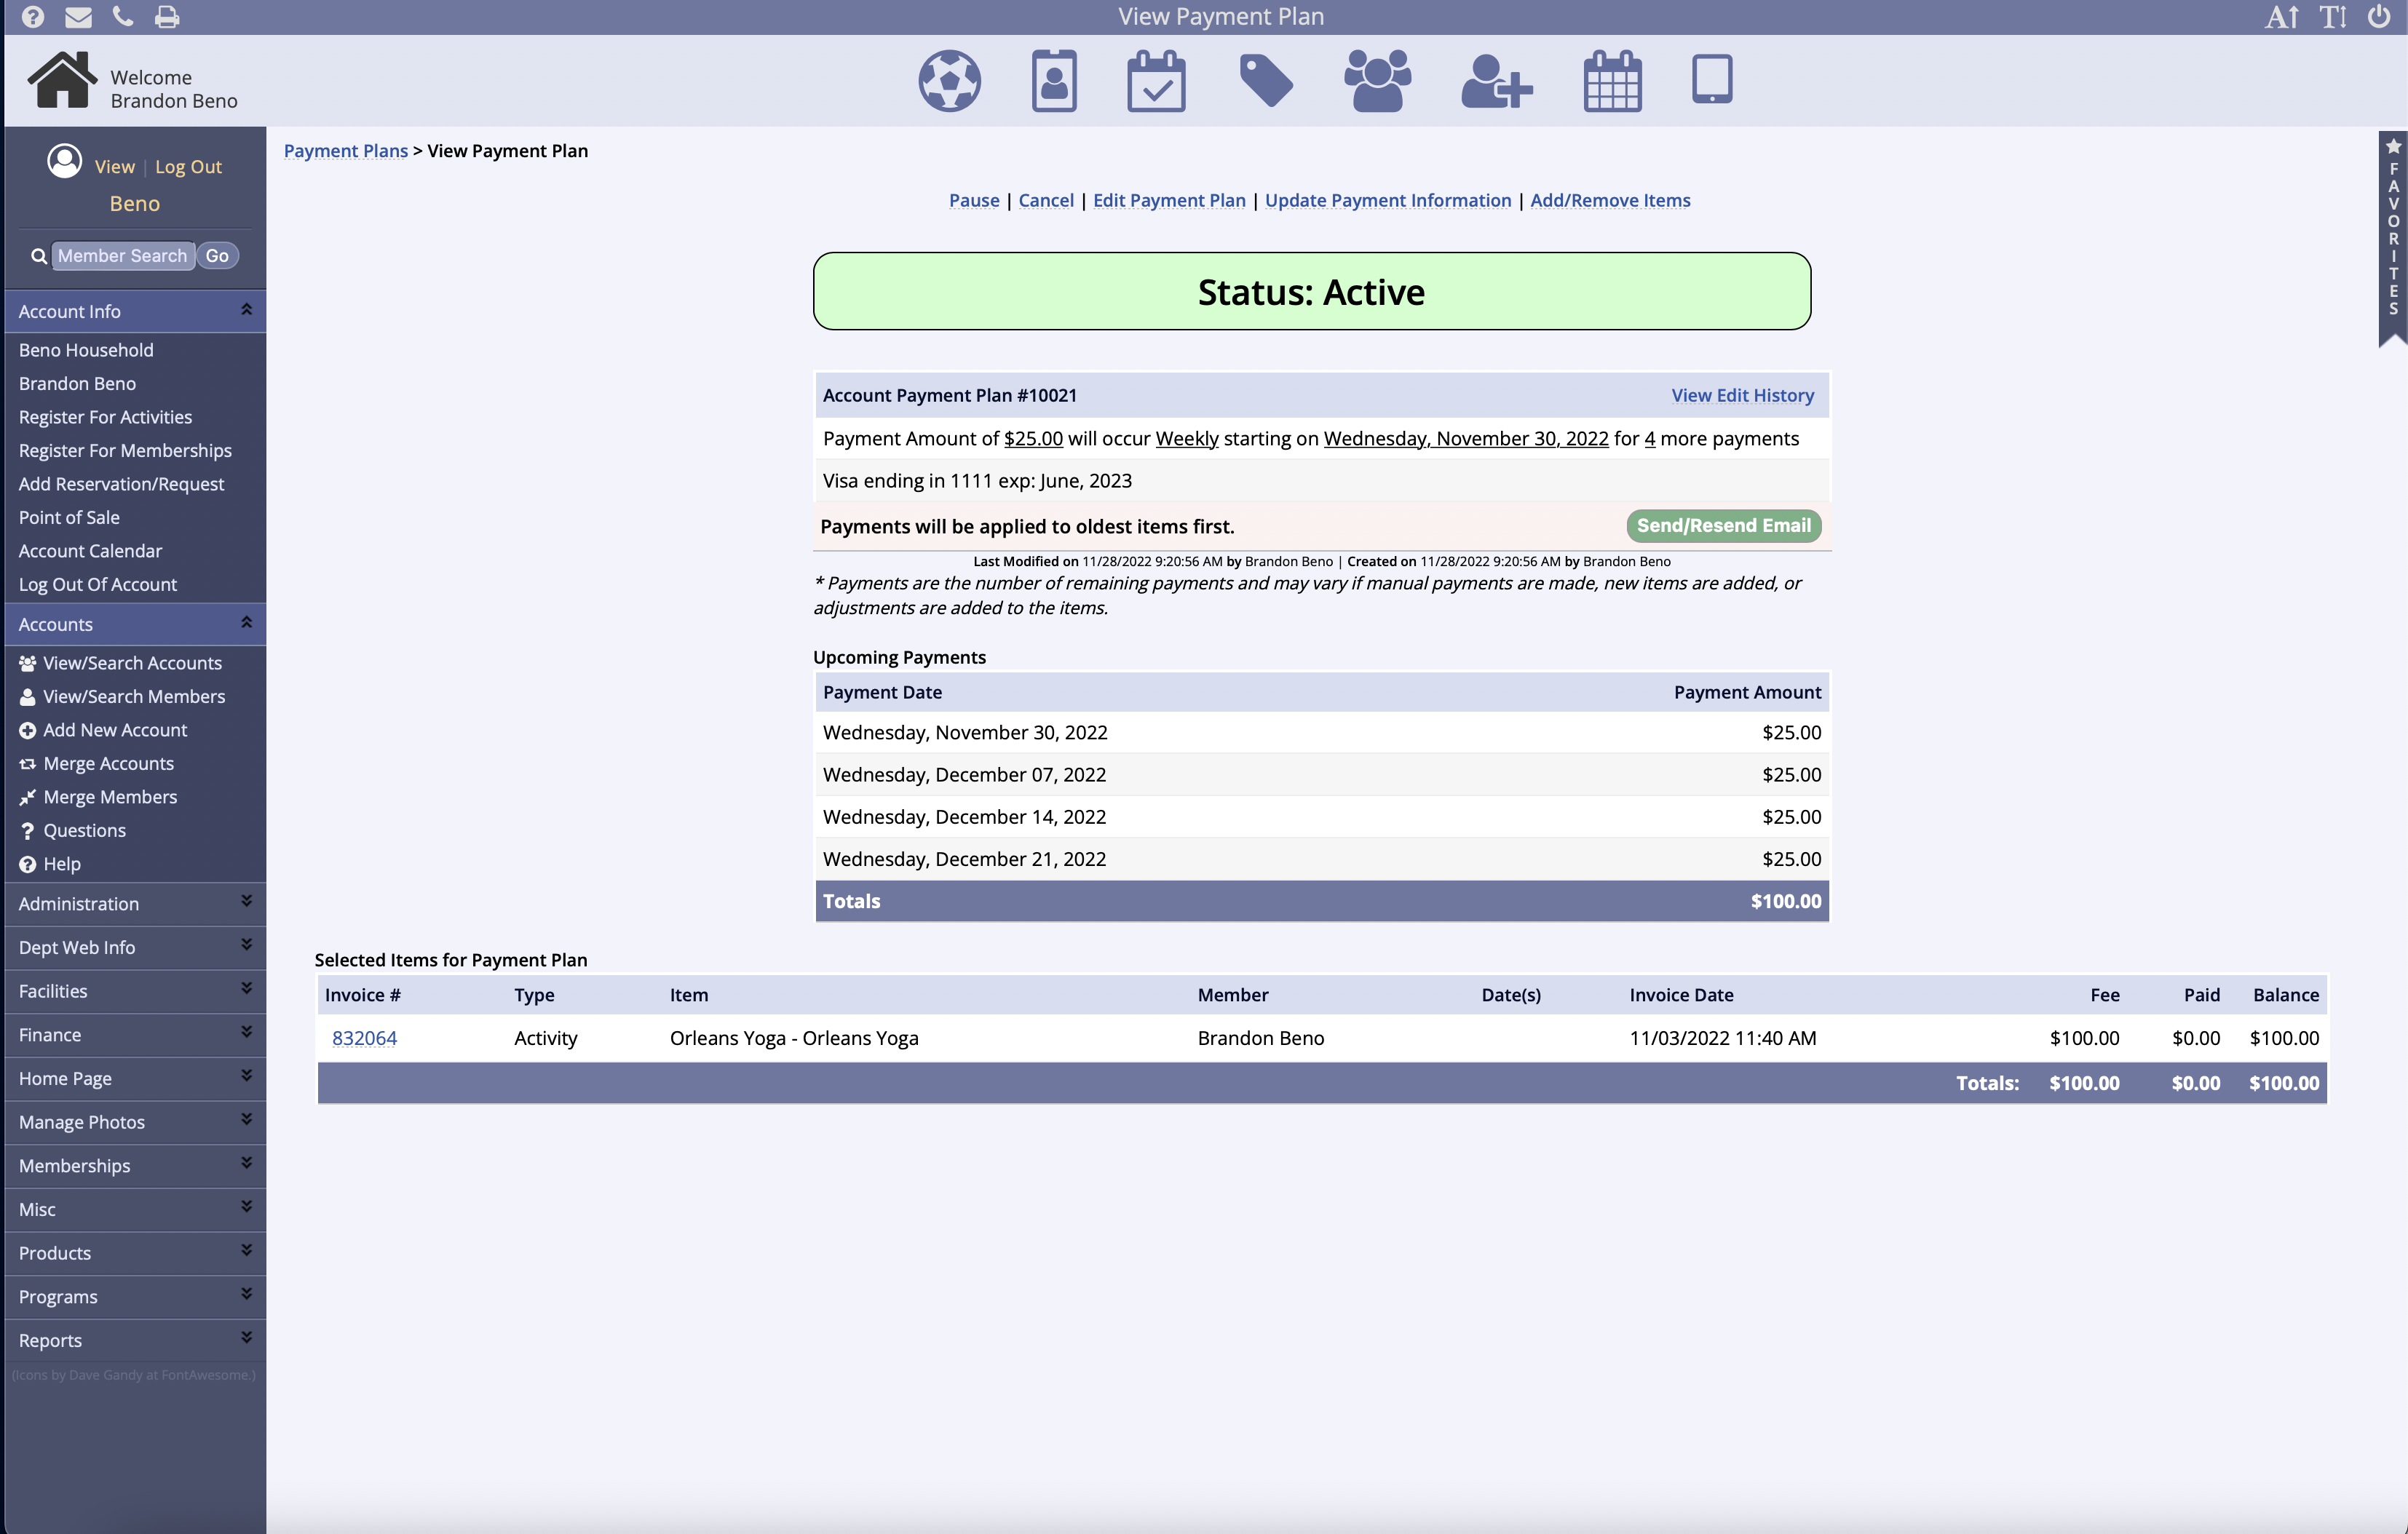
Staff users can modify the Account Payment Plan from the member's account
Account Payment Plan (APP) modifications include:
- Pause a plan
- Cancel a plan
- Edit a plan
- Update Payment Information
- Add/Remove Items from a plan
Pause an Account Plan
Pause remains in effect until:
- A specified date
- It is manually unpaused
- The plan is cancelled
- Additional payments satisfy the total amount to pay
Pause stops payments from occurring during this time
- Using a specific ‘unpause’ date is not necessarily a payment date
- Instead, this means that the plan will continue to follow the frequency based on the start date established when the plan for created
- For example, if you have a monthly payment plan starting on 1/1, then pause and enter an un-pause date of 2/10, the next payment will not occur until 3/1
- Instead, this means that the plan will continue to follow the frequency based on the start date established when the plan for created

Cancel an Account Plan
Cancel will stop the plan
- Any remaining balances will need to be paid manually
- Items will be available to be added to another plan
- Plans cannot be uncanceled

Edit Account Payment Plan

- Before the first payment is made, staff can change all of the plan information, including recurrence and start date

- If the first payment has already been made, a note will appear explaining why you cannot make a change

- After the first payment has been made
- The payment amount can be changed
- option to send or not send receipt emails can be changed
- Staff can add or remove items to and from an existing account payment plan
- Only items not associated with an account payment plan, subscription or recurring payment arrangement can be added to an account payment plan
To Add Items
- Select an item from the Select Items to add to this payment plan list
- Click the green Add Selected button

To Remove Items
- Select items from the Selected items for this payment plan list in the Account Payment Plan
- Click the red Remove Selected button under the plan items list

Additional payments can be made on an account payment plan
- Additional payments will not change the scheduled payment amount
- Additional payments may shorten the length of the plan
- There are no restrictions or penalties for additional payments or early completion of an Account Payment Plan
- Once the balances owed have been fully paid, either through scheduled payments or a combination of scheduled and additional payments,
- The status will change to Completed
- No further payments will be automatically withdrawn from the associated account
- Additional payments on an Account Payment Plan are not required
- Additional payments can be made via any payment method accepted by the Department
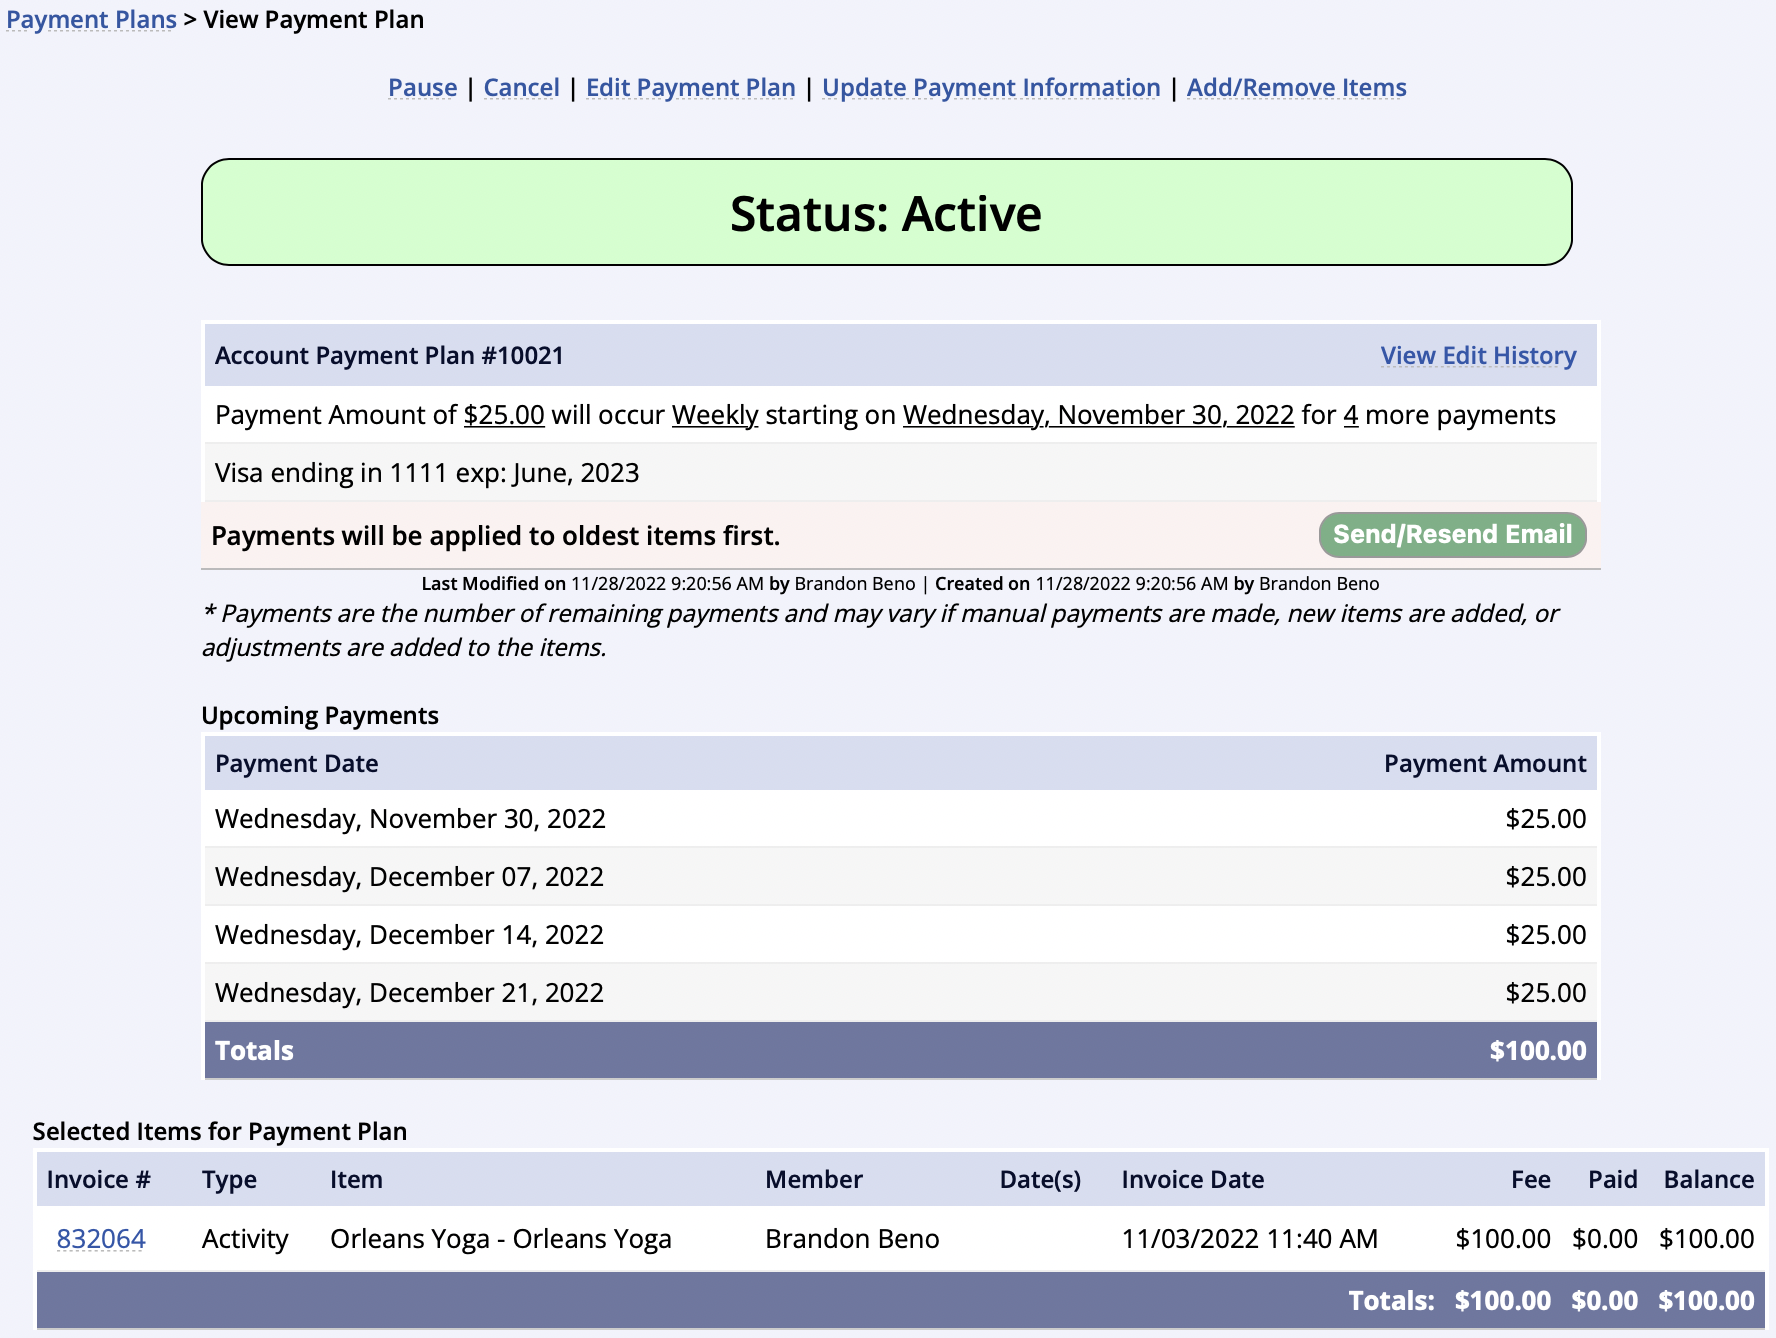
- Staff can View Edit History with the link on the right, below the status bar
