
A receipt printer can be used to print small receipts from the Point of Sale Facility Access Portal. These instructions are for the Star Micronics TSP100 FuturePRNT USB receipt printer part #39461110, TSP100IIILAN (Ethernet), or TSP100IIIWLAN Wireless Receipt printer. In order to use a receipt printer, you must change the paper size to 72mm x 200 mm.
To Set Up Receipt Printer
- If printer is not already installed, follow manufacturer instructions to set up the printer and install the software
- Go to settings for your printer in your operating system
The next instructions are for Windows 10 printer settings
- Go to your Start Menu and click the Settings icon
- Go to Devices, then Printers and Scanners
- This is where you update your printer settings
- Once in your printer settings, locate the receipt printer
- Unless the name was changed, it should be called Star TSP100 Cutter (TSP143). Click the printer icon
- Next click Manage, then click Printer Properties
- Click the Advanced Tab
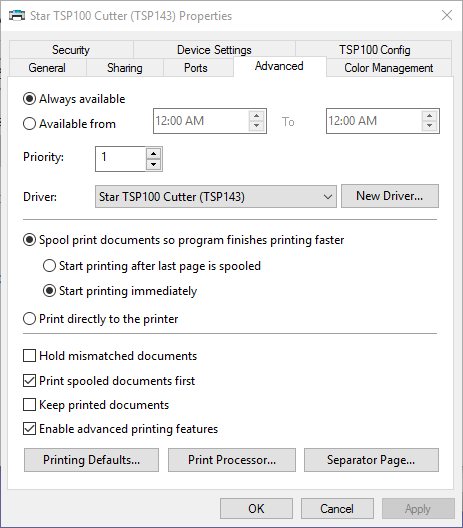
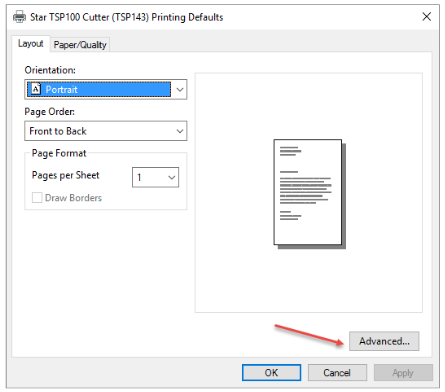
- Click Printing Defaults
- In the lower right corner of the Printing Defaults screen, click Advanced
- In Advanced Options > Advanced Document Settings, under Paper/Output the Paper Size needs to be 72mm X 200mm
- If this is different, change it, and click OK

- The setup of the receipt printer is complete
- It should properly print small receipts
To configure the printer to prompt the cash drawer to open:
- Once in your printer settings, locate the receipt printer
- Unless the name was changed, it should be called Star TSP100 Cutter (TSP143). Click the printer icon
- Next click Manage, then click Printer Properties
- Click the Device Settings tab
- Under Installable Options select Cash Drawer for both Peripheral Unit 1 Peripheral Unit 2 and set them both to Document Bottom
Note: These instructions are for Windows 10. If you are using an earlier version of Windows the settings should be similar. If you are using another operating system, find your printer size, find where to set the paper size and set it to 72mm x 200mm.
To print a small receipt on the receipt printer:
- Go to the Point of Sale Facility Access Portal
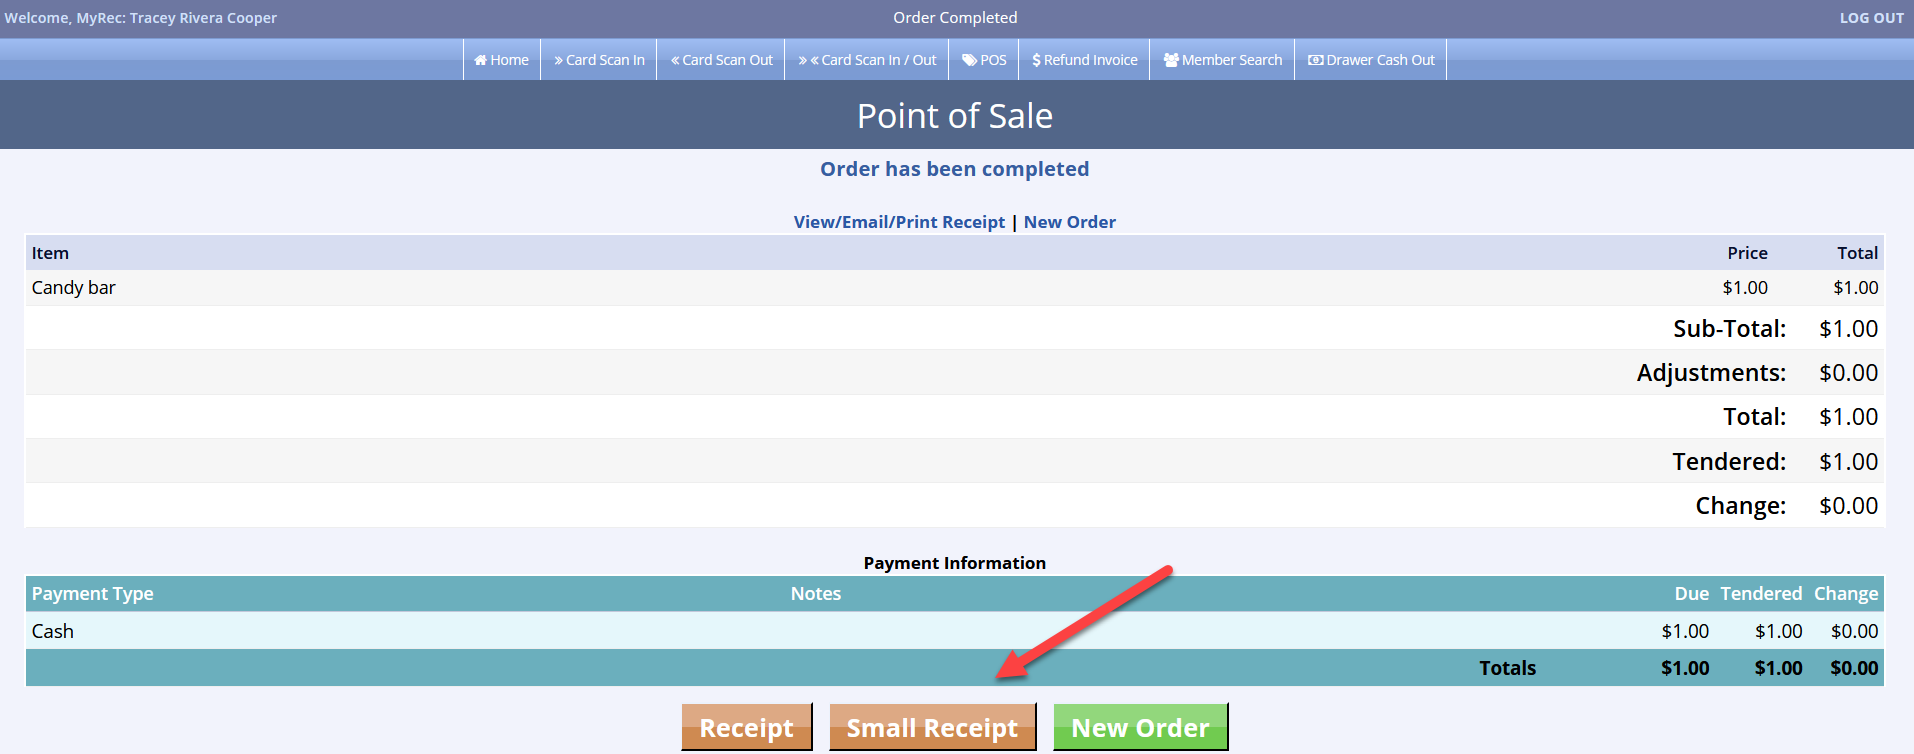
- Enter the purchases and submit the payment for the items
- After completing the order, under Payment Information, there is now a link to Print Small Receipt, click on this link
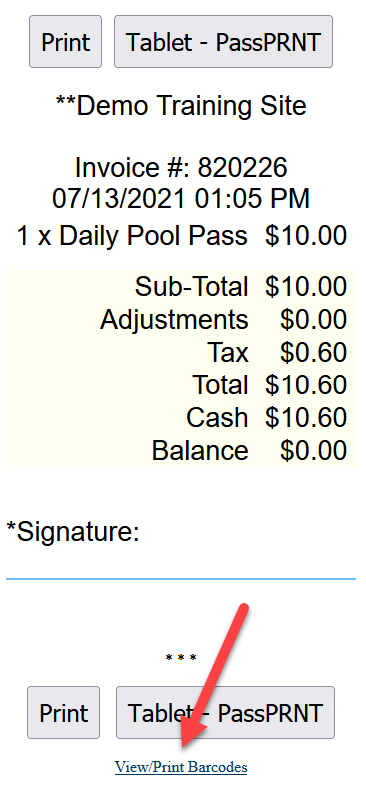
- On the receipt, click Print Receipt
- If there are barcodes, there will also be a link to View/Print barcodes
- The bar codes from the small receipt can also be printed to the receipt printer
- If there are barcodes, there will also be a link to View/Print barcodes
To print to receipt printer:
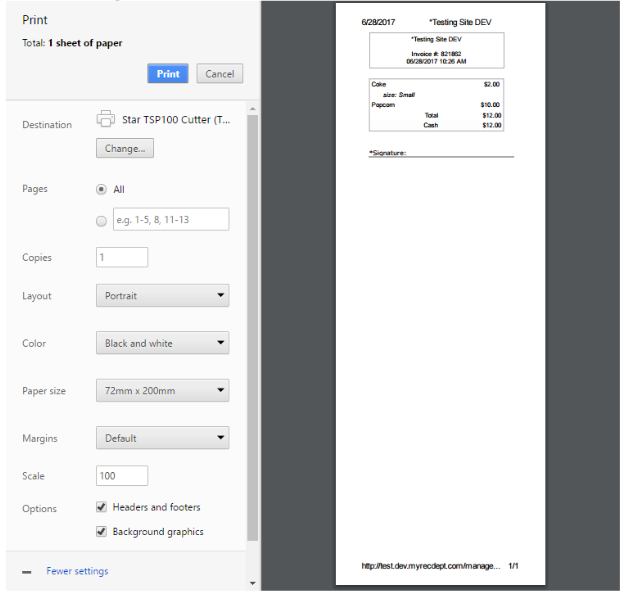
After clicking Print Receipt or View/Print Barcodes, the Print Dialogue from your browser will open. For best results, use Chrome or Firefox, but instructions are also given for Microsoft Edge. Check the following settings (you might have to click More Settings to see all these settings):
- In the Print Dialogue, make sure the destination is the receipt printer (Star TSP 100 Cutter)
- If this isn’t selected, click Change to select the correct printer
- Check Paper Size to make sure the Paper Size is 72mm X 200mm
- If you need multiple copies, either print them one at a time, or change the number of copies and manually cut each one because the printer does not cut off automatically between copies
- If Headers and Footers is checked, the date and name of your department will print on the top of the receipt and the website of your department will print on the bottom of the receipt
- If you do not want this to print on the receipt, you can uncheck Headers and Footers
Print Dialogue for Chrome
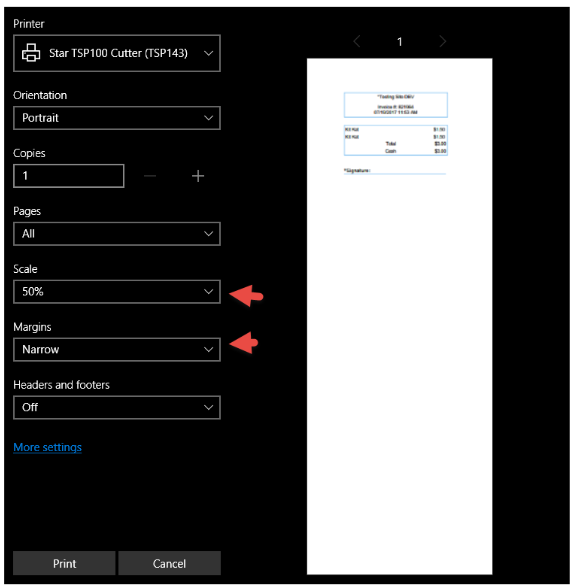
Using Microsoft Edge
- In the Print Dialogue, in addition to selecting the TSP100 printer, also set the Scale to 50% and the Margins to narrow
- This allows the receipt to fit on the page in Microsoft Edge
If you are using Firefox, no additional settings are necessary once the paper size is set.
- After making selections, click Print
- You will return to the receipt screen, or barcode screen
- After you are finished, click the X in the right corner to close the receipt