
Memberships can be used to allow access to certain facilities or provide discounts/limit access to activities. They can be limited to certain amounts of people or age by the Type assigned. They can also be provided for different amounts of time by the Length assigned.
Setting Up Memberships
- Go to the Memberships tab in the left-hand navigation, then click Add New Membership
Info
If you do not see the Memberships tab, contact MyRec.com staff for training to turn the module on for you.

- Enter Membership Details
- Membership Name: (required) Enter the name of the Membership
- Order #: (required) Identifies the position in the listing of Memberships
- Consider assignment based on similarities or alphabetize
- Status: (required) Defines if the membership is Active or Inactive
- Set to Active by default
- Description: (optional) Enter text describing the membership
- Suggest entering any specifics related to the membership such as card duplication fees, if pass is non-transferrable, etc…
- Global department information should not be entered
- To enter html code, click the HTML link and enter code
- Photo: (Optional) Select a Photo from the Photo Pool and select either upload your own photo or choose from the provided Stock Photos
- Special Settings
- Promo type
- Allows the membership to be declared as a promotional (non-donation) item for checkout
- Restricted - means this membership will only appear as a promotional membership suggestion on those memberships that have selected it
- Global - means it will appear on all memberships as a promotional item
- Allows the membership to be declared as a promotional (non-donation) item for checkout
- Promo type

- Show Promotional Memberships
- Allows selection of declared promotional items for display on checkout when registering for this membership (ex. You might also like...)
- Any past or cancelled memberships will be denoted with *Inactive and will not be asked at checkout
- Show Add-On Products
- Allows membership to suggest/require purchase of products during checkout
- Next, click Submit
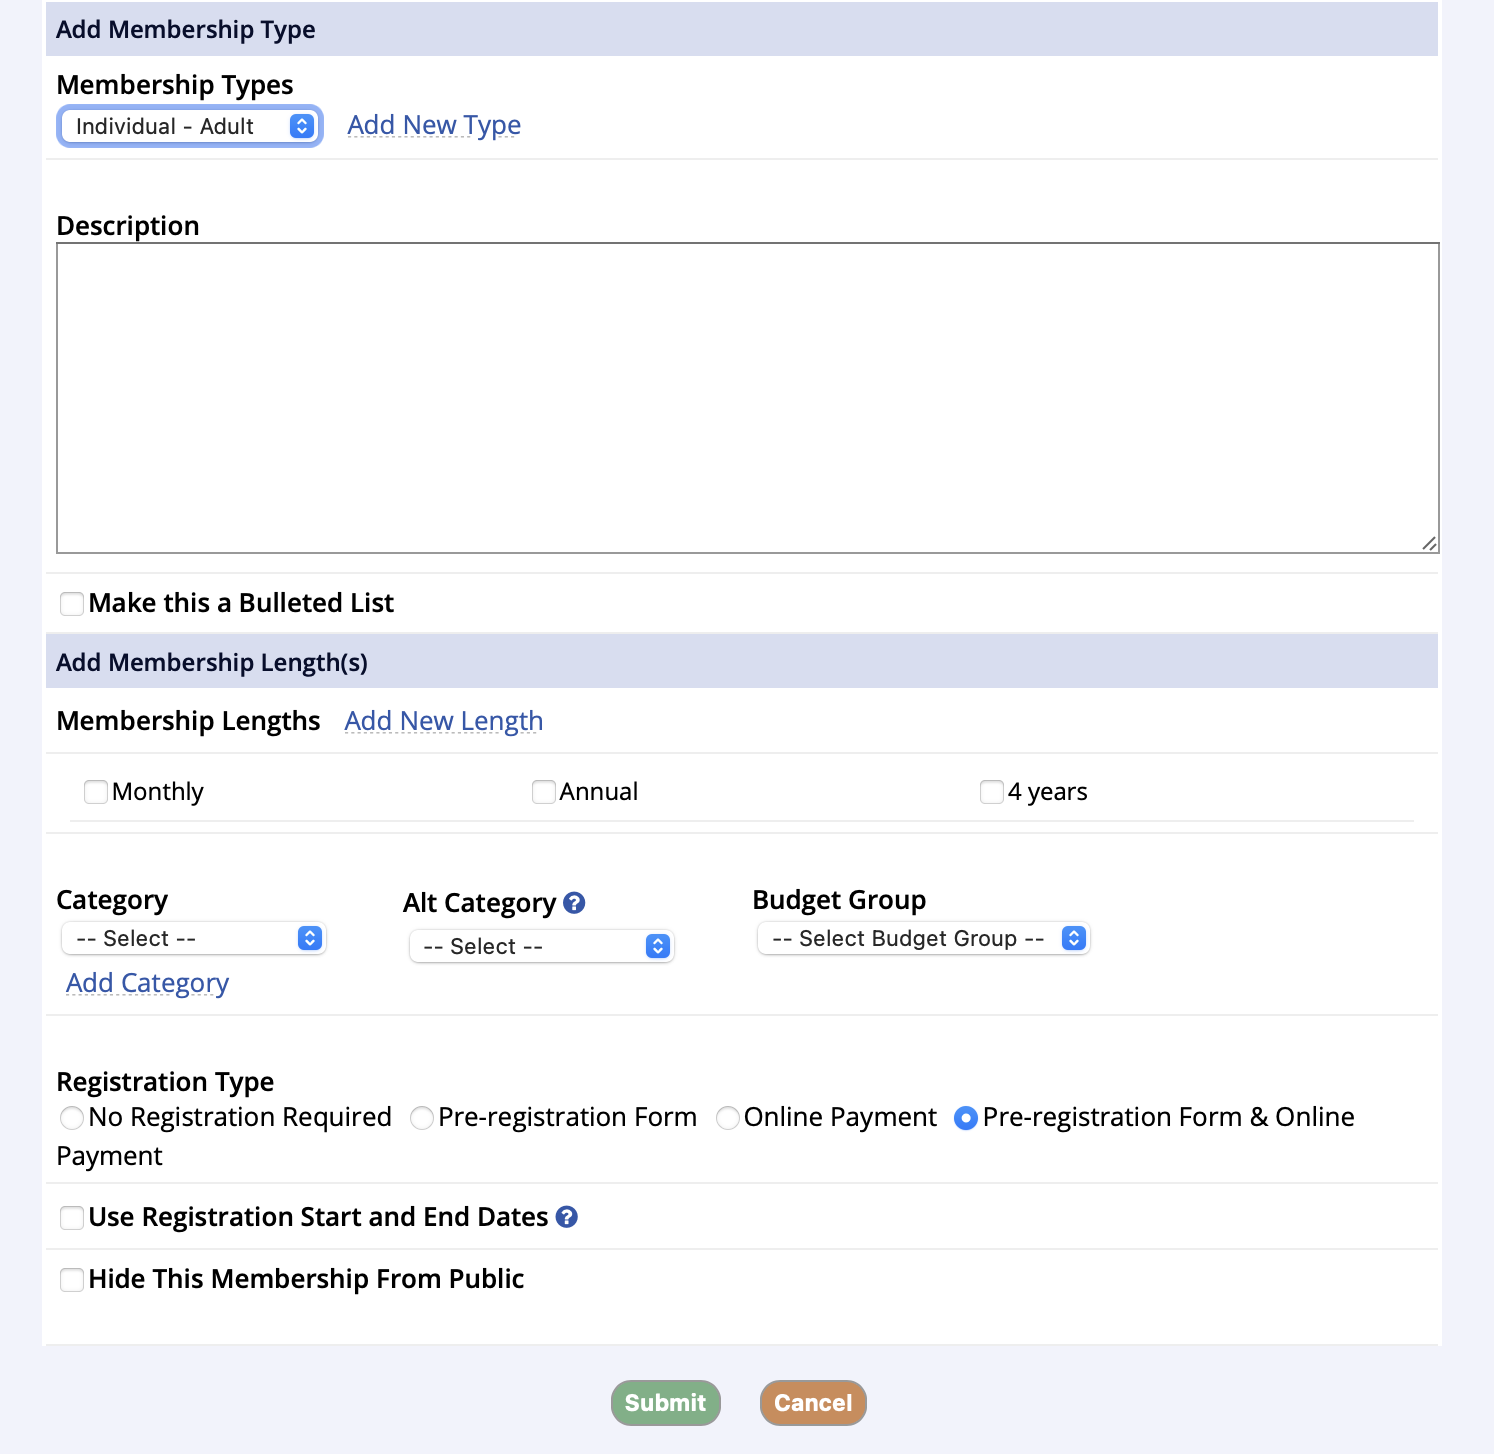
Create the first Type/Length
The next screen allows the first Type to be created and the Lengths to be associated with it.
- If the Type that is needed is not in the drop down menu, create a new Type by clicking the Add New Type link
- Types are used to assign who you’d like to allow to purchase the membership
- You can add multiple Types under a membership, but you can only add one at a time
- After selecting a Type, choose the lengths to be associated with it
- Lengths are used to determine how long a membership Type will be valid for before expiring
- Multiple Lengths can be assigned at once
- Click the Add New Length link to create a new one
- Complete the category, budget group, and registration type
- Category: (required) Memberships will display under the assigned Category from the public side
- Budget Group: (required) - Assign the applicable Budget Group for journaling to the revenue account
- Registration Type: (required) Select the RegistrationType applicable to the membership
- No Registration Required – select this option if the membership does not require participants to register
- Printable Form Only – select this option if the membership can only be purchased via printable form
- Online Payment Only – select this option if the membership may be purchased and paid in full online
- Online Payments & Printable Forms – select this option of online payments or printable forms are permitted through the public side
- Registration Start and End Dates: Select the option to specify the parameters for opening and closing registration dates
- Click Submit to save or Cancel to exit out of the membership – all additions/changes will be lost
- After clicking submit, the system will automatically advance to Edit Membership Fees
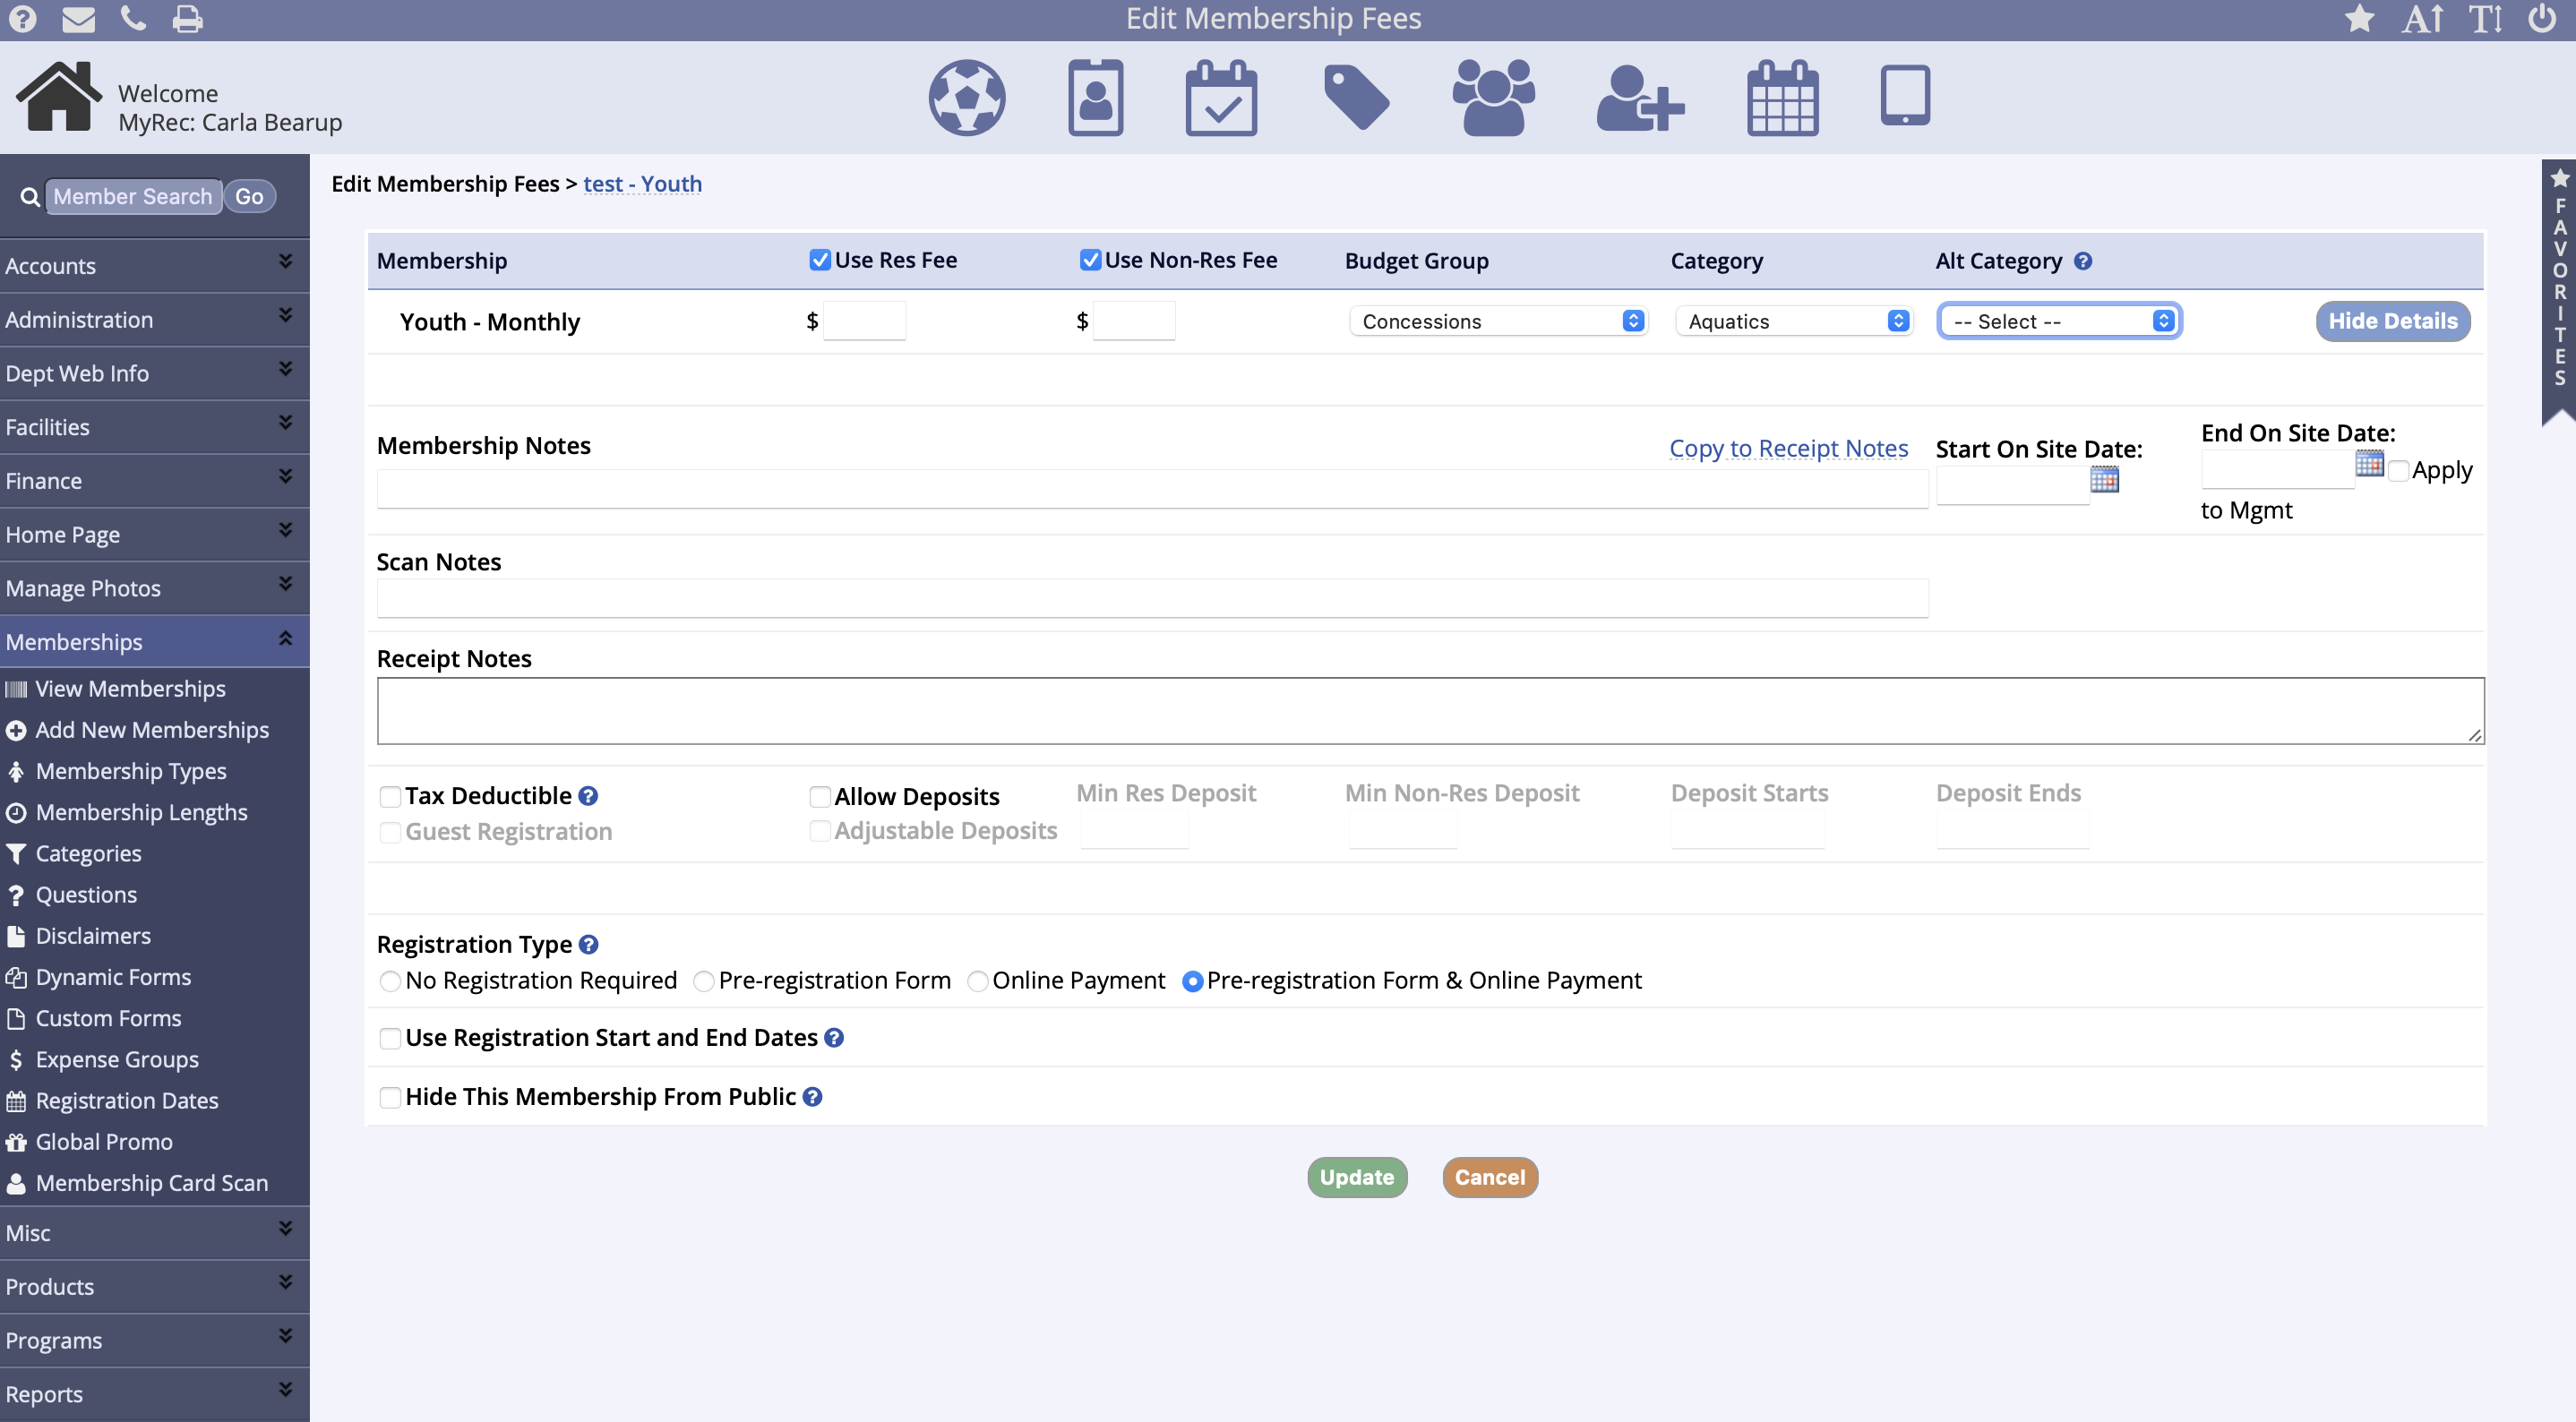
Edit Membership Fees
- Res Fee - Enter the amount Residents will be charged. Non-Res Fee - Enter the amount Non-Residents will be charged. (Note: The Non-Resident fee should be the entire fee, not the difference between the resident and non-resident rate.)
- You can edit additional information about the length by clicking the Show Details button.
- Start on Site/End on Site: (optional) - The Start and End on Site fields provide date delimiters for when the membership will begin showing and ending on the public side.
- Membership Notes - Show on the Membership page under this Type/Length on the Public Site.
- Scan Notes - Show when the membership card is scanned that has membership purchase.
- Receipt Notes- Show on the printed or emailed receipt / invoice.
- Tax Deductible - Checking Tax Deductible catagorizes this item for customers. All items that are designated as tax deductible appear under the account finance tab under the Tax Deductible view. Viewable for both public and management account views.
- Allow Deposits - Allows for registration of the membership with only a designated portion of the registration fee to be paid. The remaining portion will be owed on the account.
- Hide From Pub Check this field to hide the membership from the public side.(Note: checking this field does not just hide the fees, it hides the Type/Length of the membership entirely.)
Add Additional Types
After creating a new membership, it is possible to add additional types, thus creating additional membership purchasing opportunities. For example, if your department offers several membership options for summer swim passes, create the first swim pass, then continue to add using the Add New Membership Type link.
Add Facility Access to the Membership
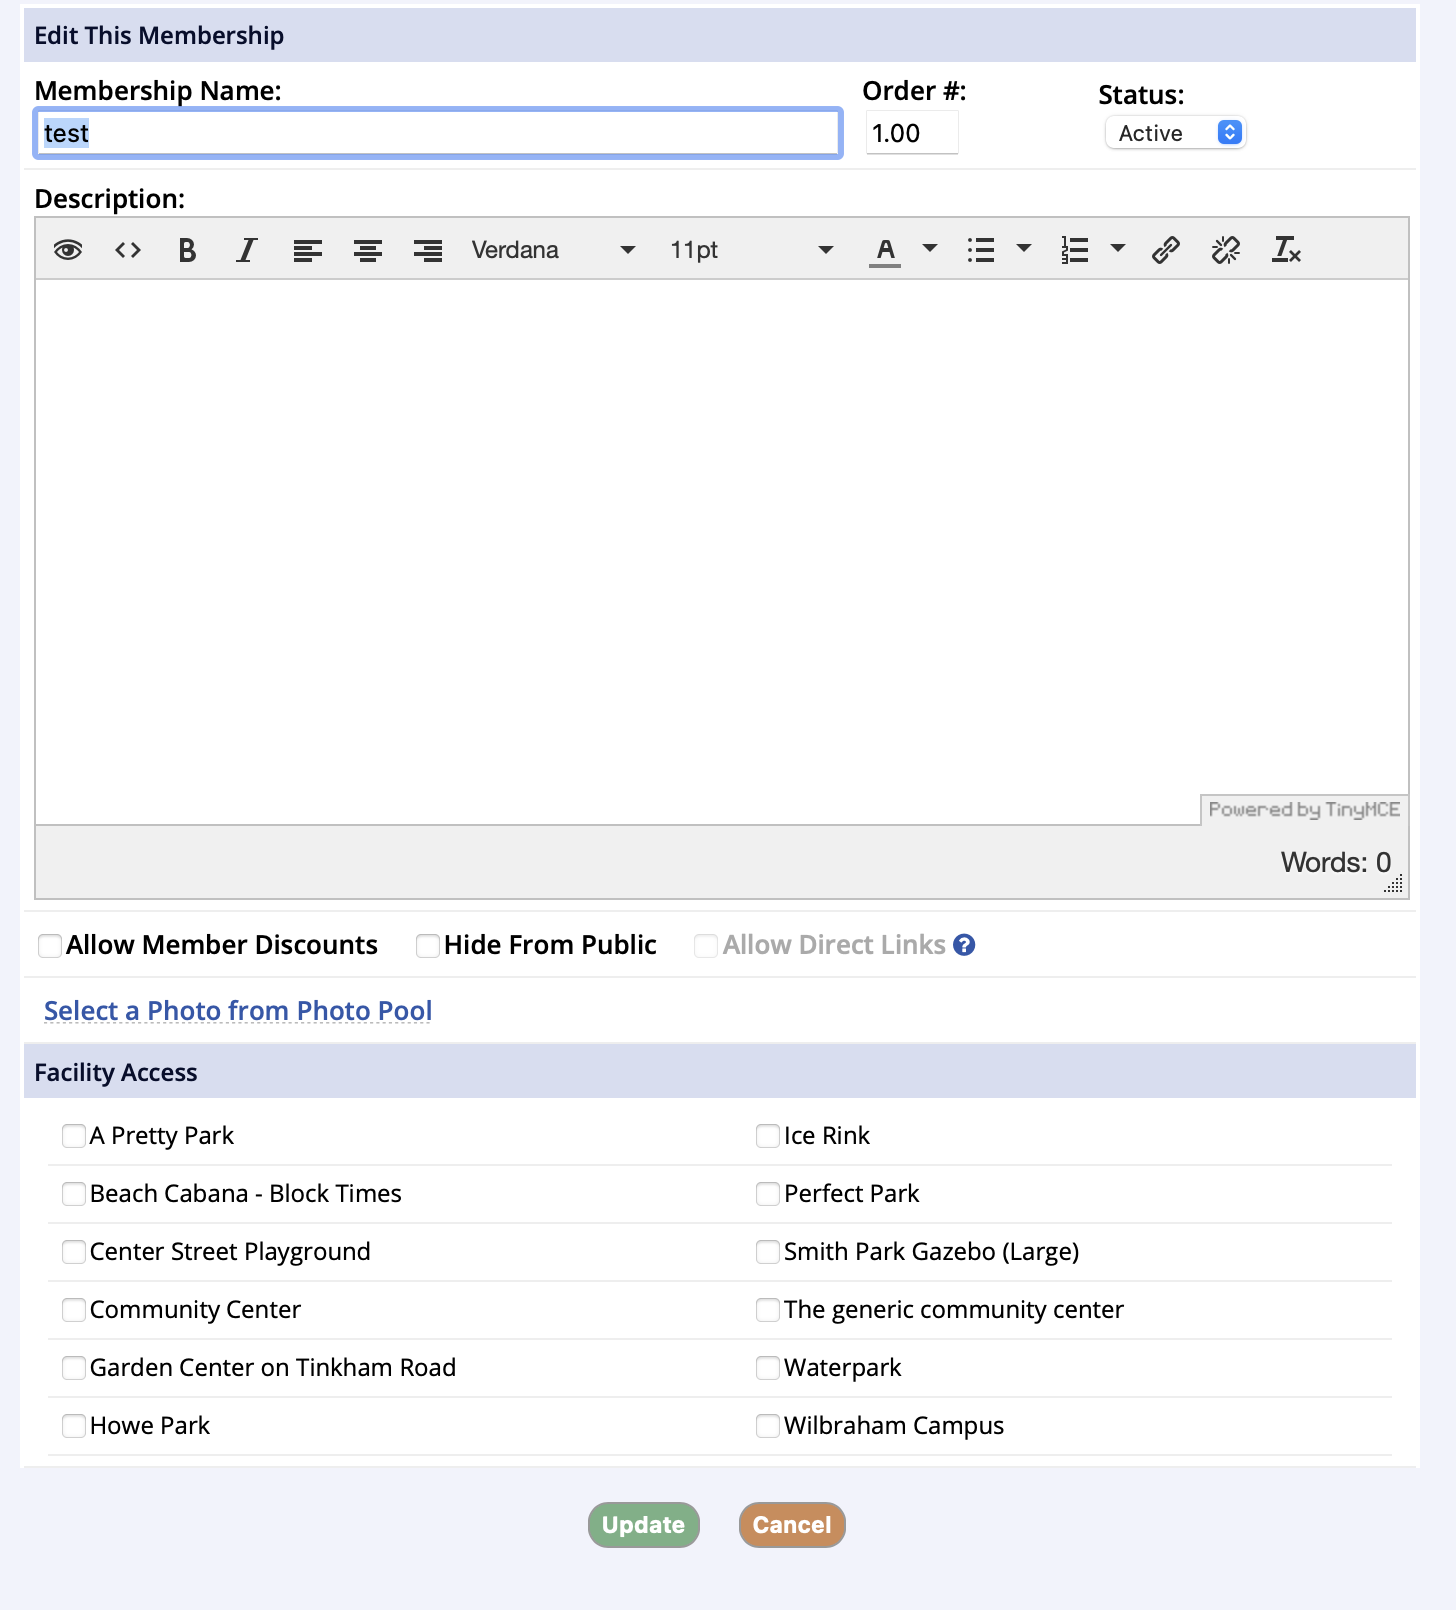
Facility access allows you to associate the membership with a facility. This is useful if you are intending to use membership scans.
- To add Facility Access to a membership, go to the Membership from the View Memberships link in the Memberships tab
- Click Edit This Membership / Photo
- At the bottom of the screen check off the Facilities that this membership grants access to and the click Update