
Program-Level Cloning
Cloning at the program level will allow you to clone all program settings in addition to any or all of the activities under the program umbrella. You can add to an existing program or create any entirely new program through the process.
-
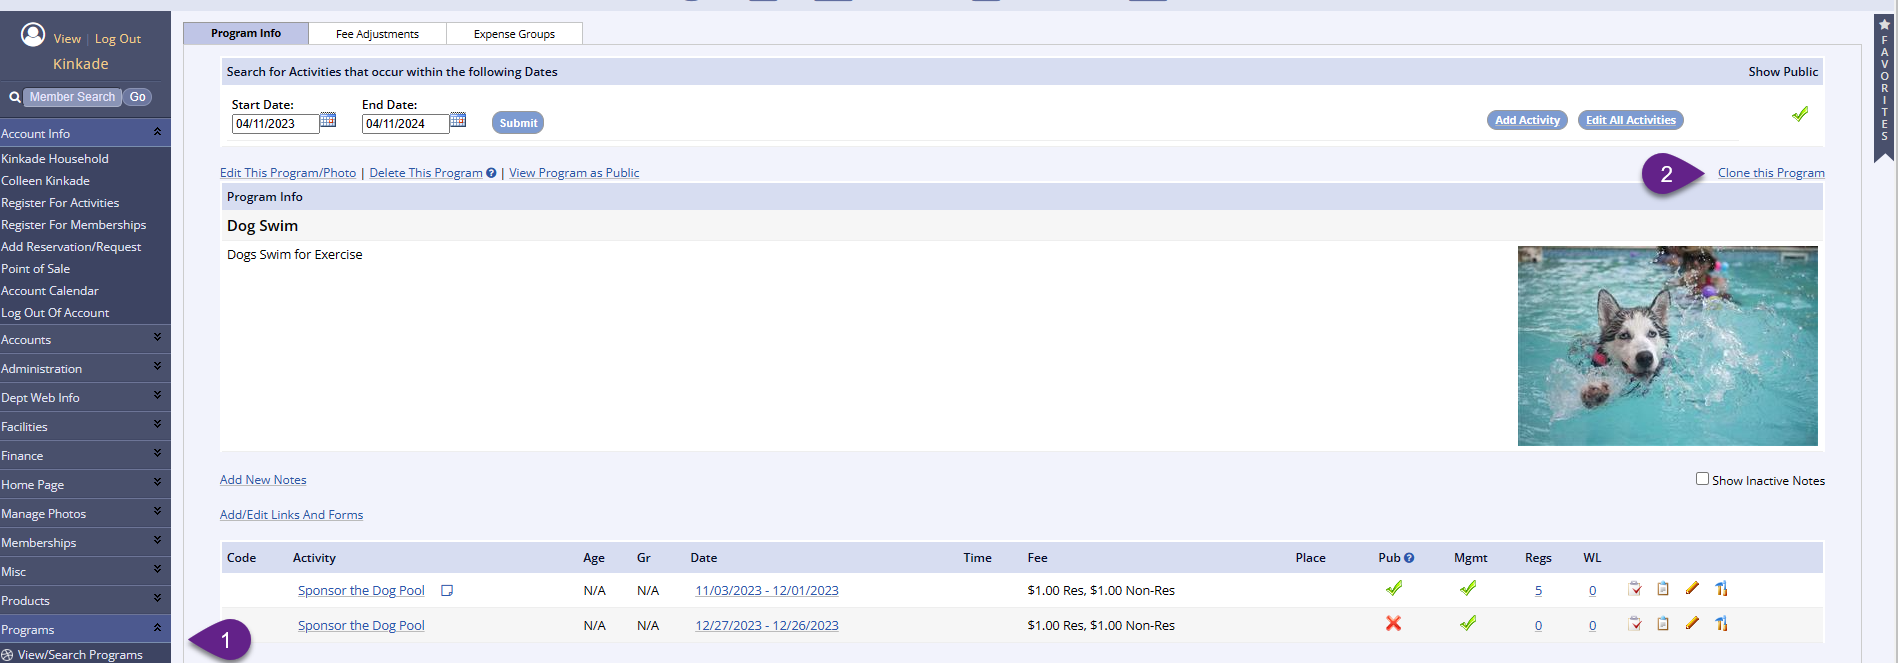
You will want to find the program which you would like to clone
-
This is done by clicking Programs > View/Search Programs > Click on the program title
- You may have to change the date range to see past programs (this is found in the upper left of the screen)
-
This is done by clicking Programs > View/Search Programs > Click on the program title
- Click the Clone this Program link in the upper right of the screen as seen below
-
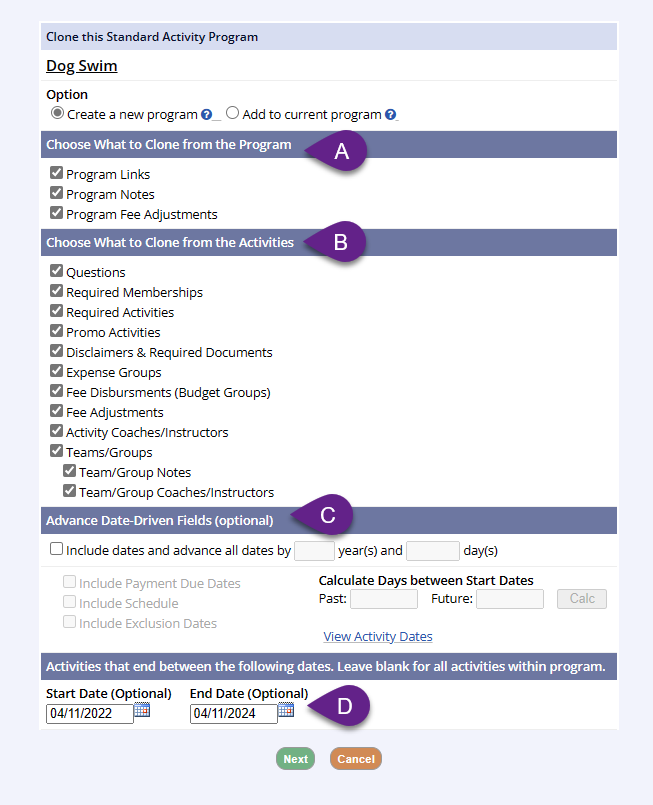
Once you click this link, you will have to select whether you would like to add the cloned activities to a new program or the current one
-
Cloning into a new program
- Will result in a new program (this will not clone previous program registrations to the new program)
-
Cloning into the existing program
- Will allow you to clone multiple activities within the existing program
-
Cloning into a new program
-
Once you click this link, you will have to select whether you would like to add the cloned activities to a new program or the current one
-
After selecting Clone this Program, you will be brought to a page with several options
- The first group of check boxes allows you to choose what aspects of the old program you would like to bring over during the cloning process (this only shows if you are cloning a new program)
-
The second group of check boxes allows you to choose what aspects of the old activities you would like to bring over to the cloned ones
- By unchecking the boxes, you are choosing not to copy information over
-
The third group of check boxes allows you to advance dates from the original activities
- Check this box if you would like to include dates in your activities, and then select how many years/days to advance them from the old activities dates (you can enter this manually or calculate it using the Calculate Days between Start Dates option)
-
If you choose to leave the Include dates and advance all dates by box unchecked, the cloned activities will have no dates and you will have to enter them later in the Schedule tab of the activity by clicking Edit
- This will also prevent the option of including exclusion dates from the original activity to align with any Missed Day Credit you have created on the pricing option
-
The fourth set of options allows you to specify activities to clone using a date range
- If this is left blank, all activities within the program will show to be cloned and you can select the activities you would like to clone
- After you have made your selections, click the Next button
-
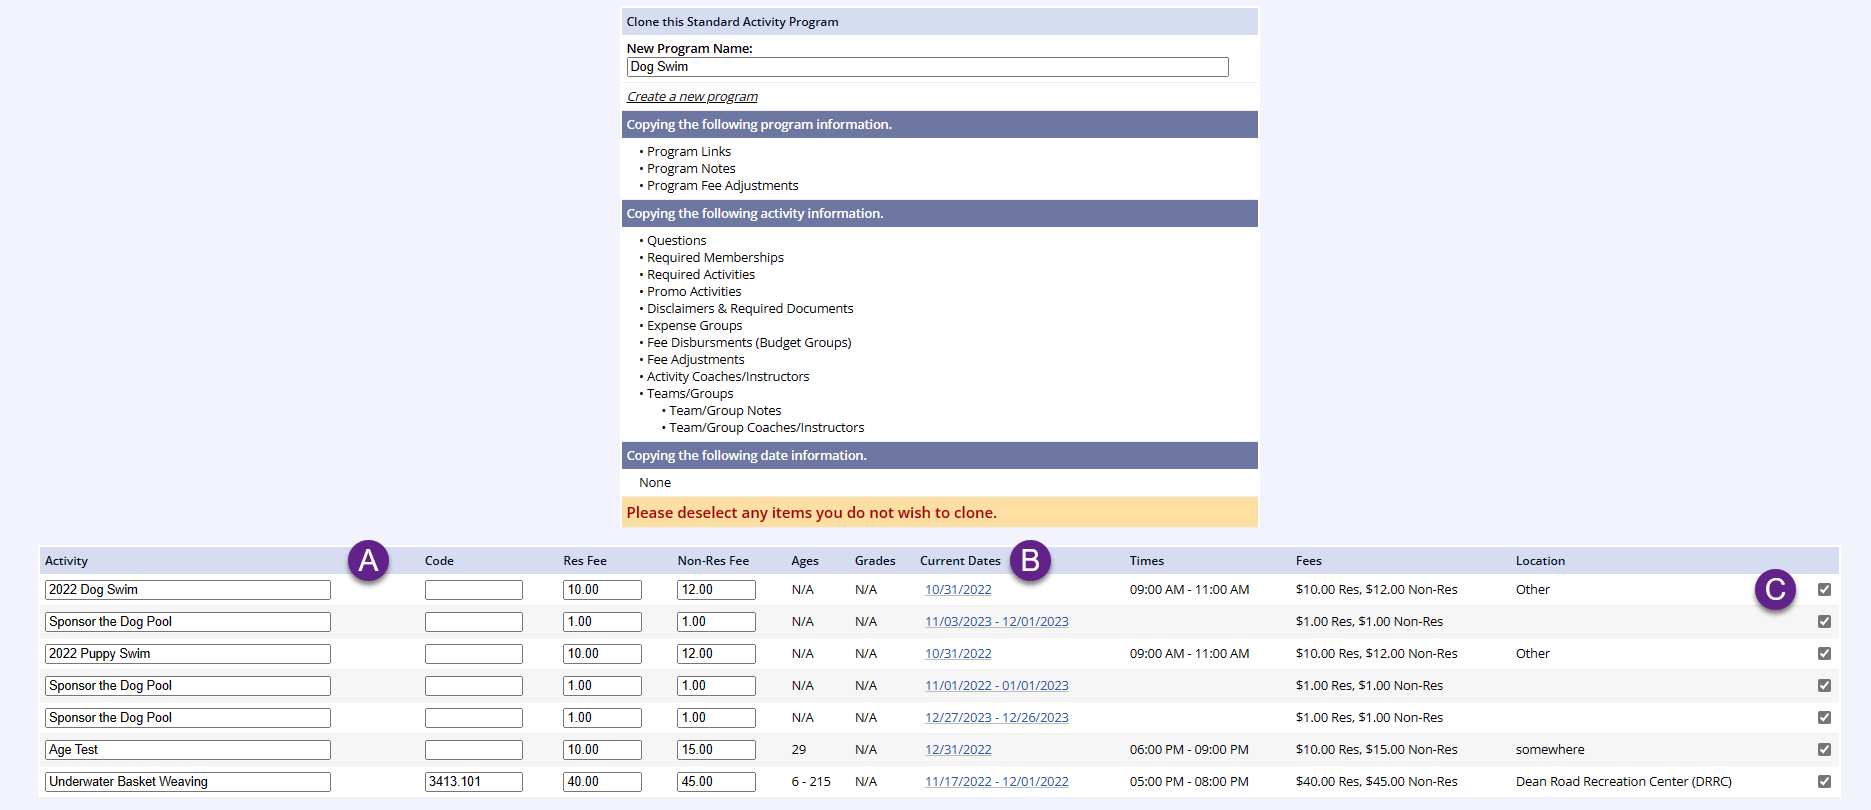
The next screen will allow you to edit the activity names, codes, prices, and see other information about each activity in the clone.
- View and edit the names of the new activities as well as their code and fees
- See the old and new dates for the activities
- If you click on the dates, you will be able to see more information about them including days, weeks, exclusion dates, times, and places
- You can select and deselect activities here
-
After clicking Continue, the new program and activities will be created
- They will be hidden from the public and management by default, so you will have to un-hide them
Note: If you chose not to advance the dates, you will have to go into each and edit the schedule to add dates before the activity will display to the public.
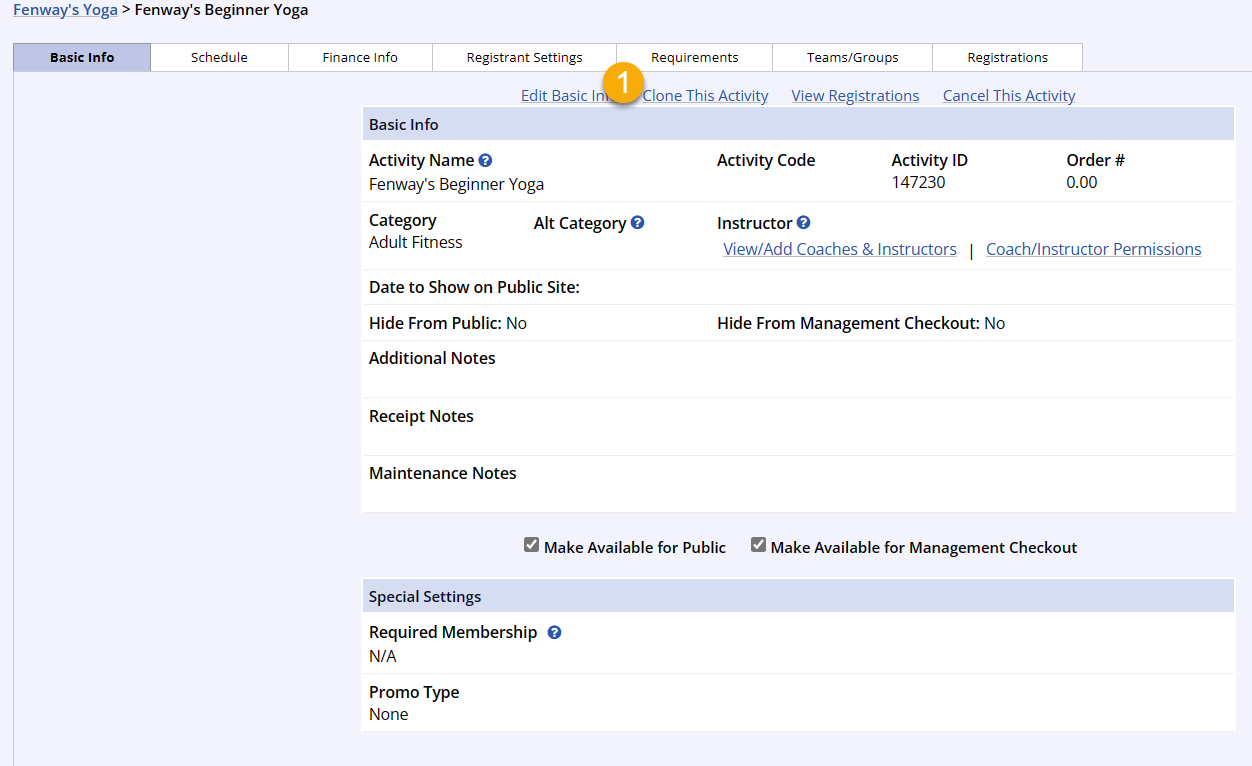
Activity Level Cloning
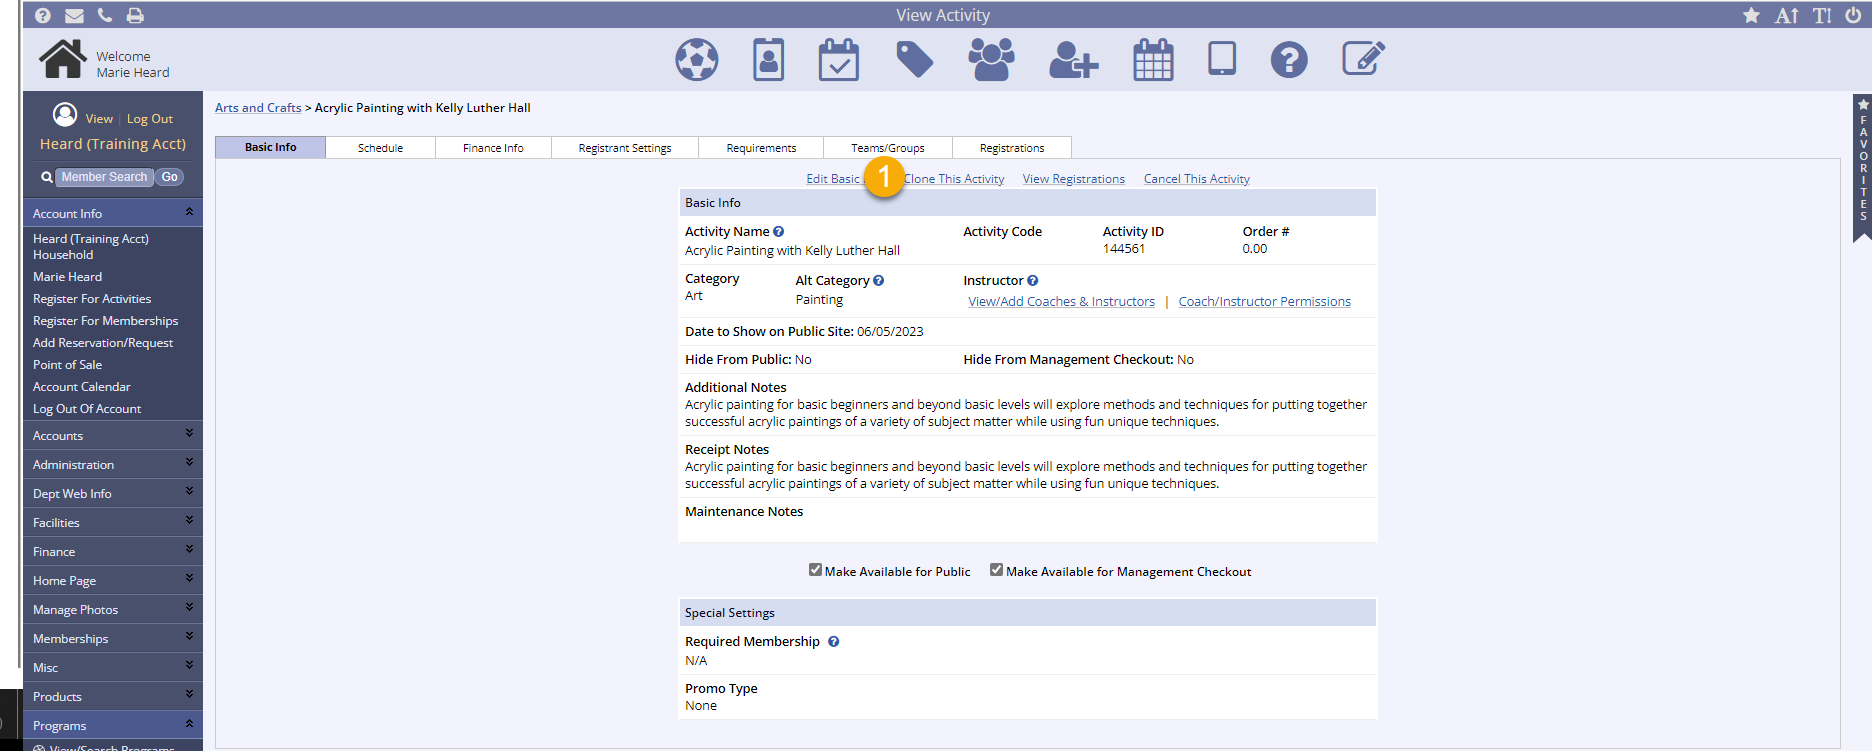
- Open the Activity and click the Clone This Activity link
-
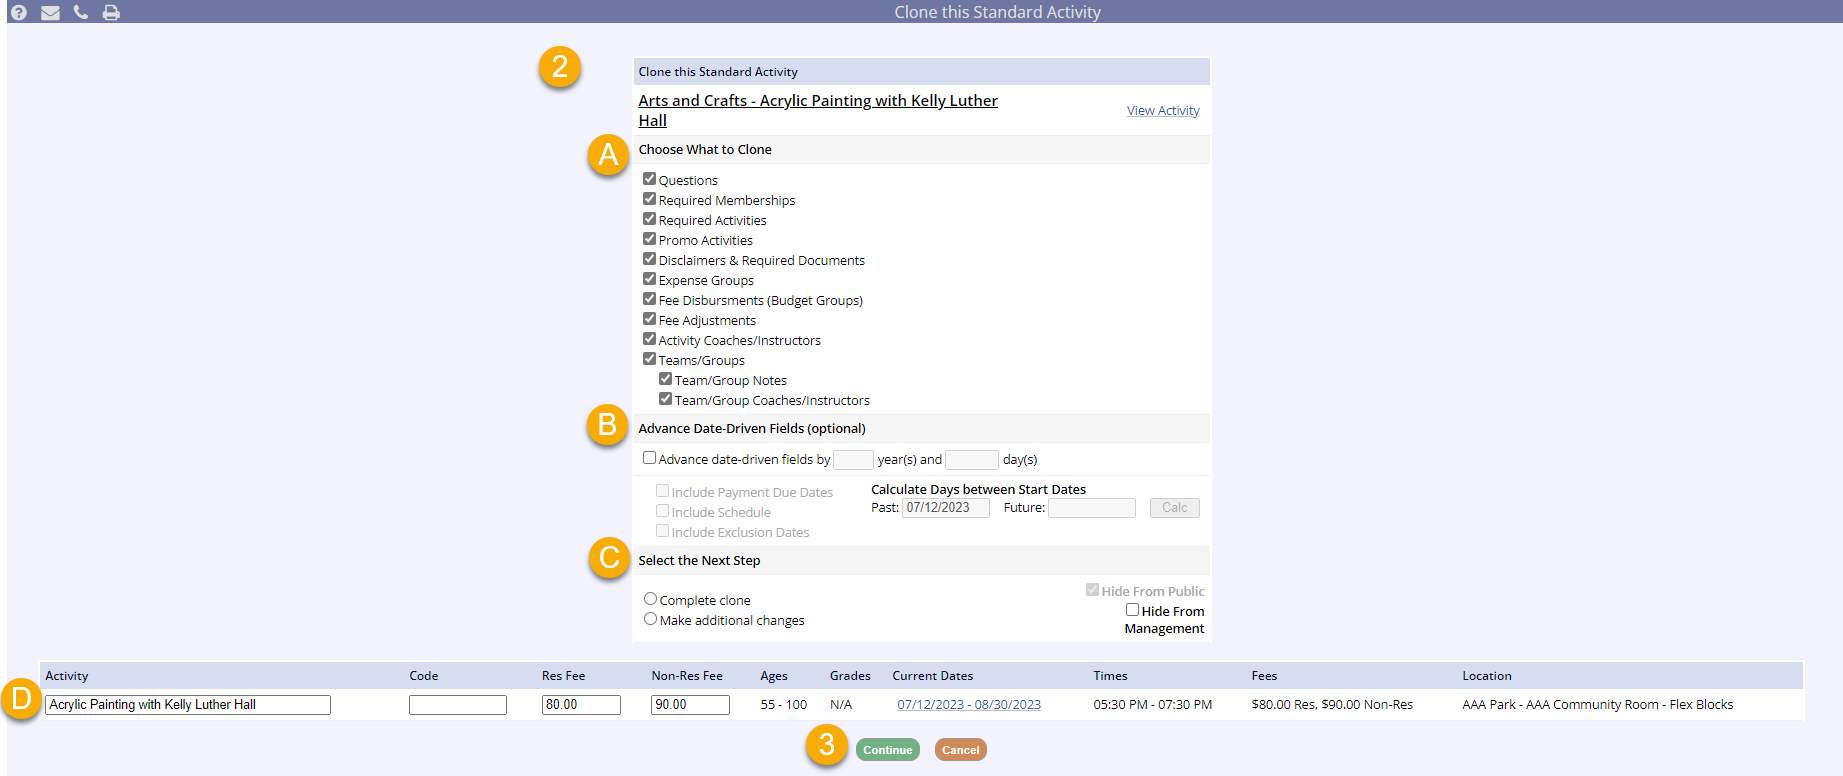
After selecting Clone this Activity, you will be brought to a page with several options
- The first group of check boxes allows you to choose what aspects of the original activity you would like to bring over during the cloning process
-
The second group of check boxes allows you to advance dates from the original activities
- Check this box if you would like to include dates in your activities, and then select how many years/days to advance them from the old activities dates (you can enter this manually or calculate it using the Calculate Days between Start Dates option)
- If you choose to leave the Include dates and advance all dates by box unchecked, the cloned activities will have no dates and you will have to enter them later in the Schedule tab of the activity by clicking Edit
-
The third set of options allows you to specify if you are doing a Complete Clone or one where you Make Additional Changes, so select whichever option applies
- You will be able to edit an activity even if you select Complete Clone
- You can change the activity title, fees, and code in the final set of options or you can change these later within the activity tabs
- After you have made your selections, click Next
- The clone is complete and you can continue to clone as needed
Cloning a Standard or Team Sports Activity with RPP settings
To clone a standard or team sport activity and capture the RPP settings, you must use the advance date-driven feature. If you do not use the advance date-driven feature, the activity will be cloned, but you will have to set up the RPP again if you want it on the cloned activity.
Cloning a Standard Activity with RPP for same schedule dates
This is useful when you want to clone an activity with its RPP settings that has same date/different times in your schedule instead of creating it from scratch.
To do a complete clone of a standard or team sport activity with RPP for the same dates, you will still use the advance date-driven feature.

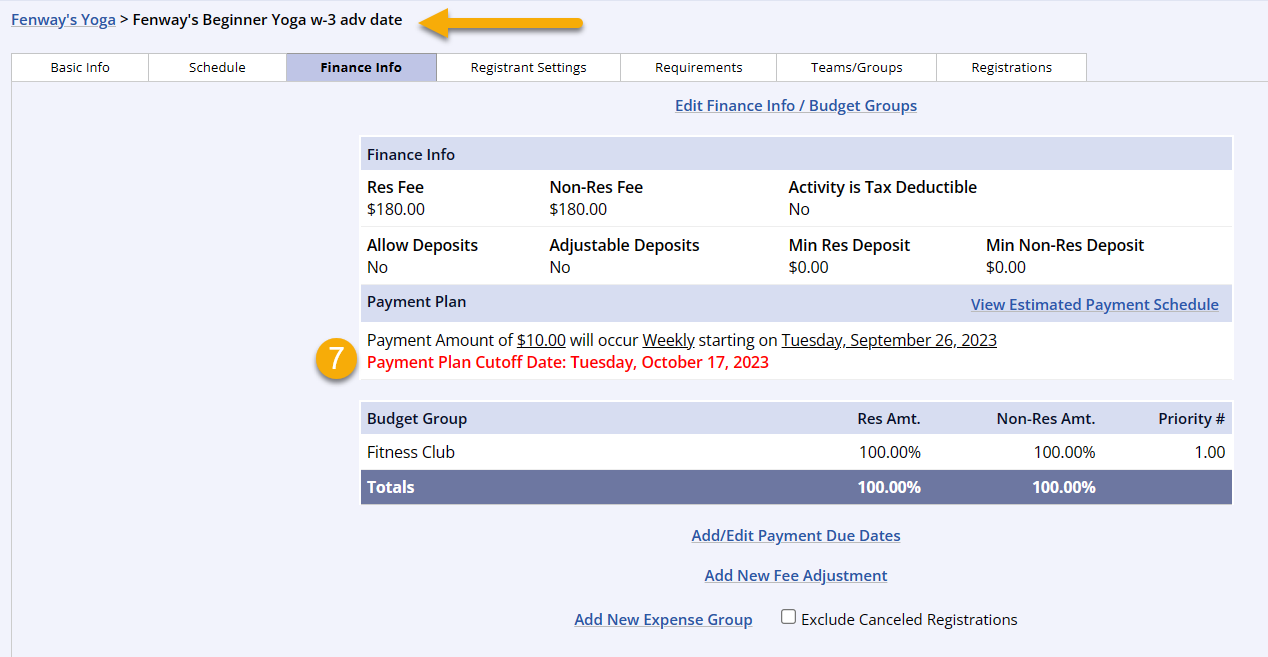
- Note the registration payment plan (RPP) setup details on the original activity
- On the activity's Basic Info tab, click Clone This Activity
- Check the Advance date-driven fields by box
- Enter 0 in the years and days boxes
- Select Complete Clone
- Make any changes to the new activity's title, code, or fees
- Click Continue
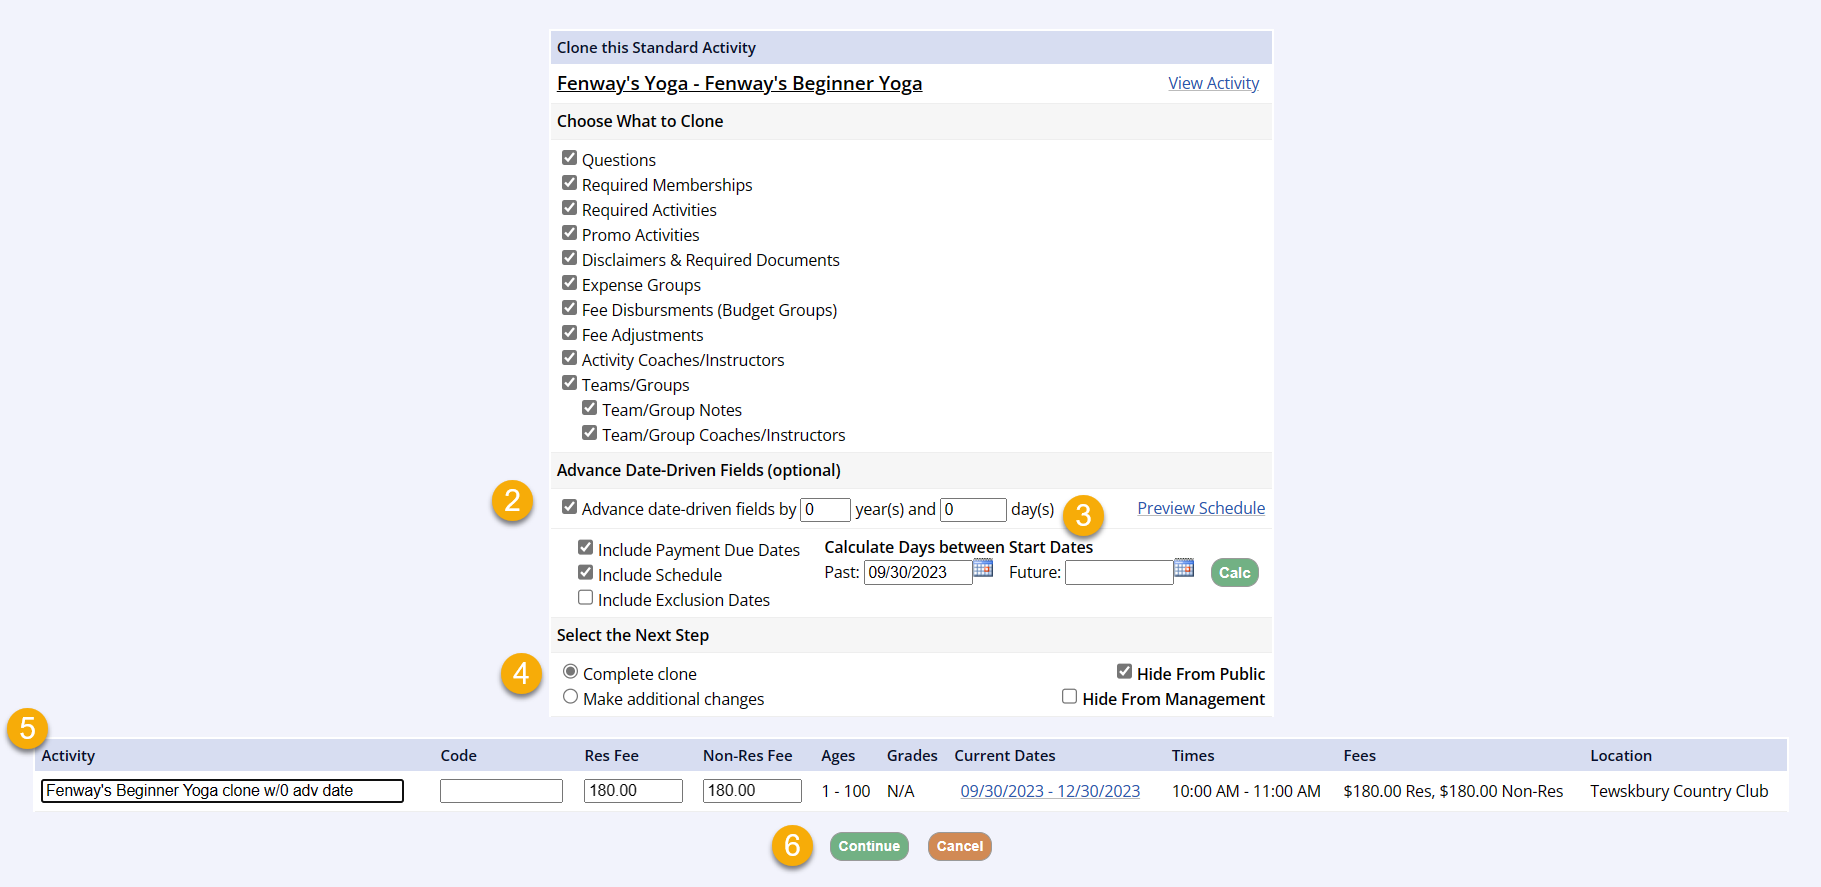
- Note the RPP setup details on the new, cloned activity have been successfully cloned
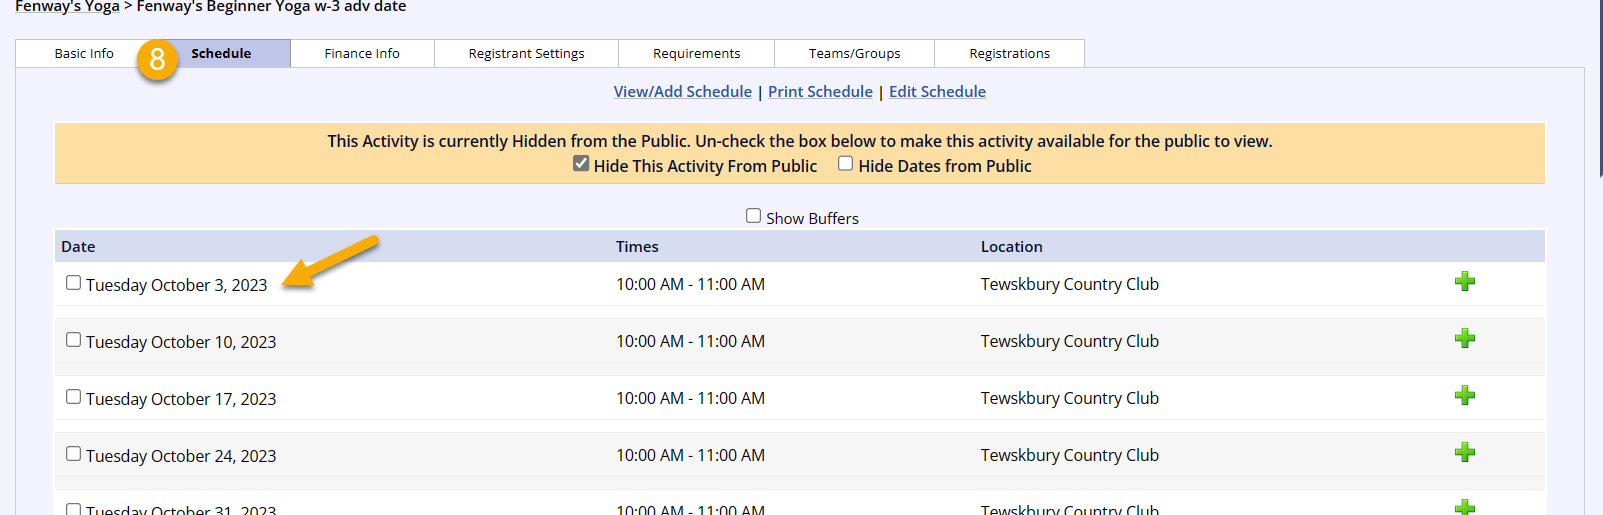
- Now, you can navigate to the Schedule tab to edit, delete, add, or update the schedule of the cloned activity accordingly
Cloning a Standard Activity with RPP for different schedule dates
- Note the registration payment plan (RPP) setup details on the original activity
- On the activity's Basic Info tab, click Clone This Activity
- Check the Advance date-driven fields by box
- Enter the number of years/days in the years and days boxes
- There is a calculator to assist with determining the correct entries
- Select Complete Clone
- Make any changes to the new activity's title, code, or fees
- Click Continue
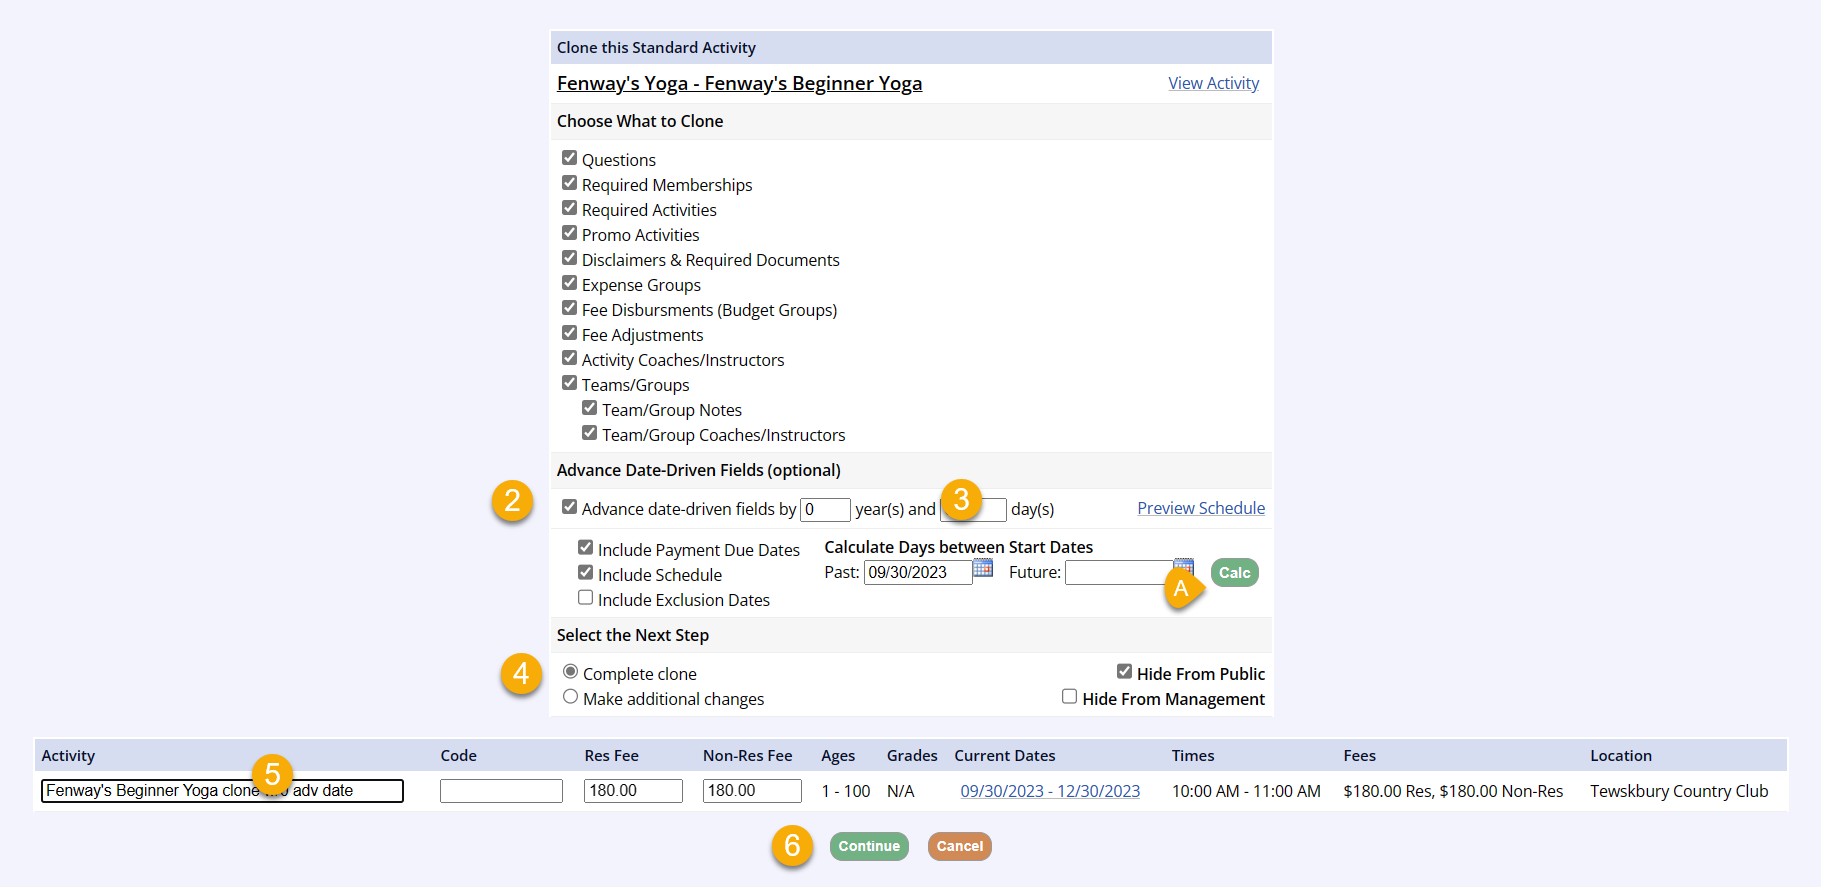
- Note the RPP setup details on the new, cloned activity have been successfully cloned and advanced by the number of years/days entered
- Navigate to the Schedule tab and notice that the schedule dates have also been advanced by the number of years/days entered
Cloning without cloning the RPP setup
To clone a standard or team sport activity without cloning the RPP settings, you will follow the cloning process without advancing date-driven fields. You will create the schedule within the Schedule tab just like any other clone.