
In order to use photos on your department’s site, they must be uploaded under Manage Photos. Photos that are to be used in Programs, Memberships, Facilities, and as home page photos should be uploaded into the Photo Pool. Photos that are to be viewed on the gallery page on the public site should be uploaded to the Gallery. Here is how to upload the photos to both the Photo Pool and the Gallery.
Photo Pool Uploads:
- On the leftside menu, go to Manage Photos, then click Photo Pool
- Click on the Upload & Crop New Photo link
- In Browse for Image, click Choose File to select an image file (Must be .jpg, .jpeg, .gif or .png )
- Click Next
Image Specifications
Images should be a 3x2 ratio and a minimum of 600 pixels wide by 400 pixels tall. Images that are not already a 3x2 ratio can be cropped when uploaded. Otherwise, they will be visually cropped when added.
Cropping a Photo
After the photo is loaded, you can then crop it to size.
- Click your cursor and drag the cursor to select the area to crop
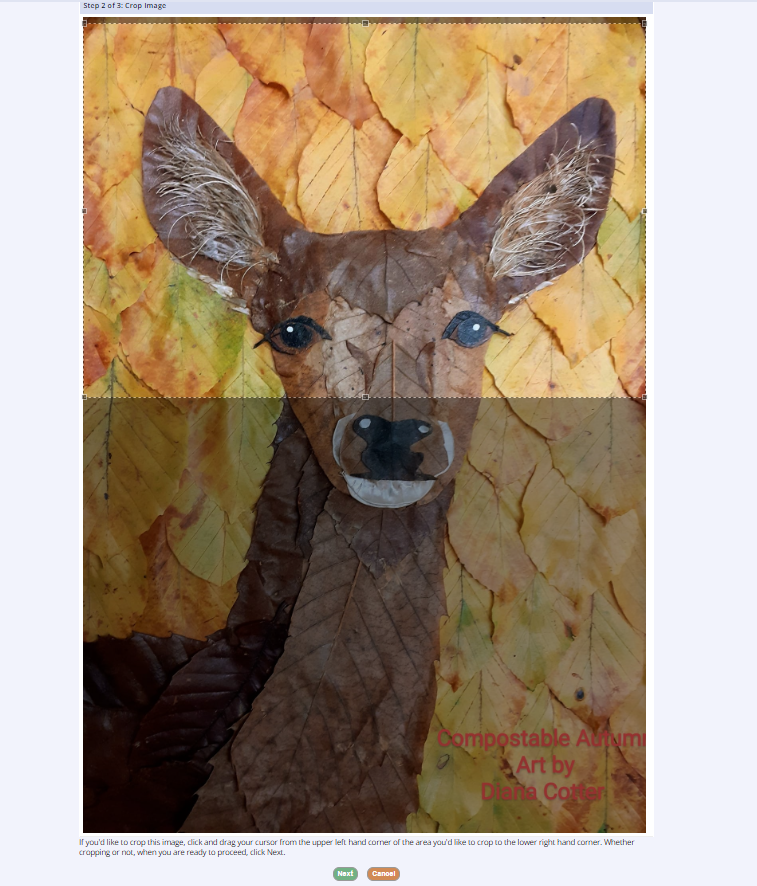
- When you are finished cropping, or if you did not crop the image, click Next
- Clicking Cancel on this screen will cancel the upload process
- If you do not like the cropped image, you can choose to Re-crop Image on the next screen
- Choose a Category from the drop down
- Add a brief caption
Captioning Tips
How to Caption an Image
The MyRec.com software requires an alt tag or caption to be added to every image you upload to your site. This is necessary to meet the standards established in the WCAG 2.2 and to make your site more usable for everyone. This article will cover what information needs to be included in an image caption.
Adding or Editing a Photo Pool Caption
If you would like to edit a caption for any of the photos in your Photo Pool, you can access that through the Manage Photos menu.
- Click Manage Photos from the leftside management menu
- Select Photo pool
- Click the Edit Captions link in the upper right corner of the screen
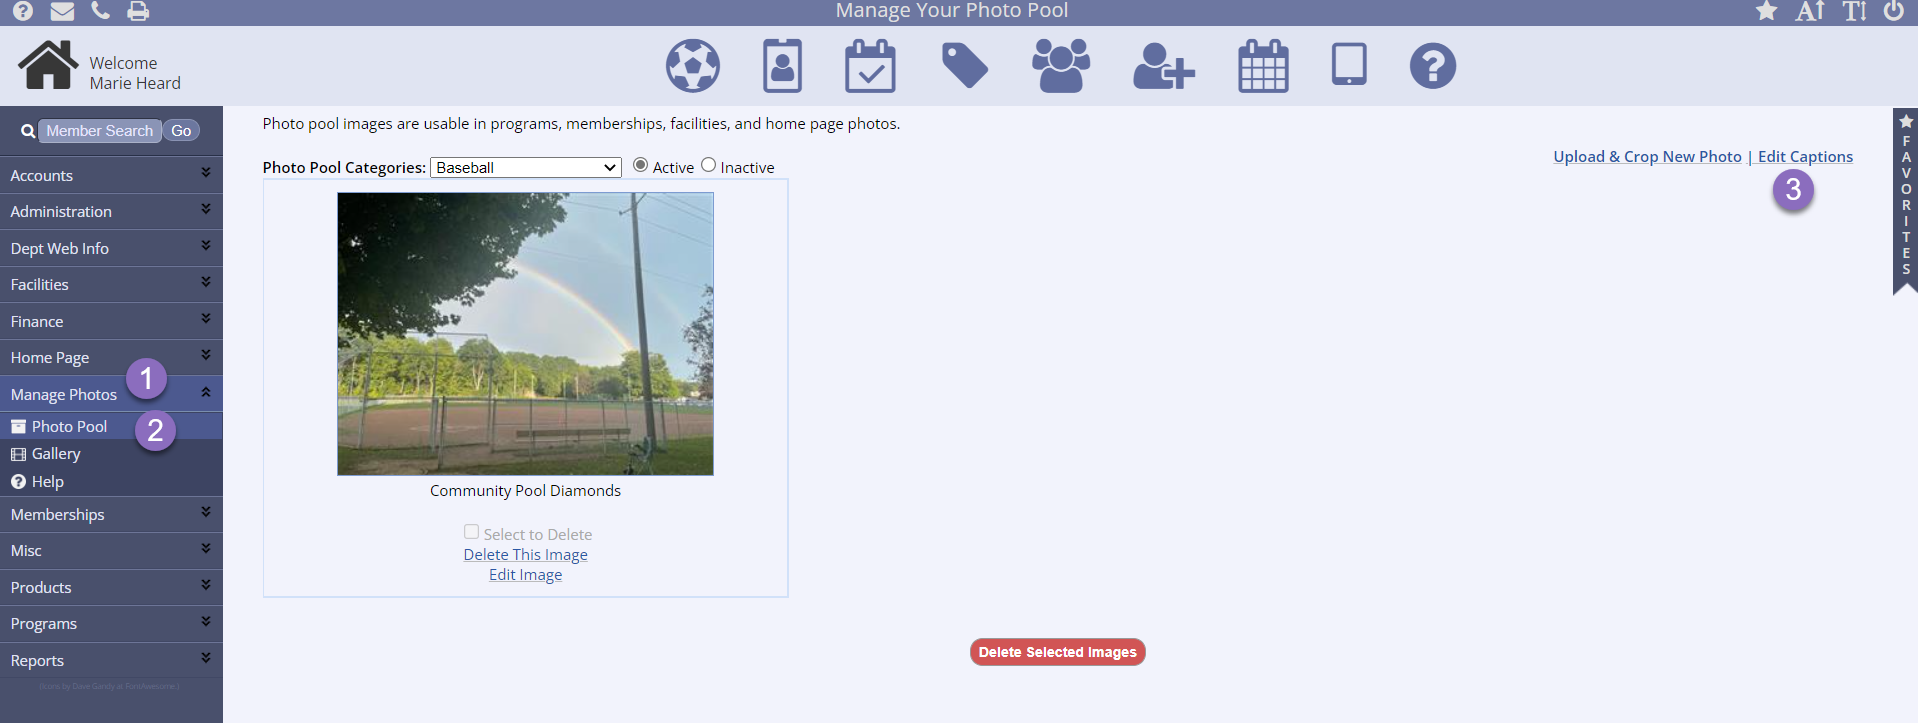
- Revise or add the caption in the text field
- Check the box to the right of the text field to set to Active
- Click Submit at the bottom of the screen

Photos
Photos should be captioned with enough information to provide context for what appears in the image. Here's a few examples of what works and what doesn't.
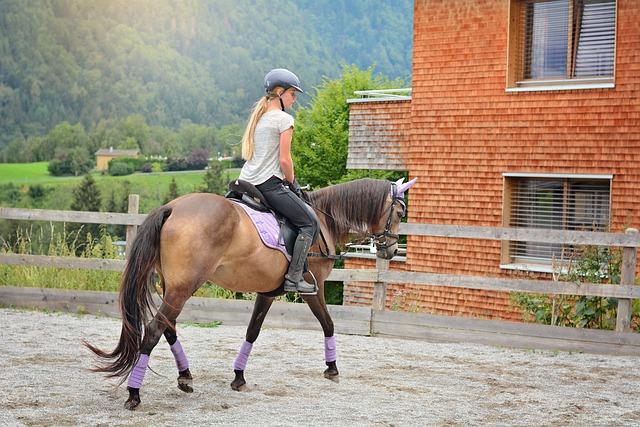
Poor: horse
While there is indeed a horse in this photo, this provides no context about what the horse is doing, where it is, or anything else.
Better: Girl riding horse.
This provides more information about what appears in the photo but not much else. Consider this to be the bare minimum when captioning a photo.
Best: Teenaged girl horseback riding in a corral.
This level of detail is ideal for a photo caption. It adds enough context to the image, without going overboard. Captions should be informational, yet concise, and contain information relevant to the text used around it.
Too Much: A young girl, maybe 14 or 15, wearing a helmet over a long blonde ponytail, rides a horse. The horse is brown and adorned with a stylish purple saddle and purple leg wraps. They are in a corral located near a red-shingled building, in a mountainous region, on a sunny day.
You definitely don't need to write a novel! This much information can actually hinder a user's experience, especially if they're using a screen reader. Imagine having to sit and wait while listening to an electronic voice reading all of that, when you just want to register for a program online!
Images with Text
Captioning an image that contains text is crucial to ensuring your site is accessible. Screen readers can only read text that is typed out, either in an alt tag or written text. They can't read text on an image. This includes flyers, logos, buttons, and everything in between.

Poor: scrabble letters
In this case, the Scrabble tiles are not relevant to understanding the image. What the tiles spell out is what a user needs to know if they can't see the image.
Best: Let's go on adventures.
For images containing text, the most important information to convey to the user is what the text reads. The other details, if not necessary to understand the context of the image, do not need to be included.
Too much: "Let's go on adventures" spelled out with Scrabble tiles on a polka-dot background.
The extra details are not necessary to understand the context of this image. The most important information is what the text reads not what's surrounding it. Adding too much information to a caption takes away from the user's experience.
Alternative Option
If you attach a flyer to your site that has a lot of text on it, you do not necessarily need to include all of that text in your caption. It is acceptable to tag the image as flyer and type out the text as it appears the flyer, word for word, below or near the image.
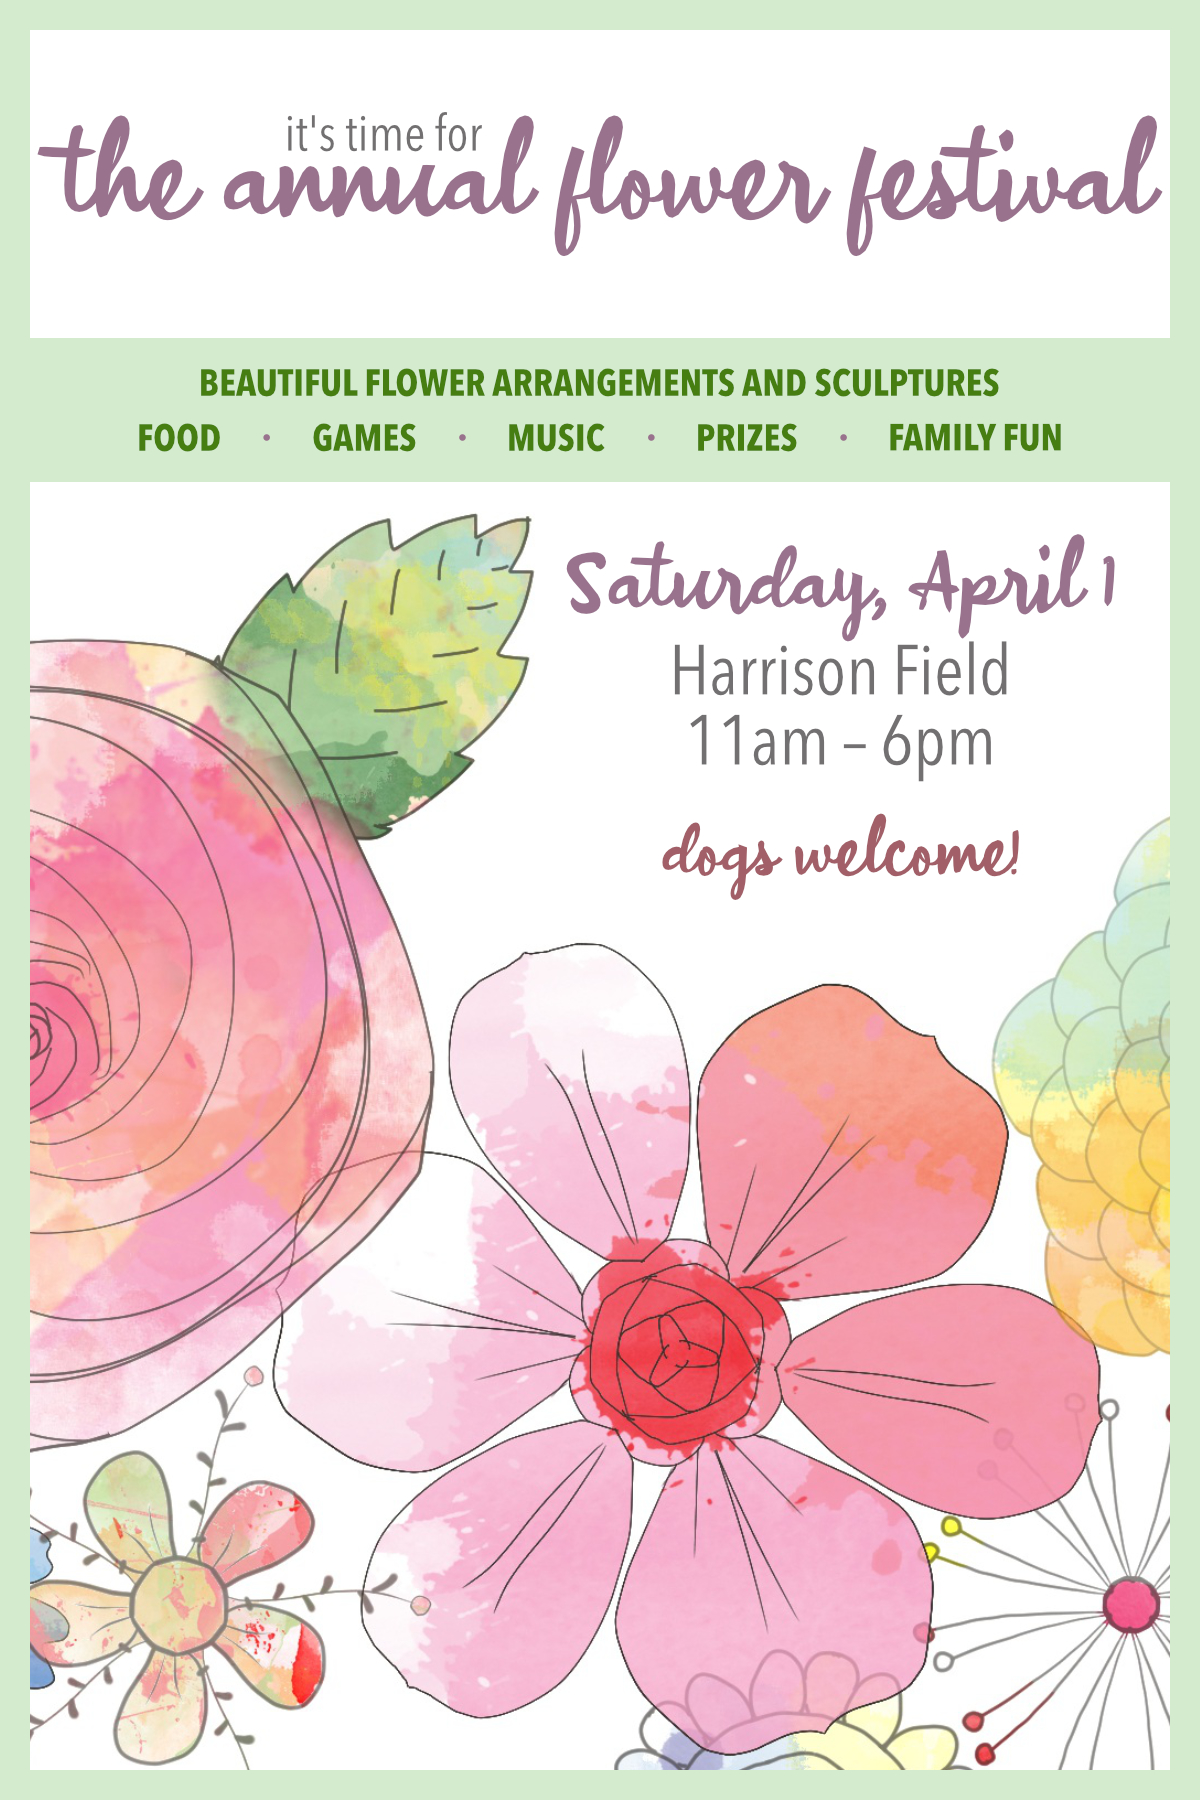
Caption: Annual Flower Festival Flyer
Text above or below image: It's time for the Annual Flower Festival! Beautiful flower arrangements and sculptures, food, games, music, prizes, family fun. Saturday, April 1, Harrison Field, 11am-6pm. Dogs welcome!
Need Help?
Our Client Services team is happy to help! Contact us any time.
- You can see a thumbnail of the image, and if more cropping is needed, click Re-Crop Image
- If no more cropping is necessary, click Save Image
- If you want to add another photo, click Save and Add Image to add multiple photos following the same process above
Gallery Uploads:
- On the left navigation bar, click Manage Photos
- Click Gallery
- In Manage Your Photo Gallery, if there are no categories present, you must create some before adding photos
- To create a category, go to Gallery > Gallery Categories > Add New Category using the tabs near the top of the page
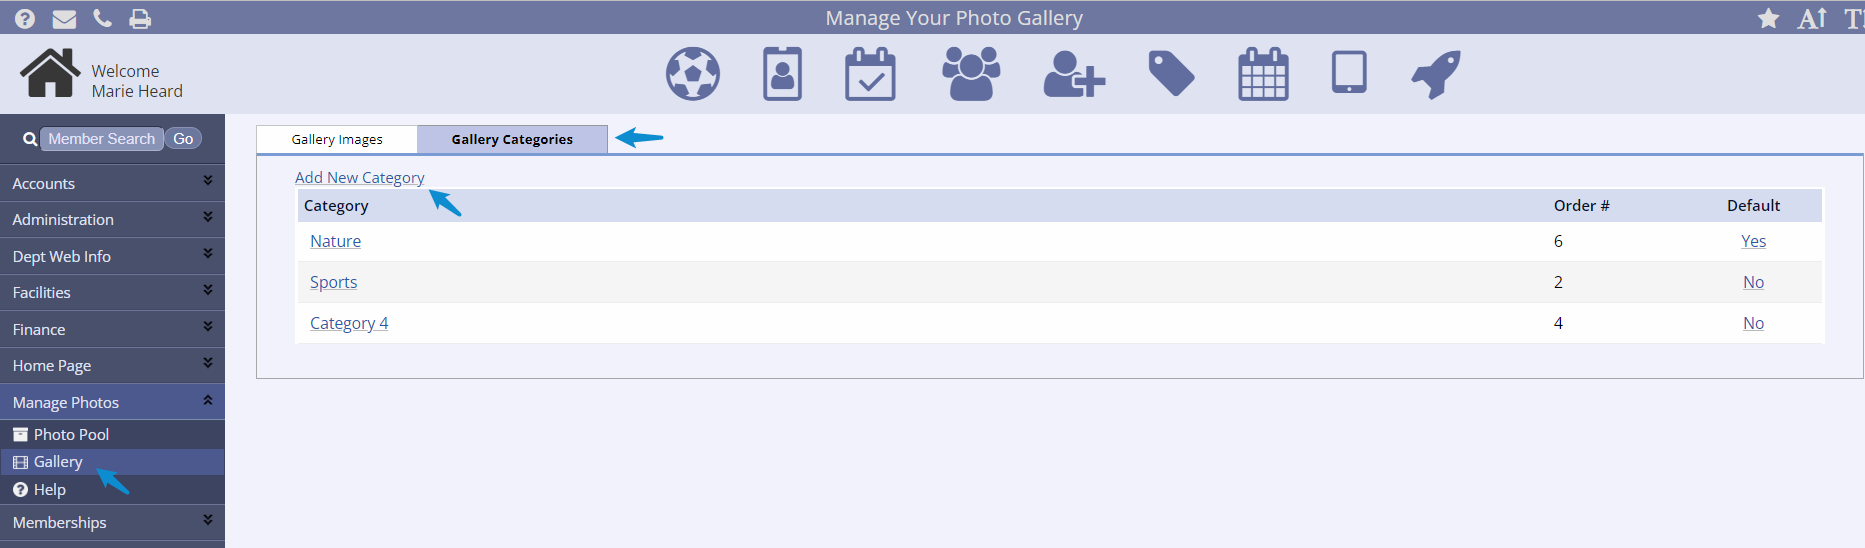
- Create the categories (for example: Camp, Day Care, Aquatics, etc.) and click Submit
- Once your Categories have been created, select the Gallery Images tab near the top of the page
- Use the category drop down to select where the photos should be located
- You can now upload photos to the Gallery by following the same process for uploading the photos to the Photo Pool