Access the Public Navigation
- Open the Administration tab on the leftside navigation menu
- Select the Settings option
- Click the Public Navigation tab
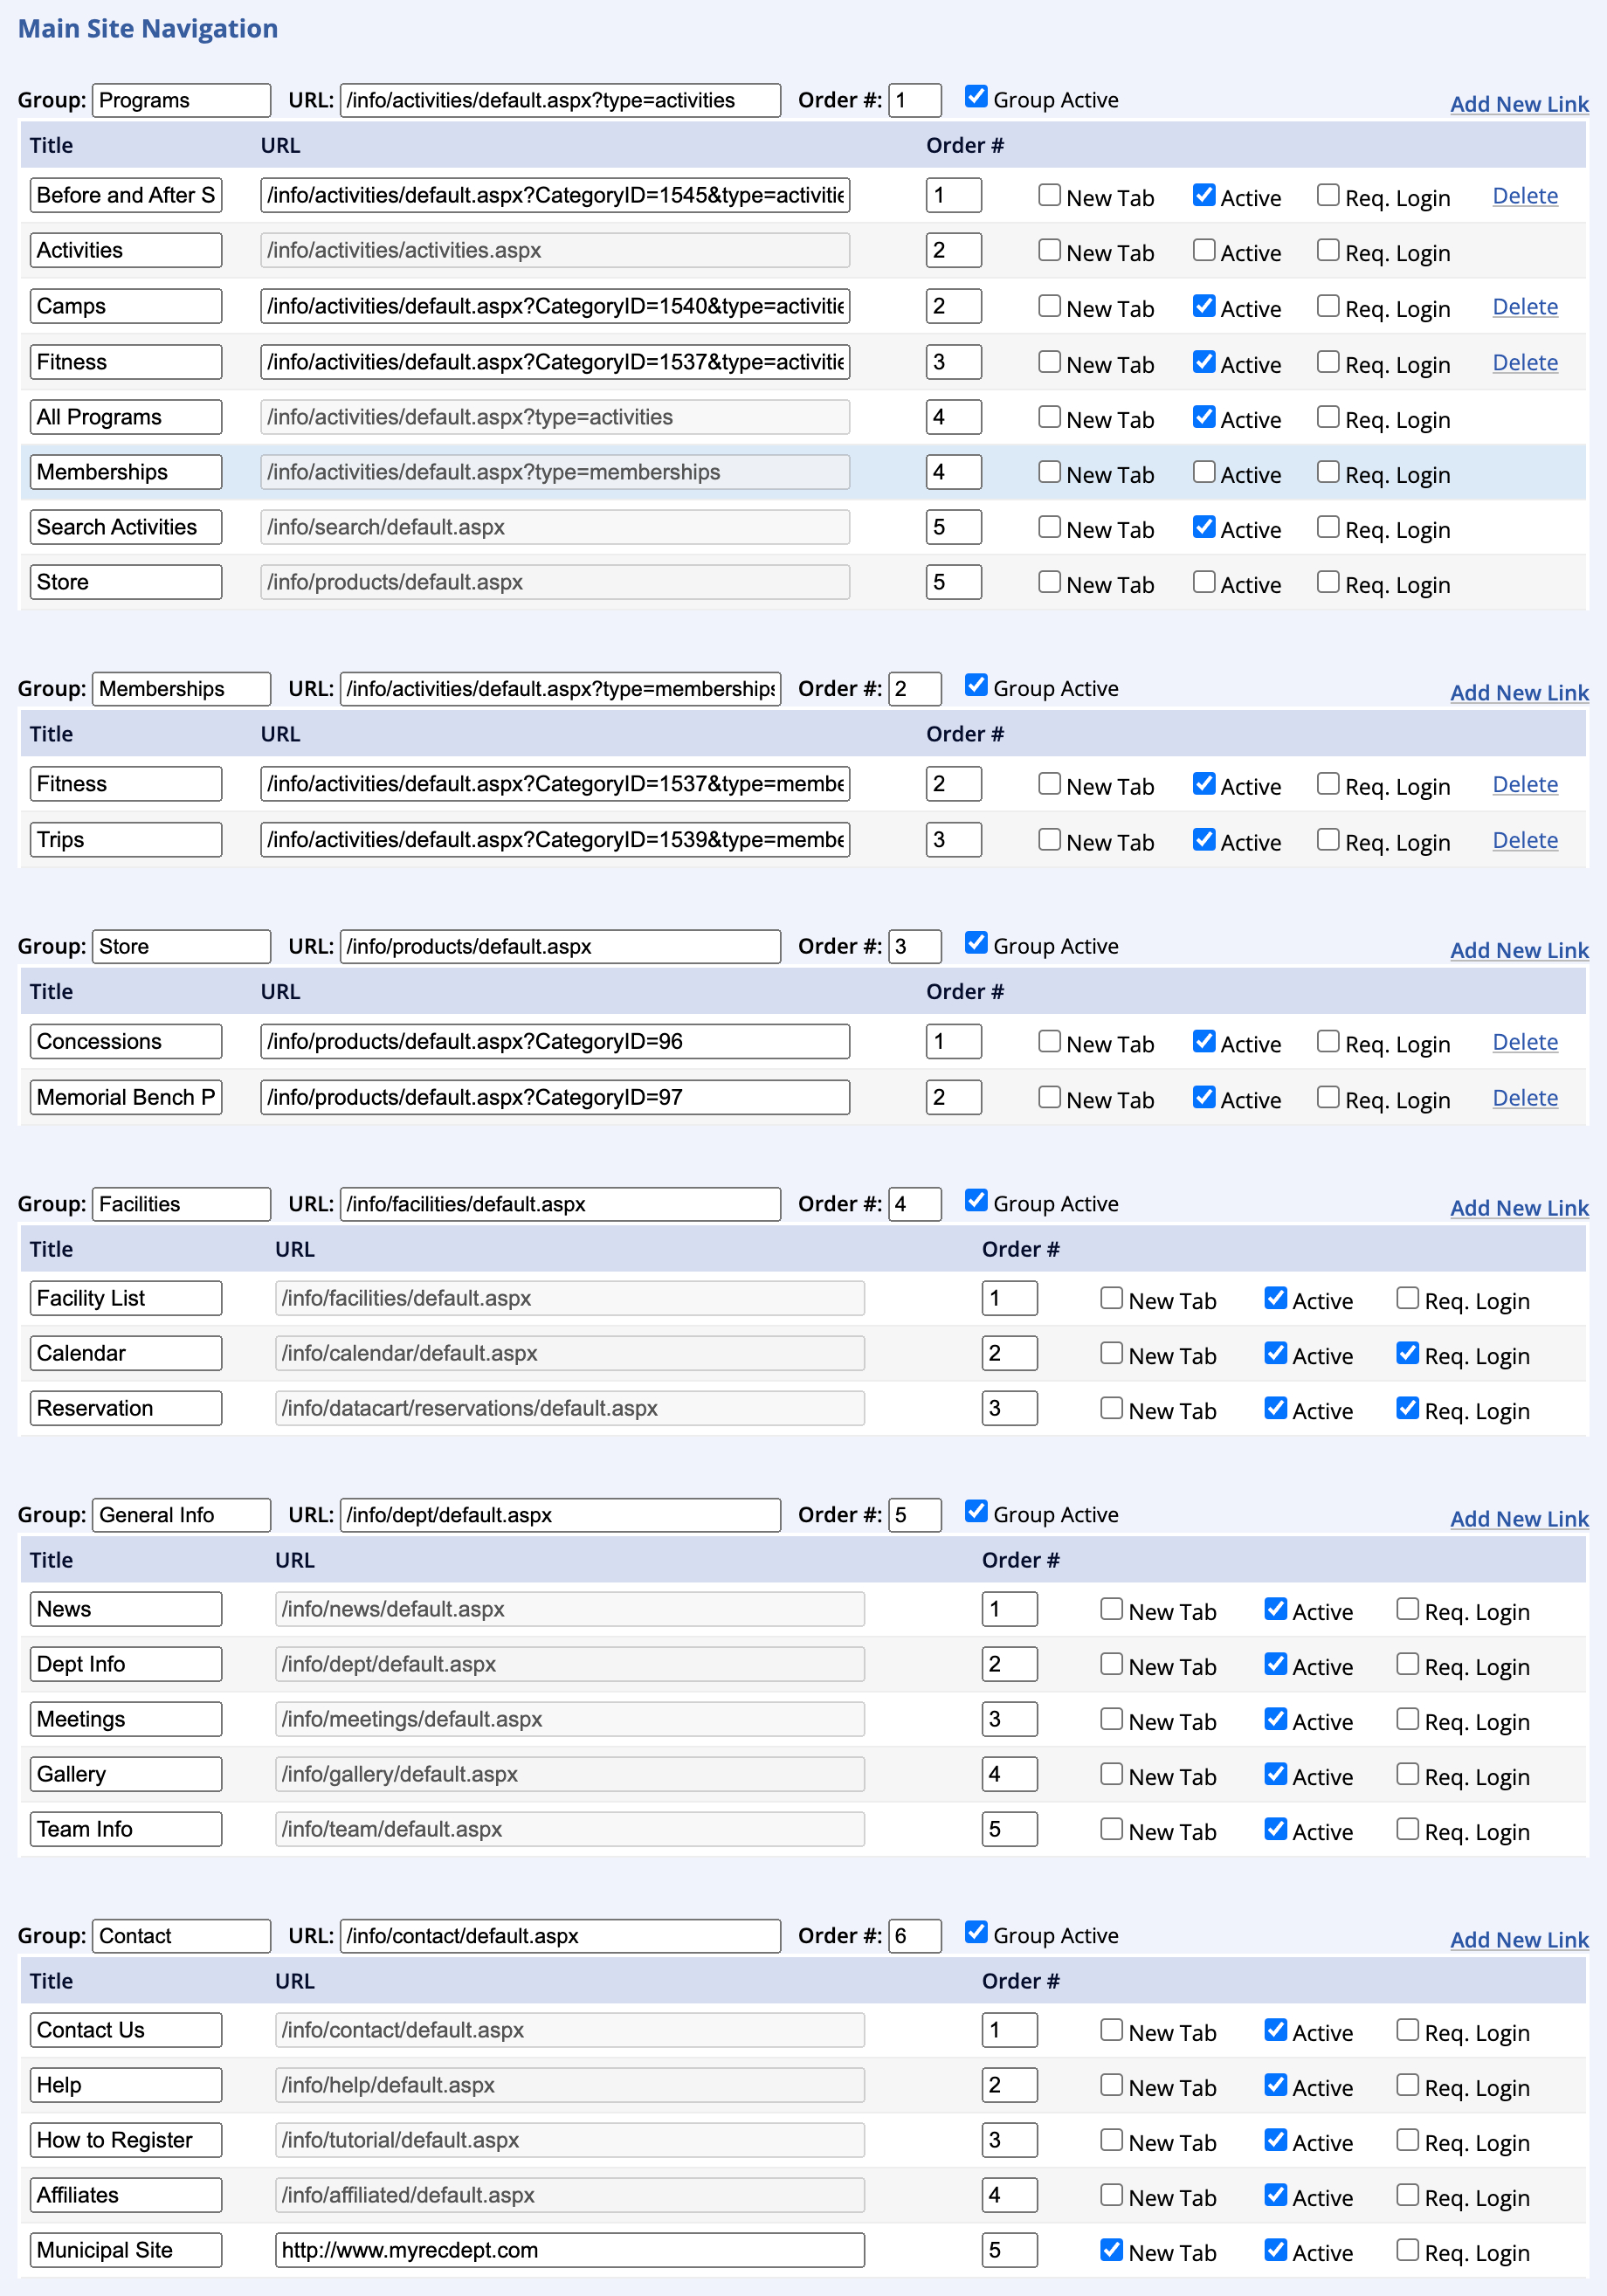
- Enter a title for the Group
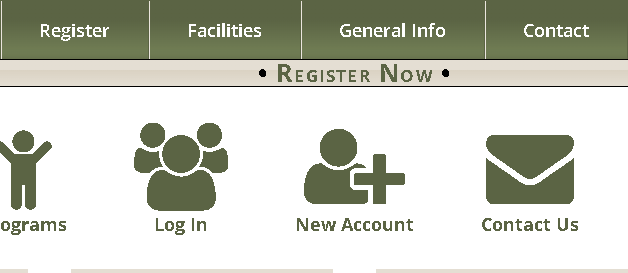
- "Groups" are the main tabs that will show at all times on your Public Site
- Paste the page URL into the field
- Set the order number and check the Group Active box
- Add options below each Group that will be displayed on the pub
- The links within each grouping include a title, URL destination, and order number
- These links can be set to Open in a New Tab, Active, and Require Login
- Click the Submit button at the bottom of the screen
Enabling and Editing the New Groups
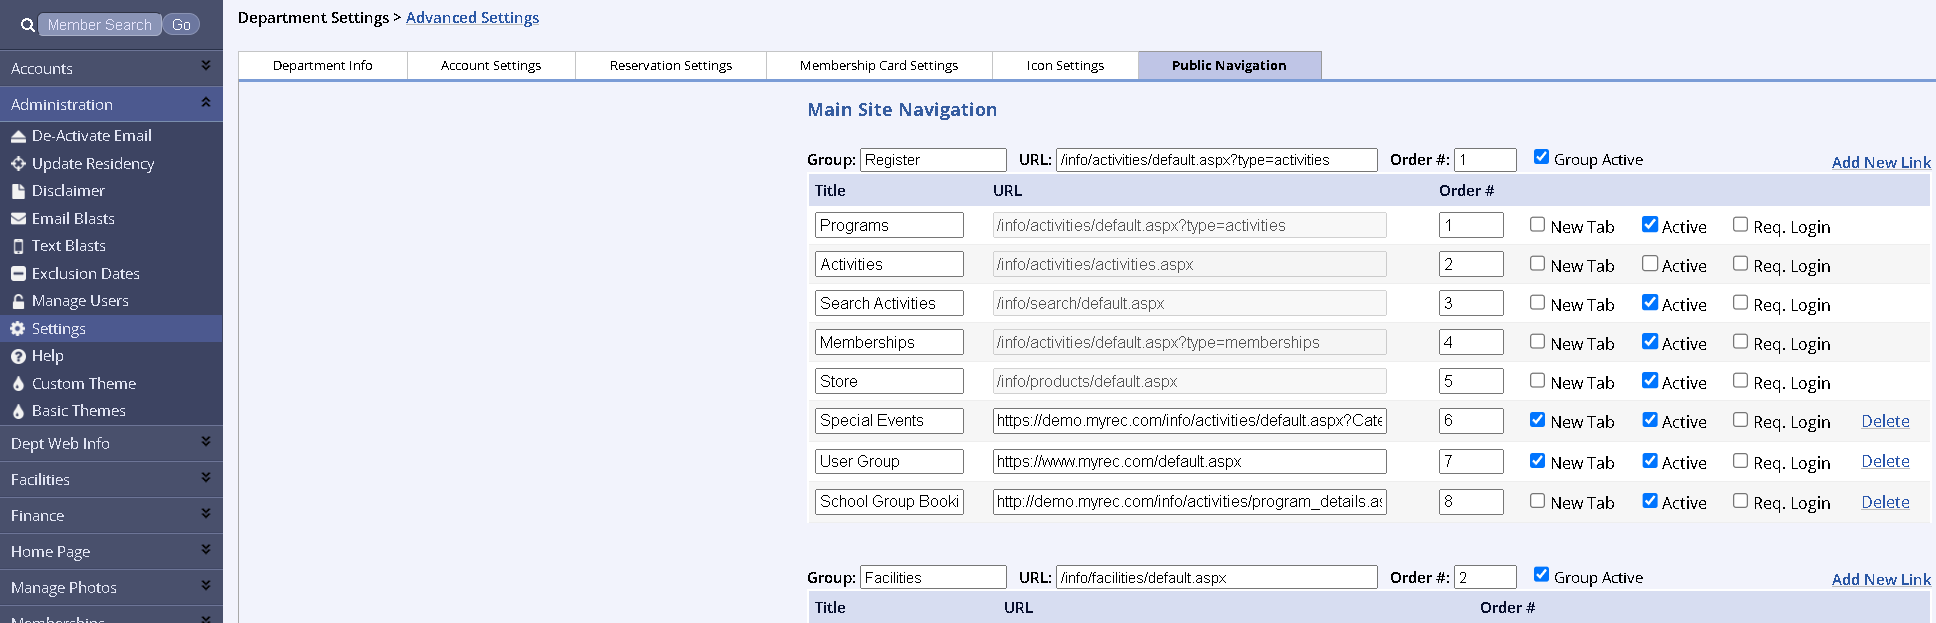
- On the management side, navigate to Administration > Settings, and click the Public Navigation tab.
- The Administration area is only available to administrator-level users
- If you do not see the Public Navigation tab, Contact Us and we can make it available on your site
- Scroll to the bottom of the page, and you will see the two new groups
- Click the checkbox next to Group Active to enable them

- Make any adjustments to the settings to suit your needs
- Group changes the name of the group
- URL changes the link the user will be taken to when clicked
- Order # specifies the order in which the groups should appear on the public side
- Select the checkbox next to Group Active to enable the group to display on the public side
- Click Add New Link to add a link that will appear while hovering over the group title on the public side
- Scroll to the bottom of the page and click Update
Adding Category Links
- On the Public Navigation tab, click Add New Link next to the desired group
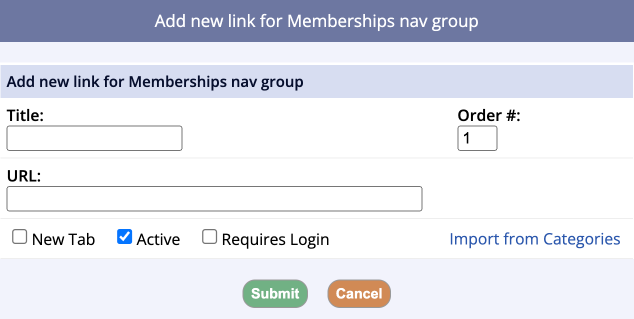
- In the bottom right-hand corner of the pop-up window, click Import from Categories. Some new fields will appear.
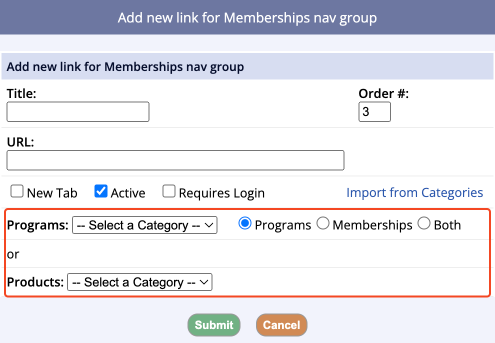
- If adding a Program or Membership category, you can select the type of category you'd like to add – Programs, Memberships, or Both. Select the desired category from the drop-down menu
- If adding a Product category, select the desired category from the drop-down menu
- The Title and URL fields will automatically populate with the name of the category and the link to view the associated programs, memberships, or products
- You can use the Order # field to change the order in which each link appears on the public side
- Click Submit to finish
Recommended Navigation Setup
The screenshot below outlines an example of how we suggest using the new navigation features to organize your site.