
Overview
This article will review the Point of Sale Portal and the Facility Access Portal housed within it. This portion of your site allows for on-site checkout of products, product scan-in and out, membership and barcode scanning for facility access, invoice refunds and voids, and drawer reporting. If some features are not showing on your site, they may not be enabled, so please reach out to a Client Success representative to discuss activation.
Accessing the Portals

Clicking either the navigation icon at the top of the management homepage or the link within the Products menu provide quick access to the portals.
Portal Features

- Home Page
- Scan In, Scan Out, Scan In/Out
- POS
- Product Check in
- Refund Invoice
- Member Search
- Drawer Cash Out
Home Page
Home page allows you quick access to the Facility Access Portal options of scanning members in or out of a facility as well as quick access to Point of Sale.
Scan in, Scan out, Scan In/Out
Facility Access Portal
The Facility Access Portal can be accessed through the POS portal and several shortcuts from the management homepage.
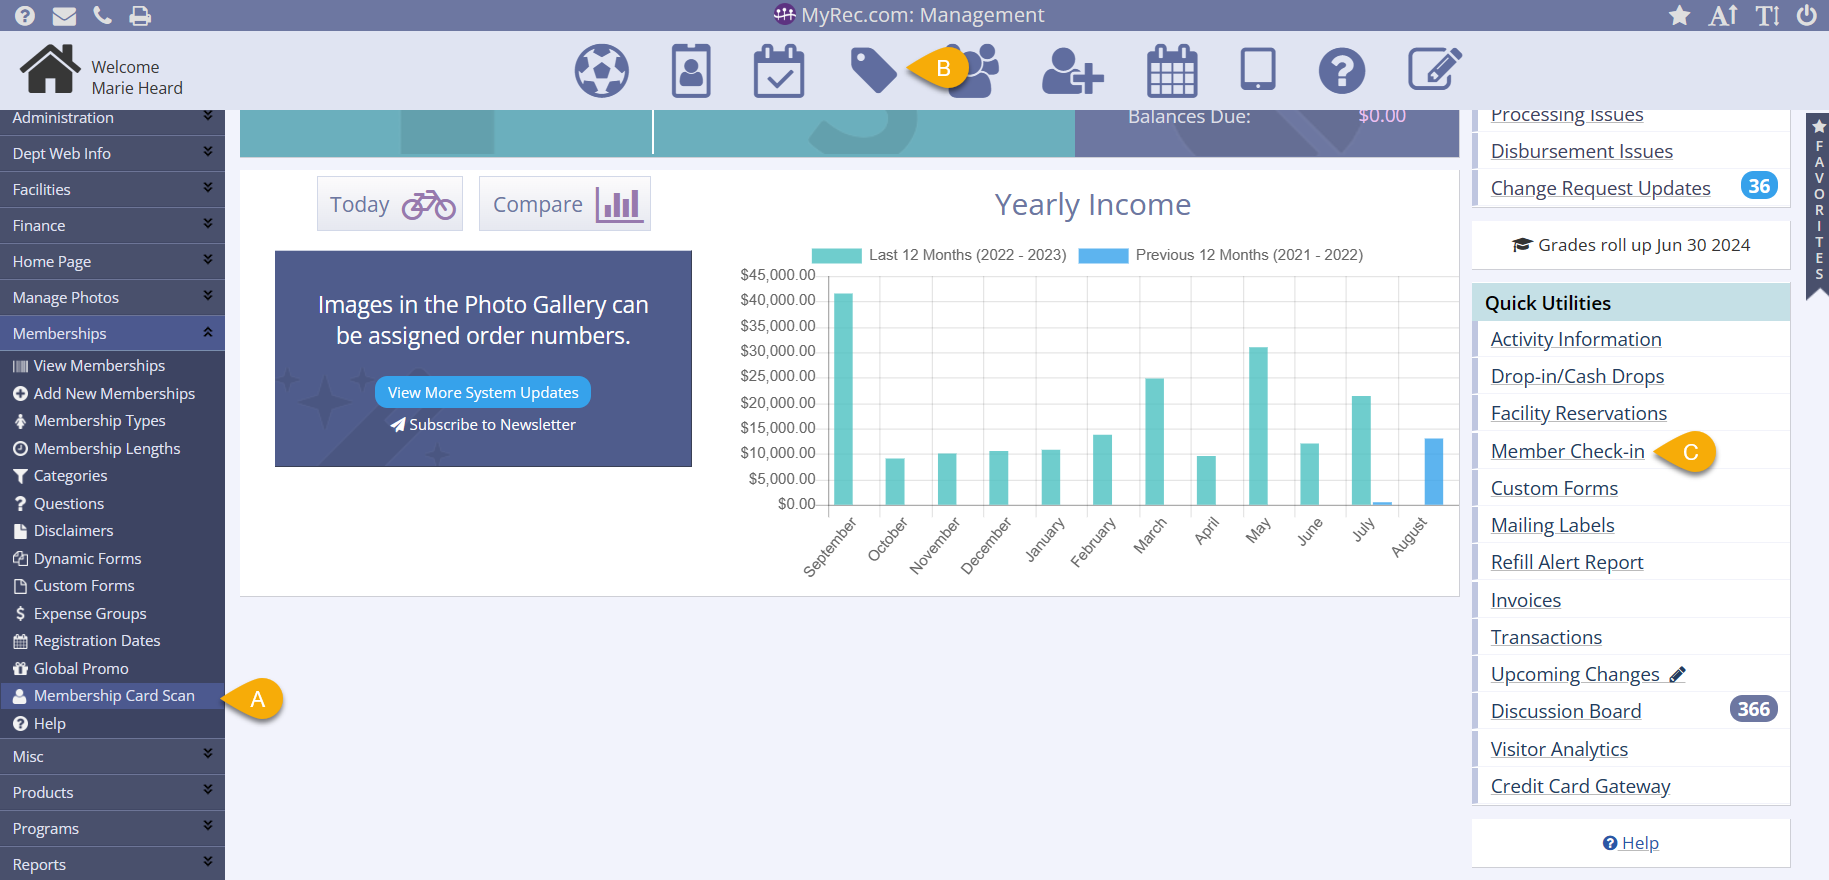
Scanning a Member Into a Facility
- To give a member access to a facility, you can open the Facility Access Portal
- In the Membership menu on the leftside navigation bar
- By clicking the POS icon on the top of the management screen
- By using the Member Check-In link in the Quick Utilities box on the right side of the management homepage
- Select the facility
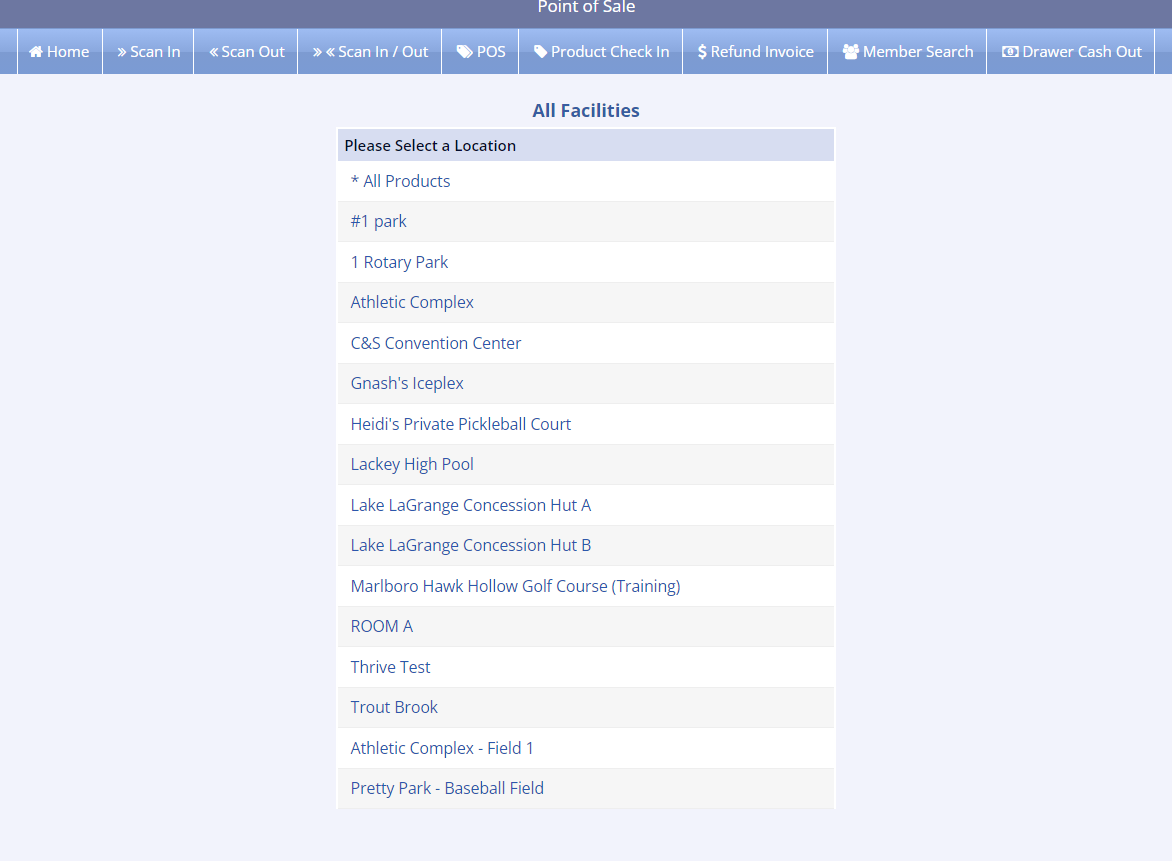
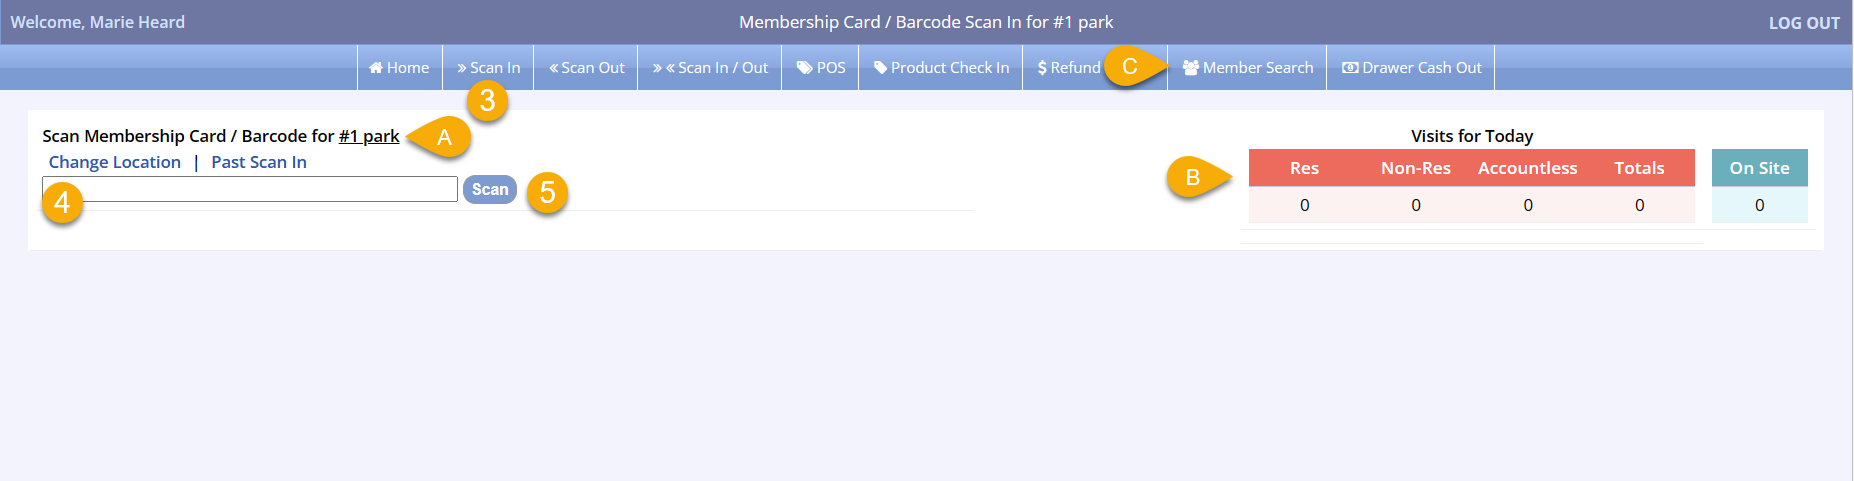
- Click Scan In from the bar along the top of the screen
- Note the location you selected on the previous screen is displayed
- The Visits for Today are display on the right side of the screen
- If you do not have the membership number to enter, which allows access to the facility, you can select Member Search in the top option bar to find the member
- Enter the barcode membership number or Scan the barcode using your barcode scanner
- Click Scan
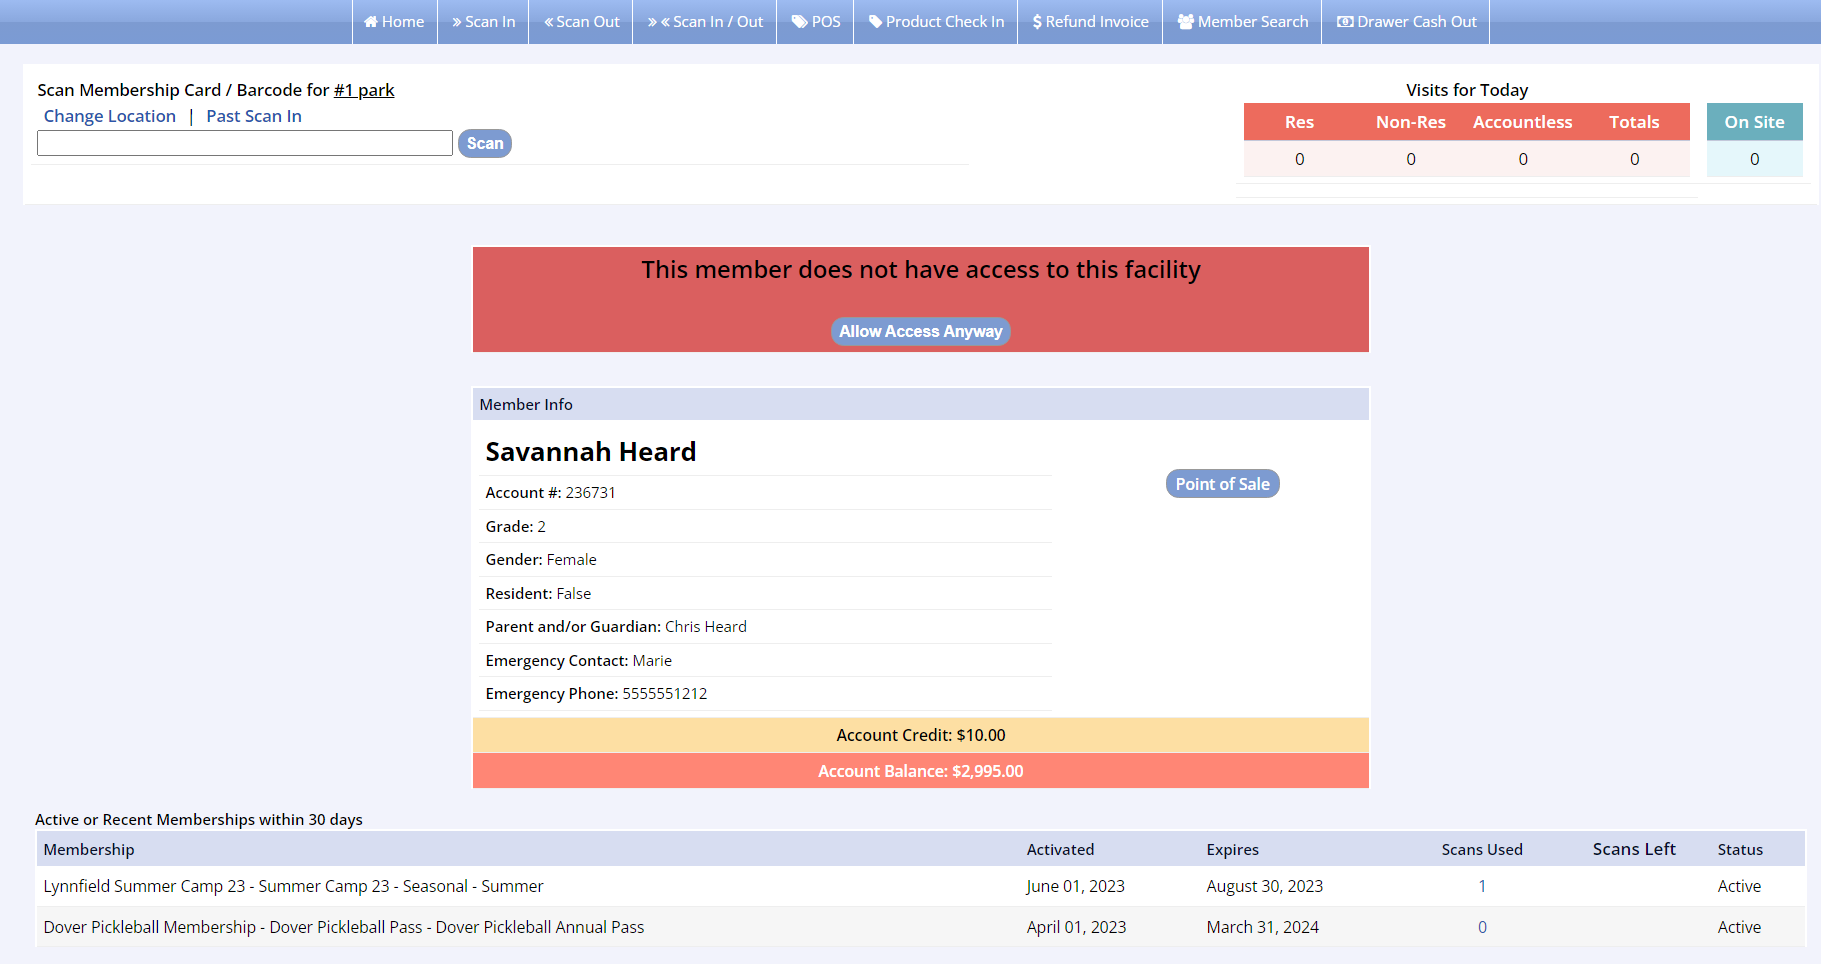
Member Does Not Have Access
- A red bar will be display and an alert will sound (if computer audio is working) to indicate that the member scanned does not have access to this facility
- You can override this by clicking Allow Access Anyway
- You can visit the member's Point of Sale
- You can view active or recent memberships at the bottom of the screen
Member Does Have Access
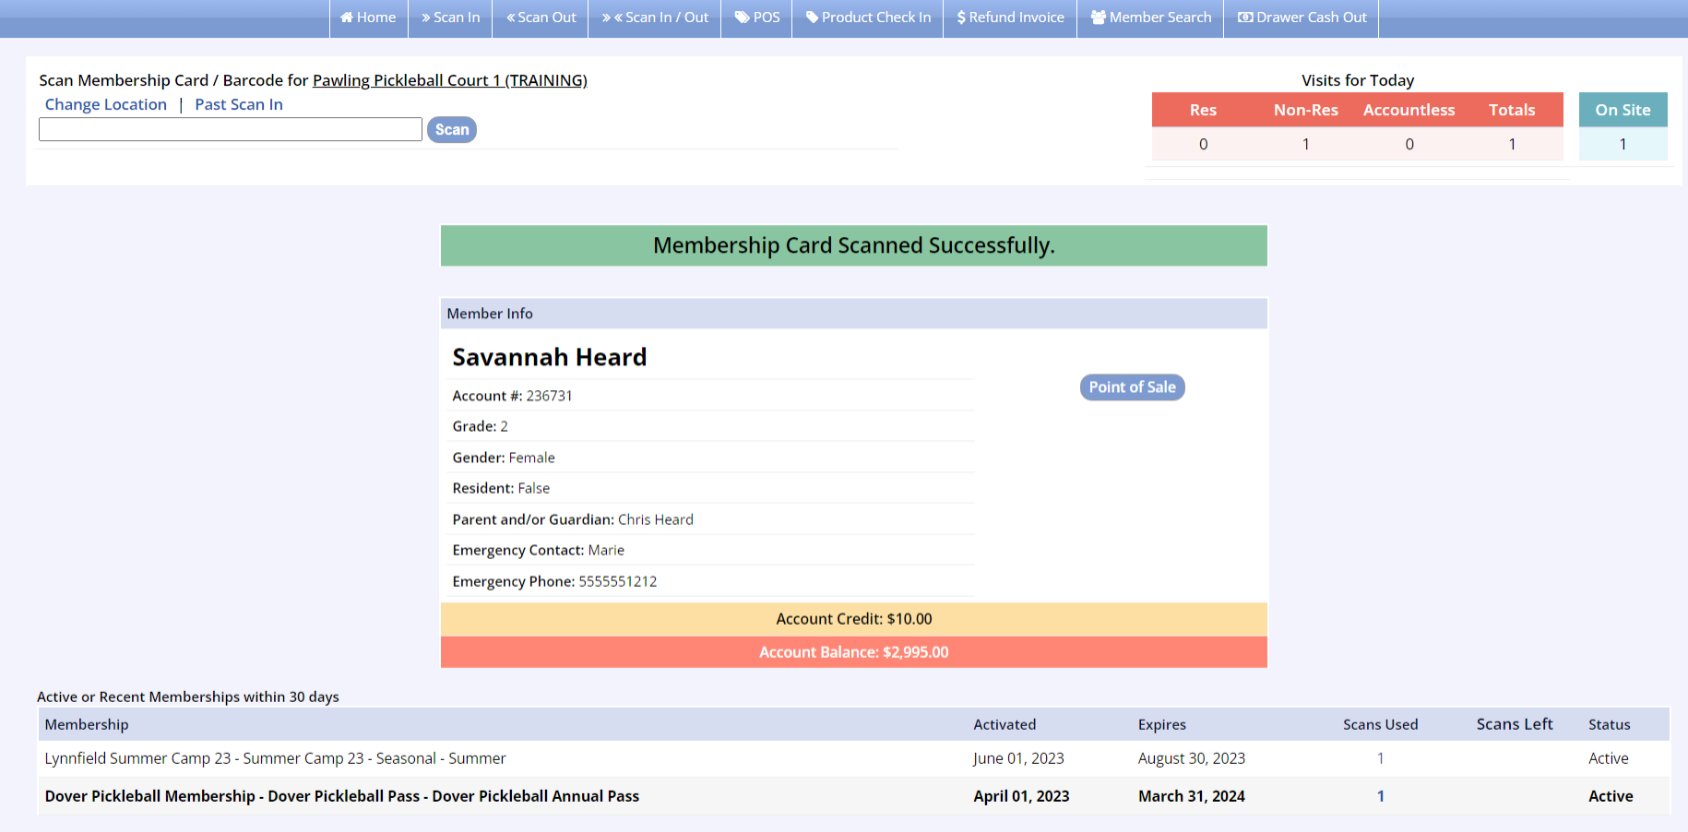
- A green bar will be display and a doorbell will sound (if computer audio is working) to indicate that the member scanned does have access to this facility
- You can see the Visits for Today in the upper right corner has been updated to reflect the member's access
- You can visit the member's Point of Sale
- You can view active or recent memberships at the bottom of the screen
Scanning a Member Out of a Facility
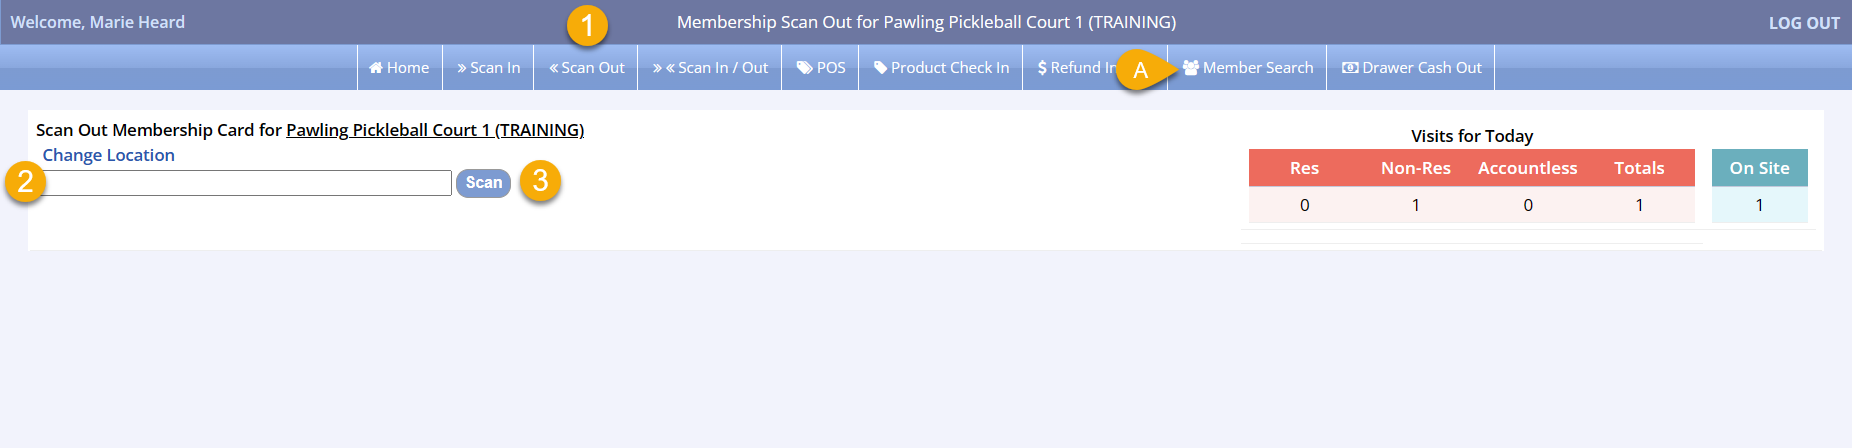
- Click Scan Out from the bar along the top of the screen
- If you do not have the membership number to enter, which allows access to the facility, you can select Member Search in the top option bar to find the member
- Enter the barcode membership number or Scan the barcode using your barcode scanner
- Click Scan
Silence is Golden…
To deactivate or activate scan in/scan out sounds, please contact Client Success.
POS
This tab allows for the sale of products, such as shirts, concessions, gift certificates, and even passes to your facility. If products are assigned to specific facilities, first the user should choose the facility they are working from, then sell the products available at that site. To learn about selling products through the portal please view the article Selling Products in Point of Sale (POS).
Product Check In
Product Check-Ins
Your department can use the Product Check-In feature in the POS to rent or check out and return products like kayaks, pool tubes, golf clubs, and other equipment.
Accessing Product Check In
- The POS portal and several shortcuts from the management homepage
- In the Membership menu on the leftside navigation bar
- By clicking the POS icon on the top of the management screen
- By using the Member Check-In link in the Quick Utilities box on the right side of the management homepage
- Click the Product Check In option on the top bar

Checking in/out Products

- Adjust the date range to search eligible products
- Select Checked Out, Checked In, or All to show specific products
- Click Search
- Products available for check in/out will be displayed and the available option will appear in the far-right column
- Click Check Out when a customer is taking an item
- Click Check In when a customer is returning an item
- The label in the column will change to show the current status
Refund Invoice
Refund Invoice (POS)
The Refund Invoice tab is found within the Point of Sale Portal. A management user's access to this feature can be set as a specific permission under their user's set up. This tab allows a management user to cancel sales and issue refunds or to void sales and their associated payment.
Invoices can be searched for through a variety of parameters.

- Invoice #
- Payment Type
- All or specific Users
- Location of User
- Invoice Dates
Cancel (Refund)
This process yields a cancelation invoice. A refund will be prompted and processed during the cancellation process

- Click Cancel (Refund) when the correct invoice is located
- Note that you can select Details to see the items sold or hover over the invoice #

- On the following page, select the item(s) to refund, and click Refund Selected Items
- If there are multiple line items, you are able to select and cancel only some of the items instead of the entire order

- Enter a reason for the refund and select the refund payment type
- Click Issue Refund to finalize the cancelation and refund
Cancel (Void)
This process does not result in a cancelation invoice, and all items on the invoice will be voided.

- Click Cancel (Void) when the correct invoice is located
- Note that you can select Details to see the items sold or hover over the invoice #

- On the following page, click Cancel Items and Void All Payments to finalize the cancelation and void process
- Note that all items on the invoice will be canceled and voided
Member Search
Member Search allows an existing member from the department to be pulled up within the portal. Once the member has been located, they can be scanned into or out of a facility. If a member has forgotten their membership card or their barcoded product, this a great way to allow access and track their visit. You are also able to proceed to the Point of Sale Portal after selecting the member, this allows a product to be sold and tracked within that member's account.
Drawer Cash Out
Drawer Cash Out
The Drawer Cash Out report works on the basis of the staff user who is logged in, and the report details are specific to that user's transactions during a certain date and time. If your department has POS staff sharing a login, the Drawer Cash Out will include transactions for all staff using that login during the date/time selected. If you want a staff-specific report, you should be using a different user login for each separate staff member.
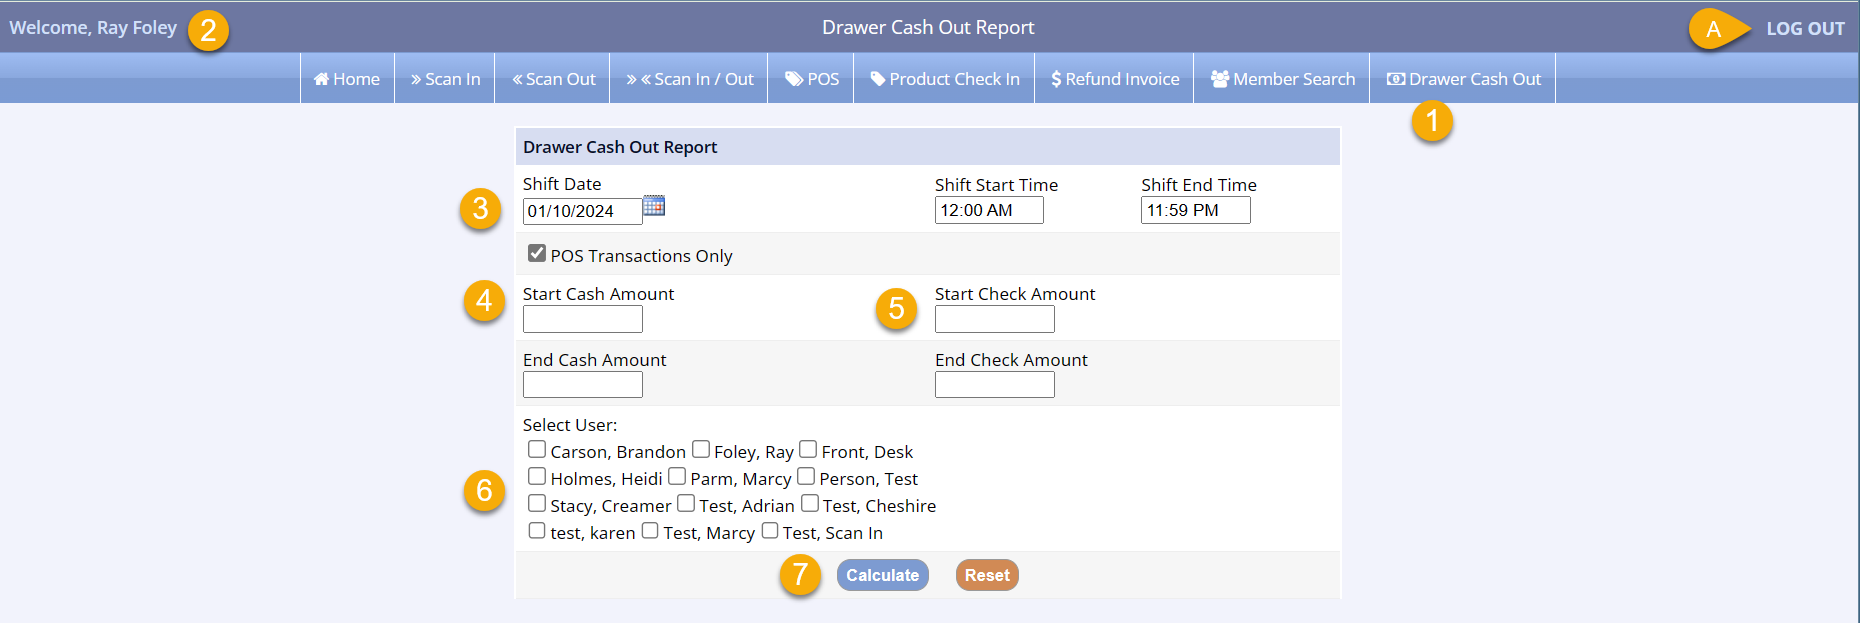
Your staff should begin their shift with a verified drawer count of both cash and check totals. Without a verified drawer count at the beginning of the shift, the Drawer Cash Out report cannot be used. Additionally, the staff member should make sure the username in the top left corner is their correct username.
- In the POS portal, click Drawer Cash Out
- Verify that the username in the top left corner matches the staff member
- If incorrect, Log Out and log in with the correct user prior to completing transactions (see the instructions at the beginning of this article for more information)
- Enter the date and start/end times of the shift
- Enter the starting and ending amounts for the cash in the drawer at the beginning of the shift
- Enter the starting and ending amounts for the checks in the drawer at the beginning of the shift
- Select the staff member whose drawer transactions you want to balance or check
- Click Calculate
Drawer Cash Out Match
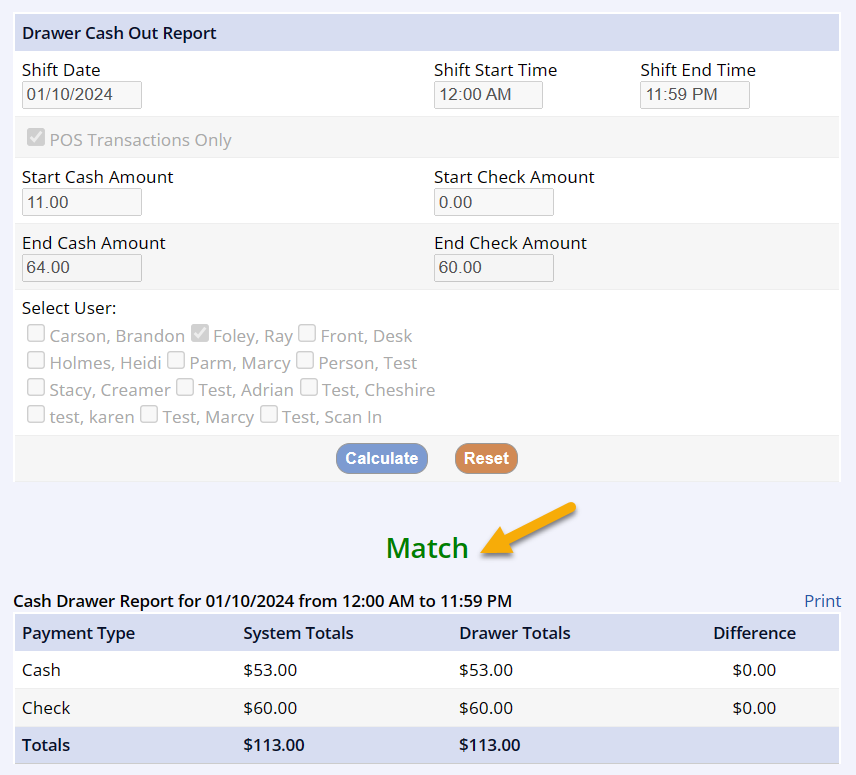
- If the drawer cash out report finds no mismatches, a green Match title will appear
- You can review the cash and check totals
- You can use the Print link to print this report
Drawer Cash Out Mismatch
- If the drawer cash out report finds no mismatches, a red Mismatch title will appear
- You can review the cash and check totals as well as the differences
- You can use the Print link to print this report
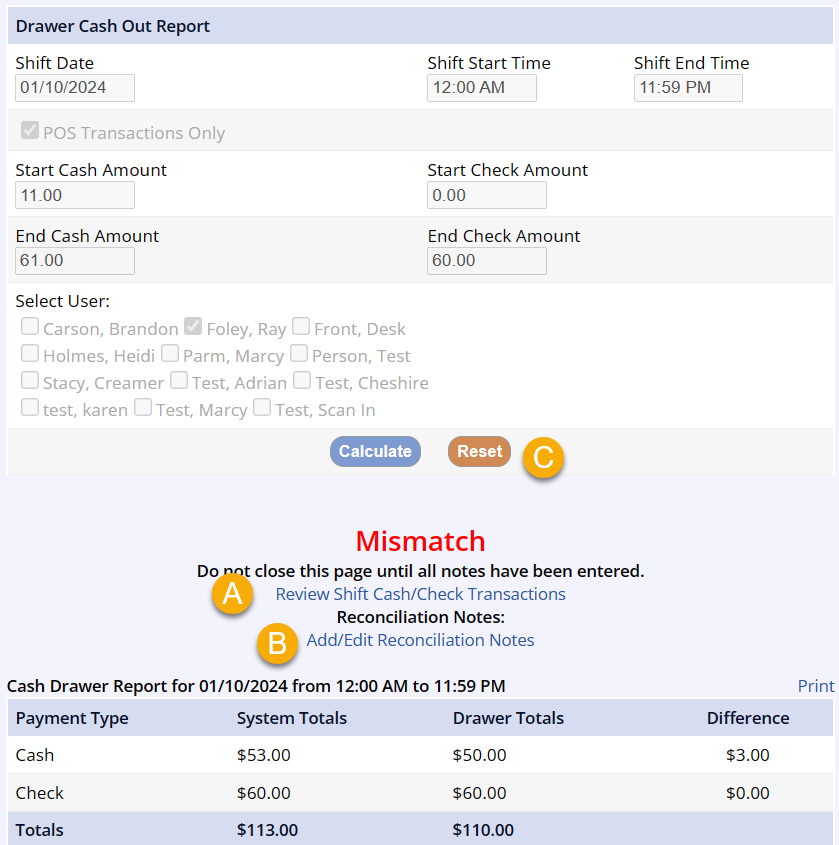
- On a Mismatch, you have additional options
- Click Review Shift Cash/Check Transactions to view transaction details
- Click Add/Edit Reconciliation Notes if you have information you would like to add to this report (i.e. gave back cash as change for a check overage)
- Reset the form to enter the totals and recalculate