Selling a Product via Point of Sale
You can use the POS portal to sell a variety of products including shirts, concessions, gift certificates, and even passes to your facility.
Accessing the POS to Make a Sale
Selling a Product from the Management Screen
- Search for the member purchasing the product by entering their name in the Member Search bar
- Click Go
- Select the correct member
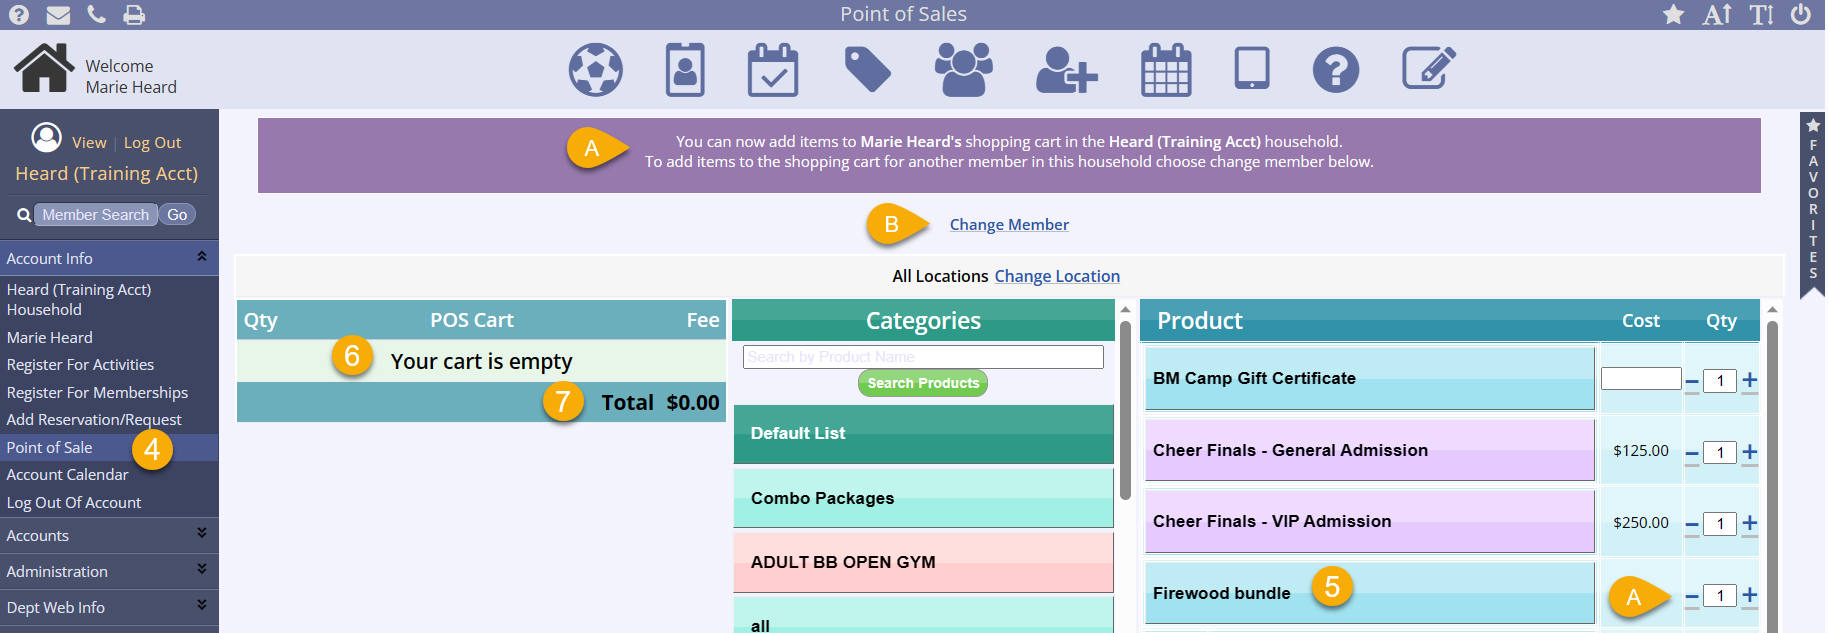
- Click Point of Sale from the Account menu on the leftside navigation bar
- You will see that the customer's name is featured in the purple bar at the top of the screen
- To change the member purchasing the product, click Change Member below the bar
- To add the product to the customer's cart, browse the Default List or Category, if applicable, and click the product name
- Change the quantity if more than one is desired, then click the product name
- Items will be displayed in the POS cart
- You can remove items from the cart or change quantities in the cart as well using the trashcan icon
- The total will reflect the total purchase price of all items in the cart
- Click Continue
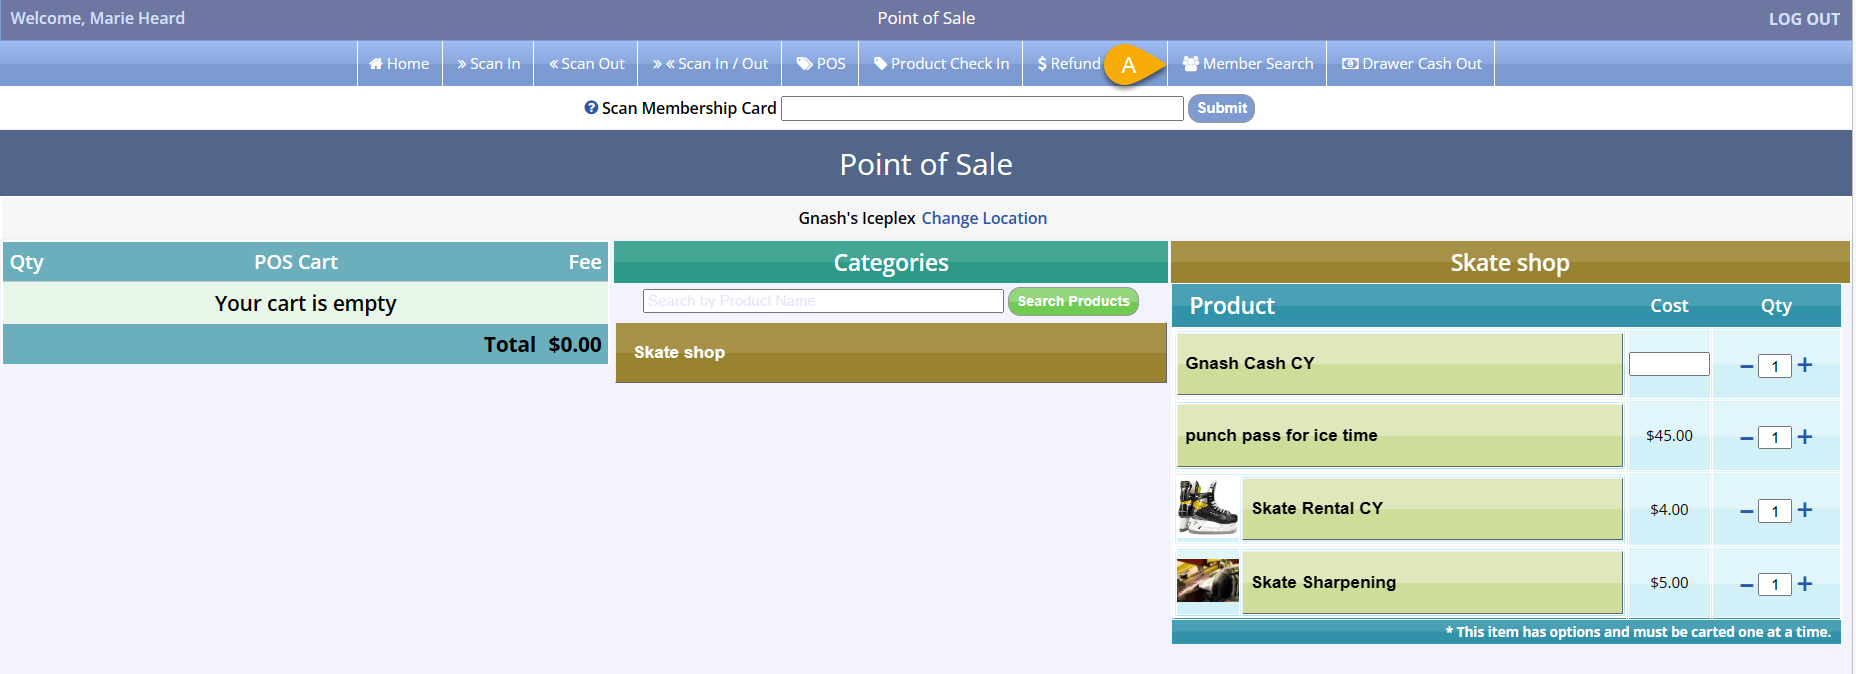
Selling a Product from the POS Portal
- Click the POS icon on the top of the management screen
- Select the facility from the list
- This will be an accountless transaction
- To make this purchase within a member account for reporting purposes, click Member Search on the top toolbar and find the member account
- Enter the member name
- Click Search
- Select the correct member from the search results
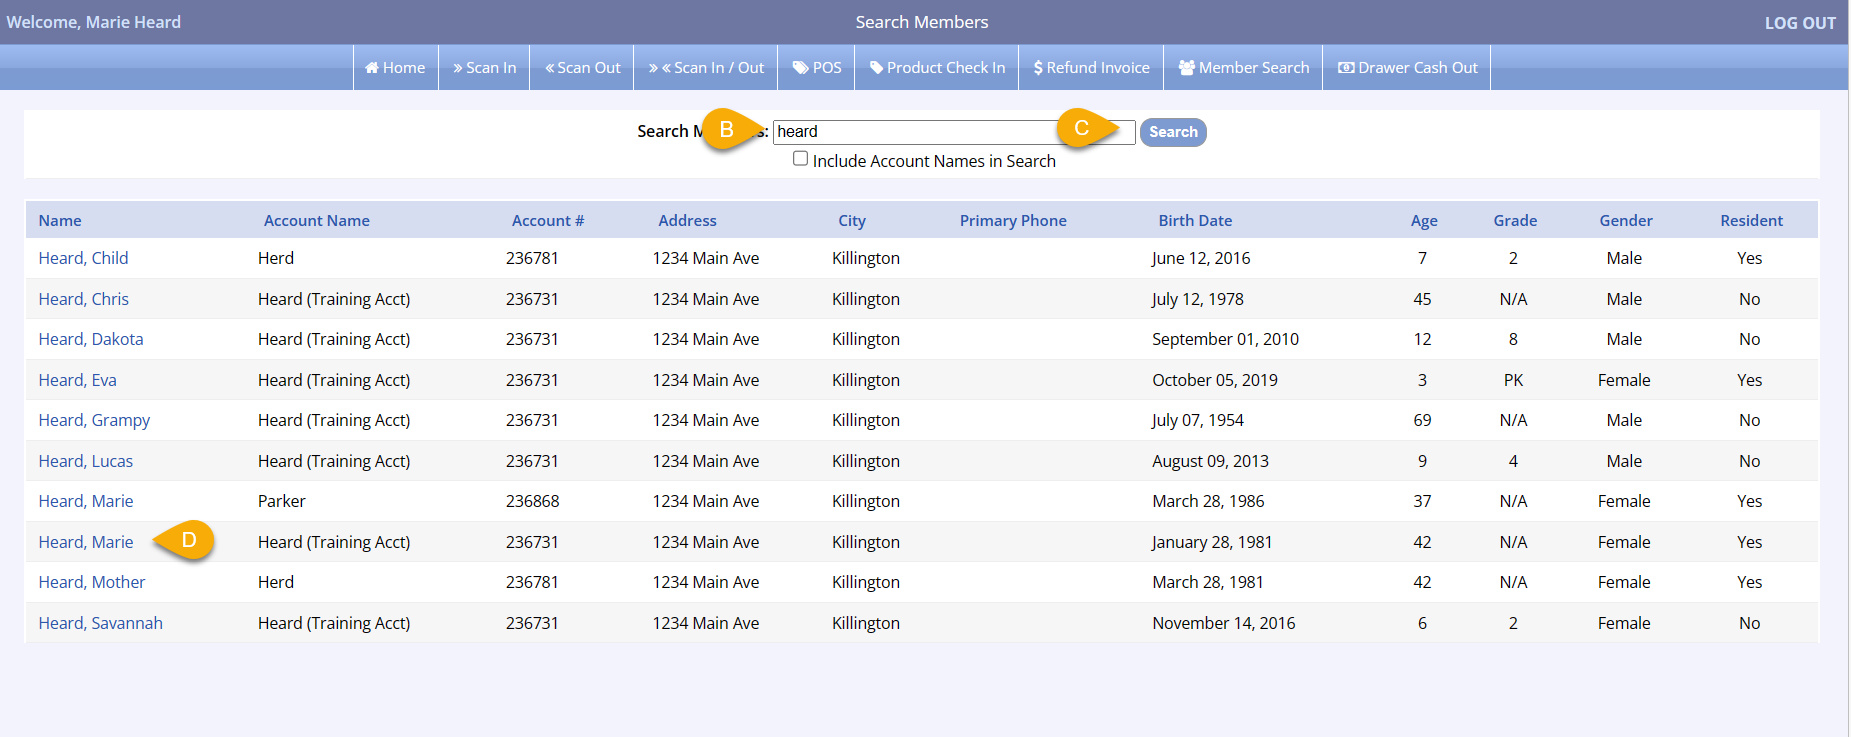
- Member info will be displayed in a box, and there will be a Point of Sale link to click under the Member Info box
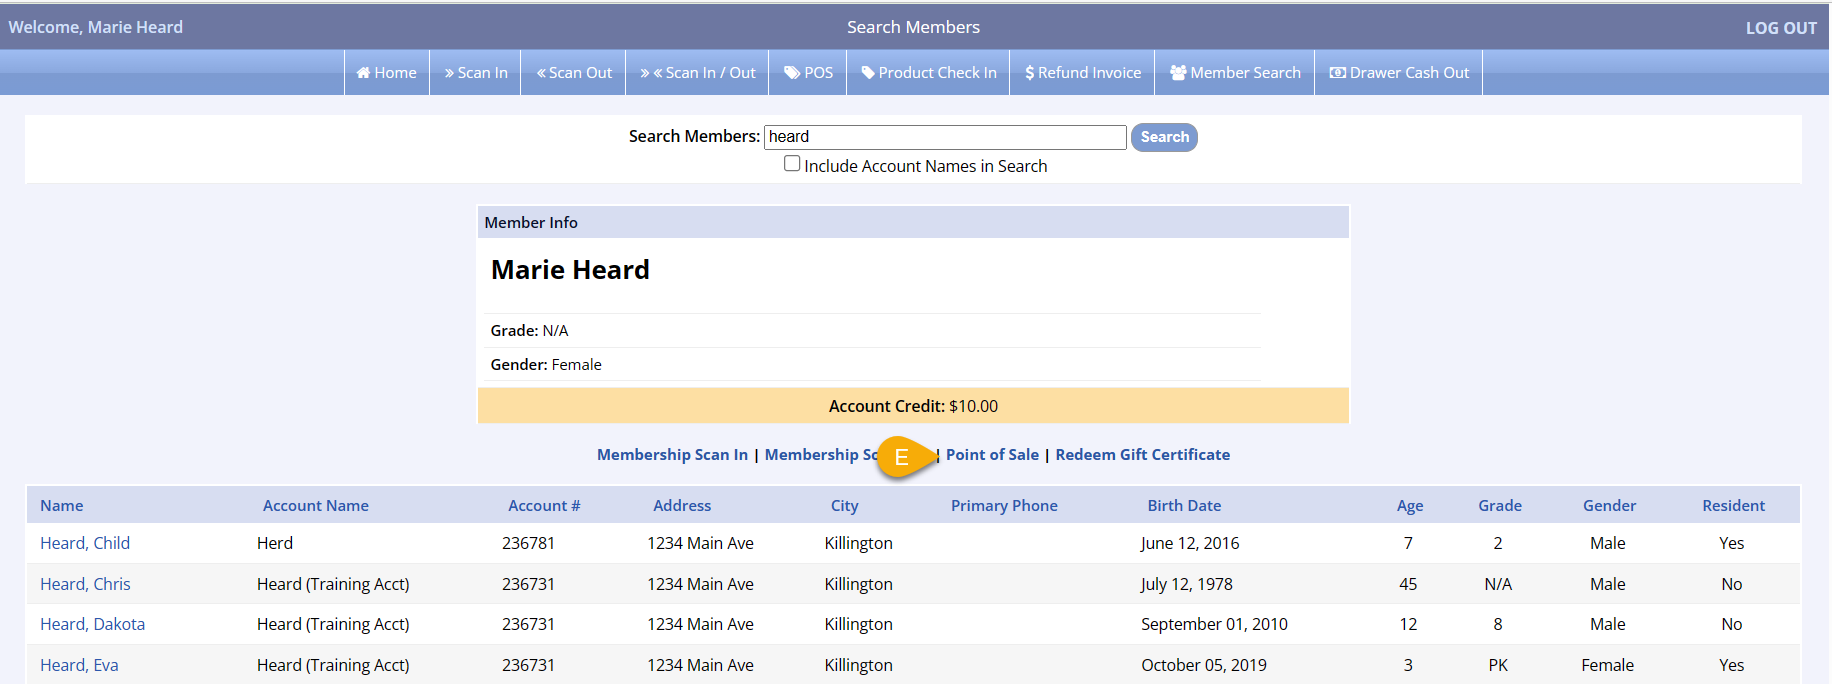
- Note that the member name is now selected, indicating that the purchase will be made within the member's account

Adding Items to the Cart
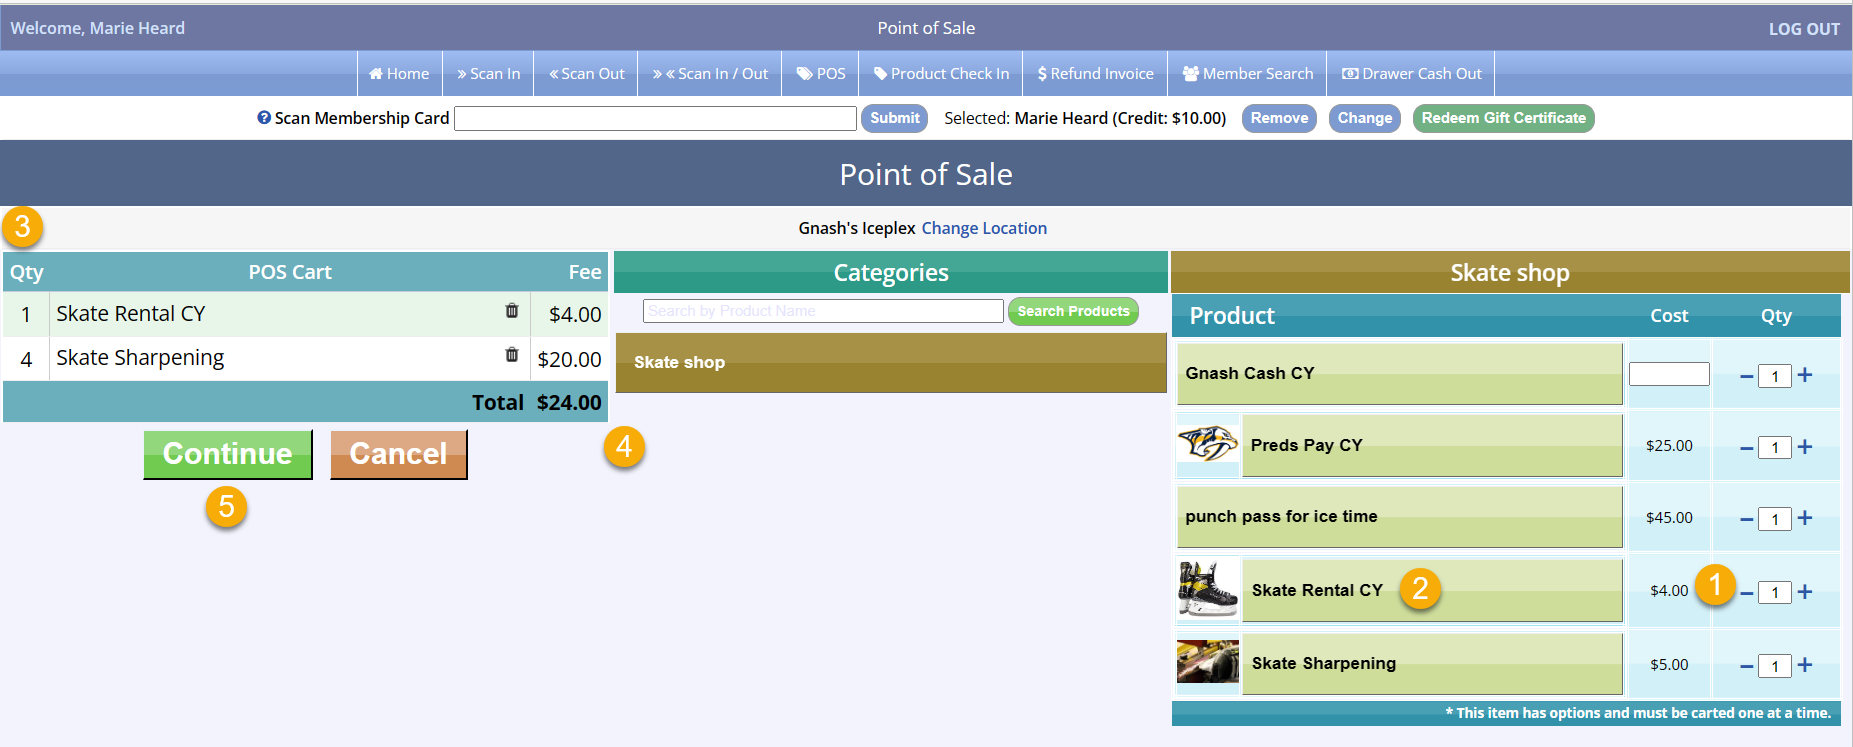
- To add the product to the customer's cart, browse the Default List or Category, if applicable, and change the quantity if more than one is desired
- Click the product name to add to the cart
- Items and their quantity will be displayed in the POS cart
- You can remove items from the cart or change quantities in the cart as well using the trashcan icon
- The total will reflect the total purchase price of all items in the cart
- Click Continue
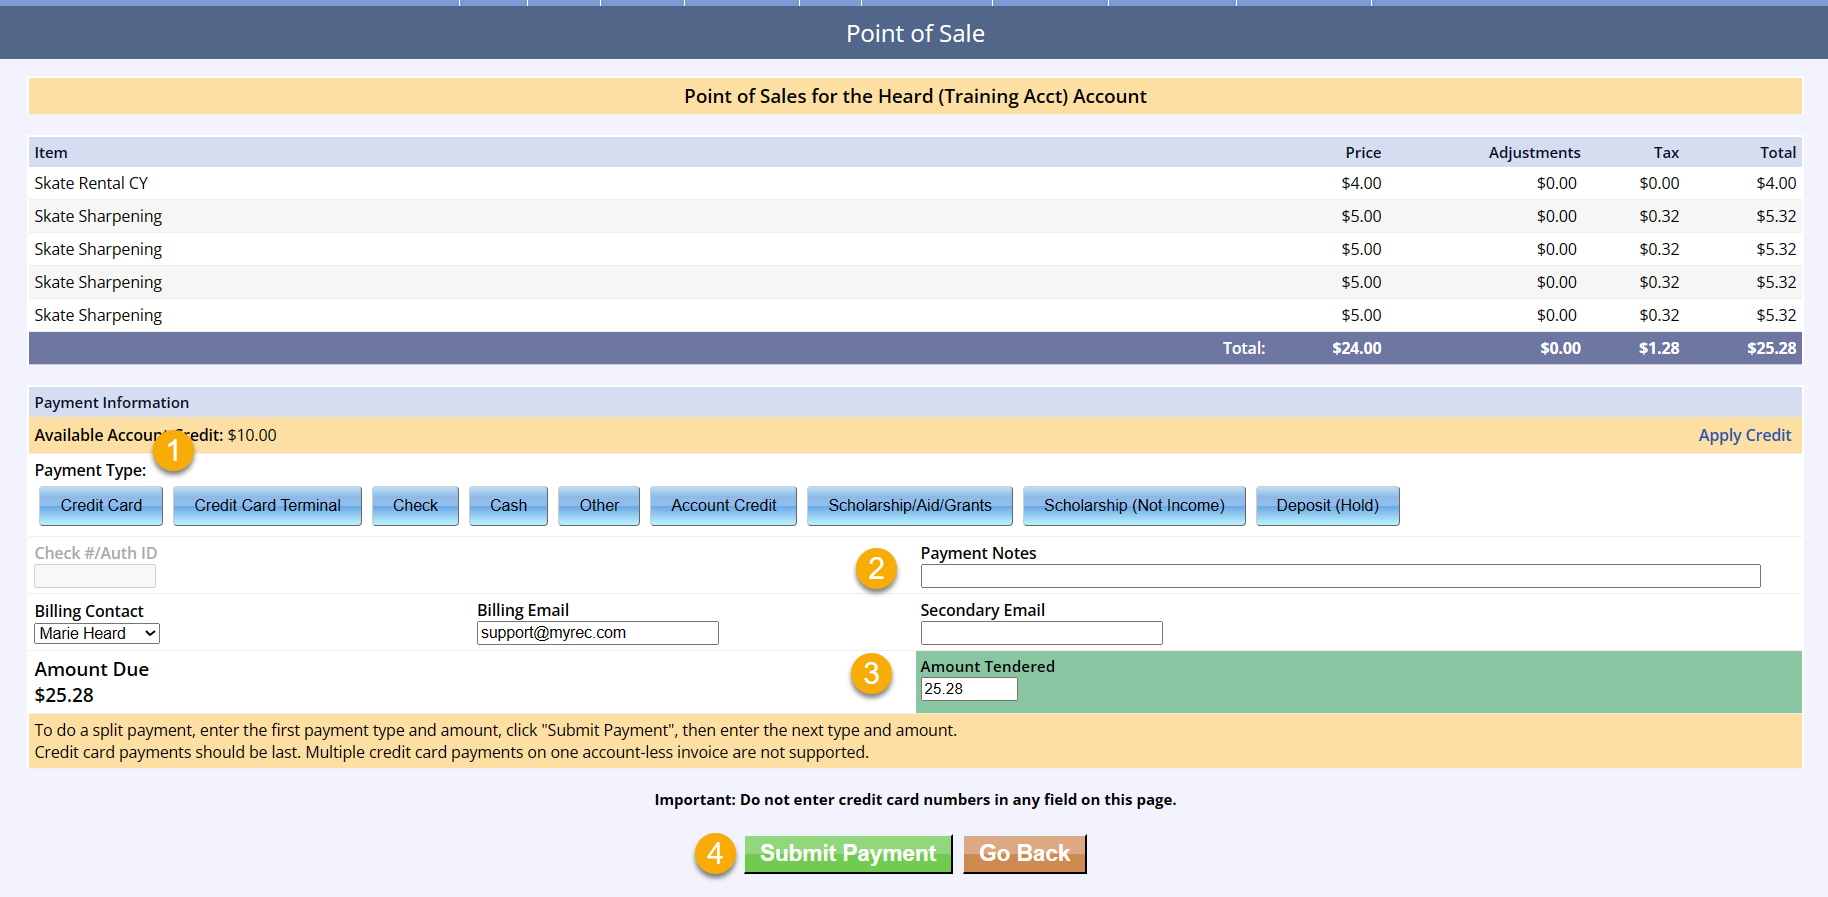
Checking out in POS
- Select the payment type
- Add any applicable payment notes
- Change the Amount Tendered if necessary
- Click the green Submit Payment button