Need to Change the Location?
Change the Location of an Existing Reservation
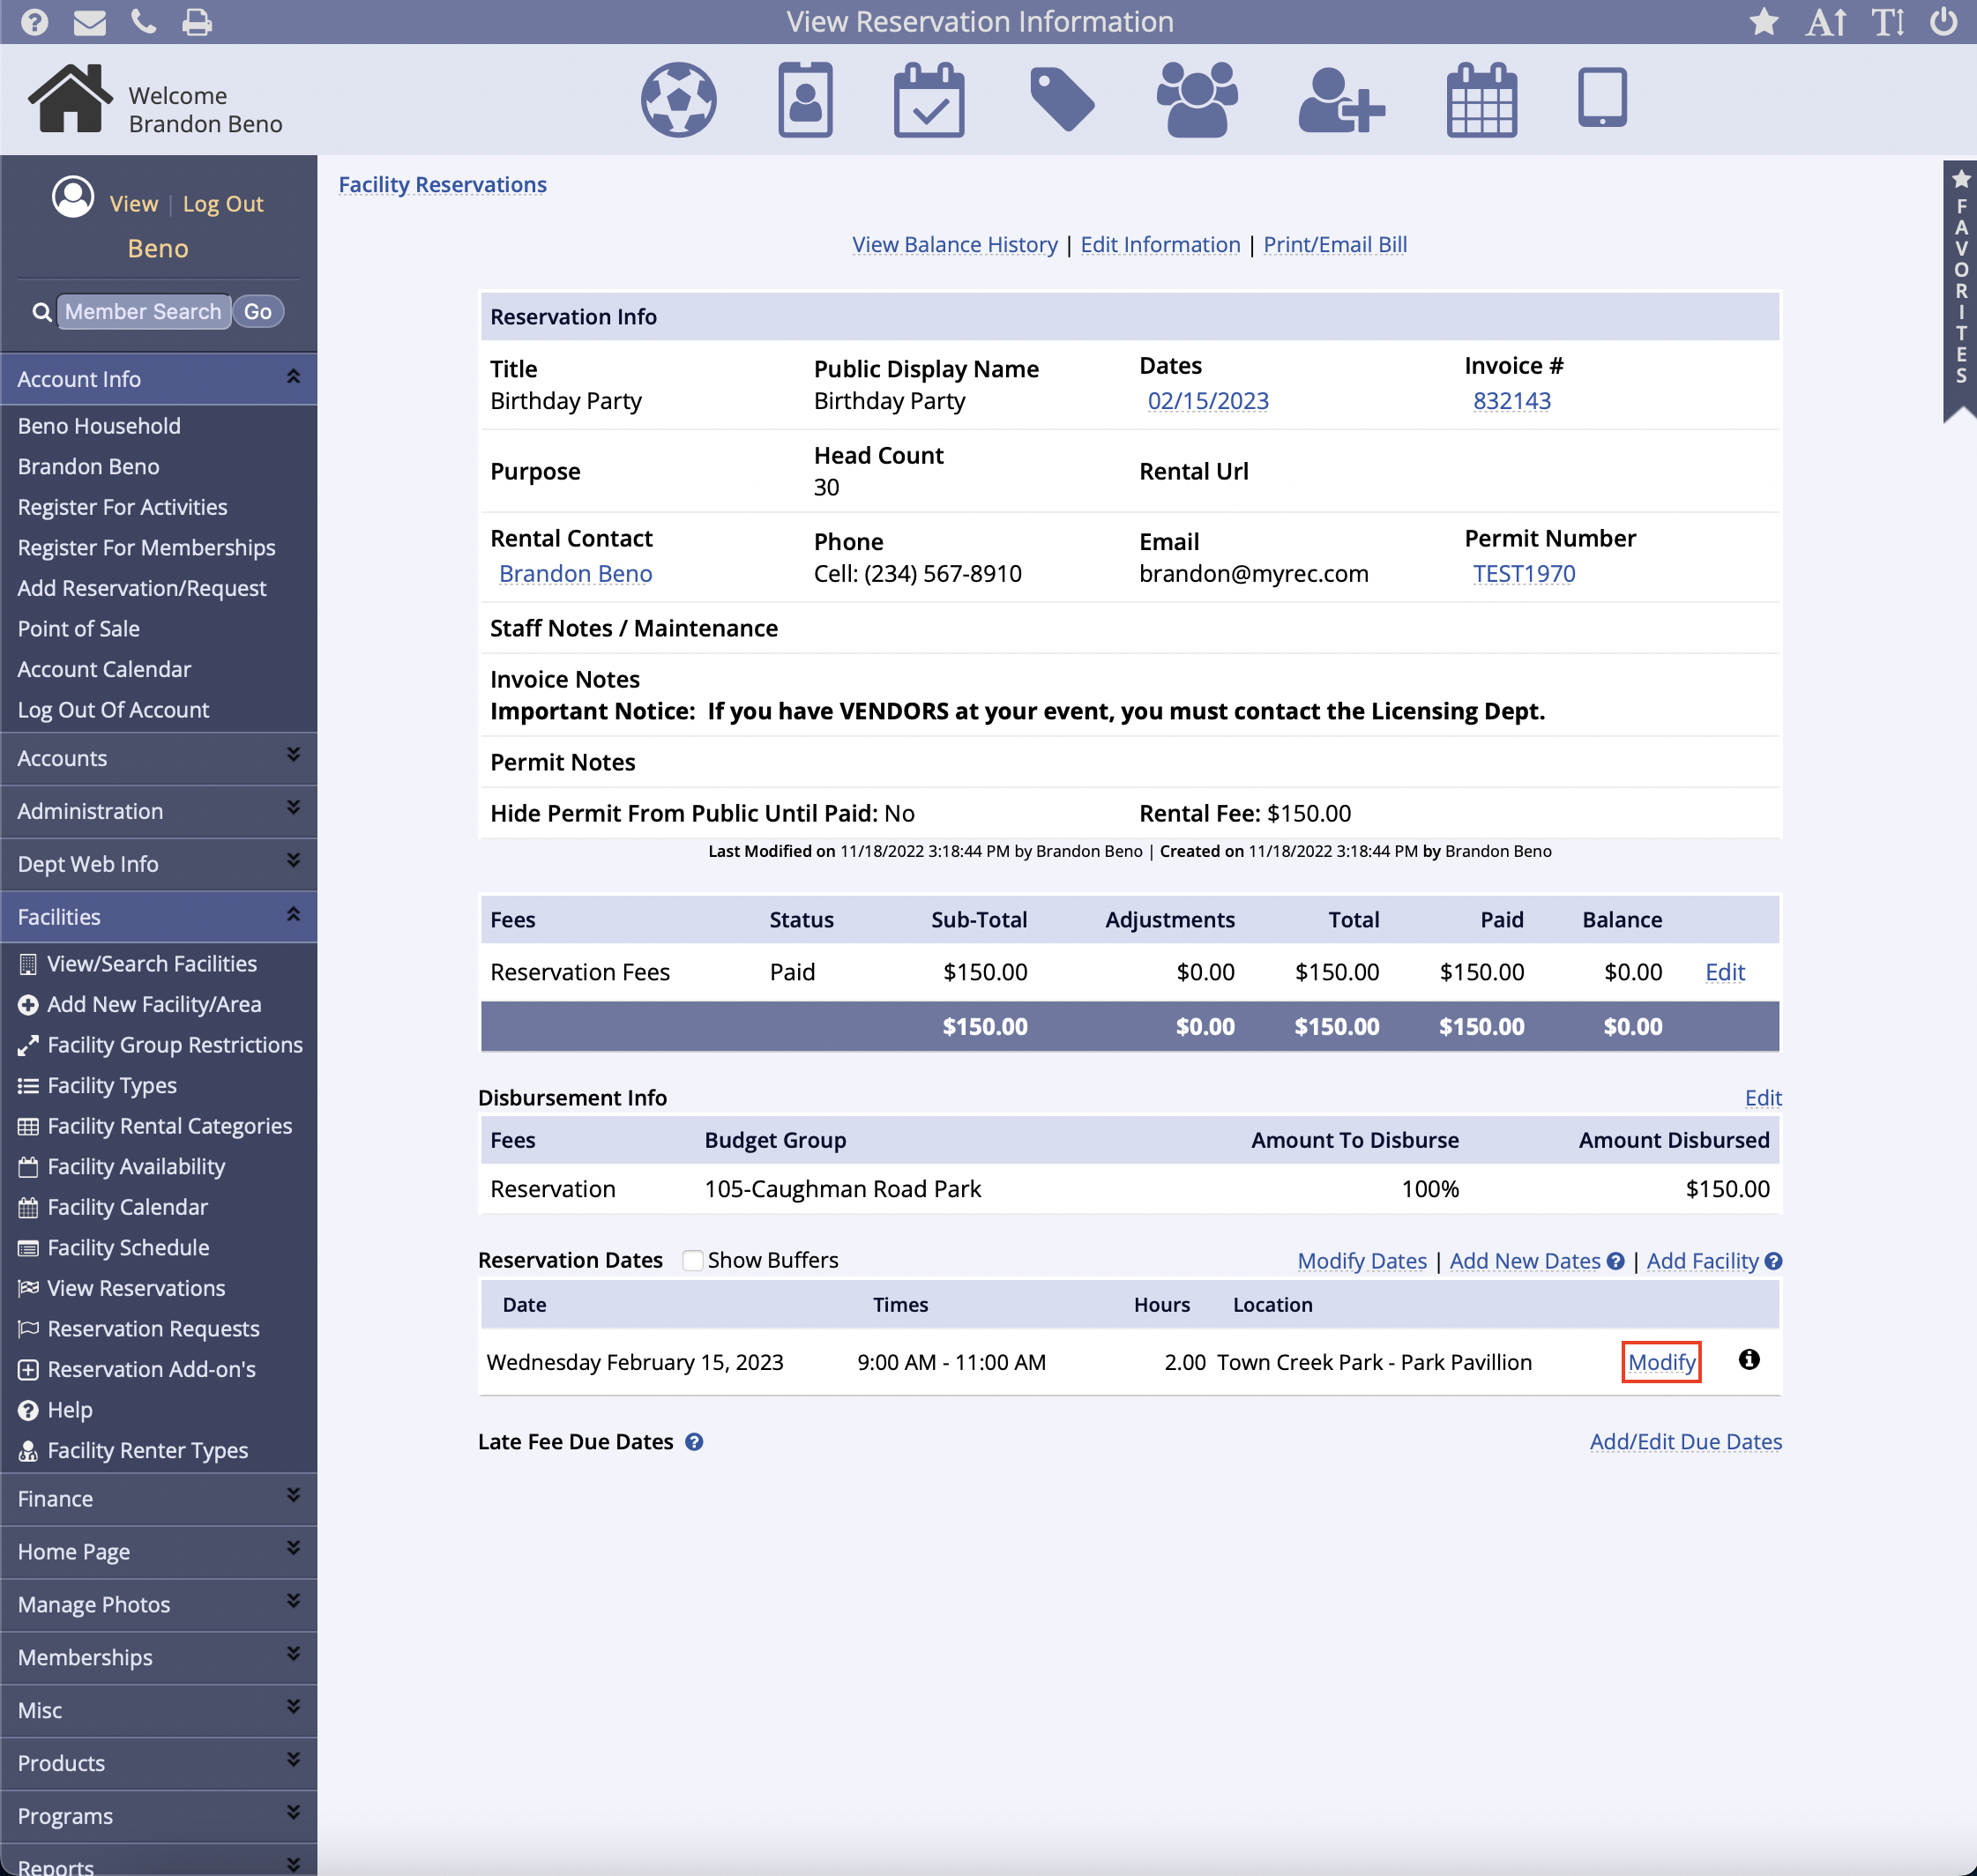
- Open the existing reservation that needs to be modified either by an Invoice search in Quick Utilities, by searching reservations on the Reservation tab in a household account, or by View Reservations in the Facilities menu on the left
- View the Reservation Information page
- Click Modify from the Reservation Dates section
- Once in the Modify Reservation Dates page, verify the reservation a location modification is selected
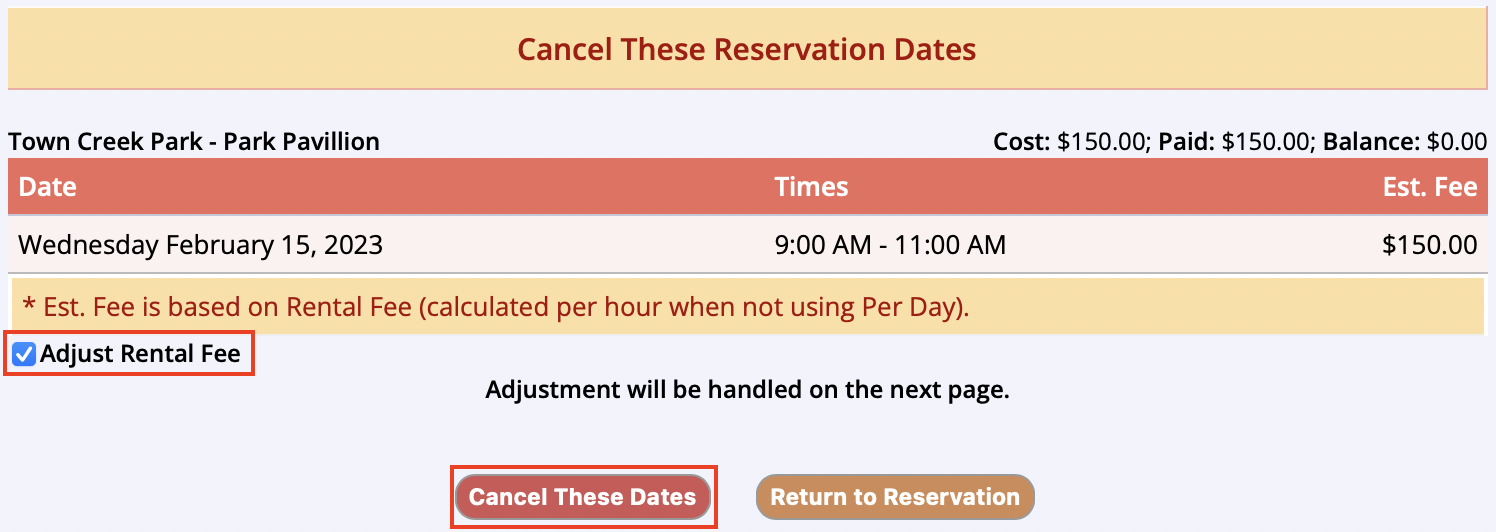
- Click the red Start Cancellation of Selected Dates button

- Confirm the correct reservation dates to cancel appear below the Cancel These Reservation Dates notice
- To issue account credit or to refund the amount that the customer paid due to a difference in the rental fee, click on the Adjust Rental Fee check box and fill in the information in the Add an Adjustment section on the next page
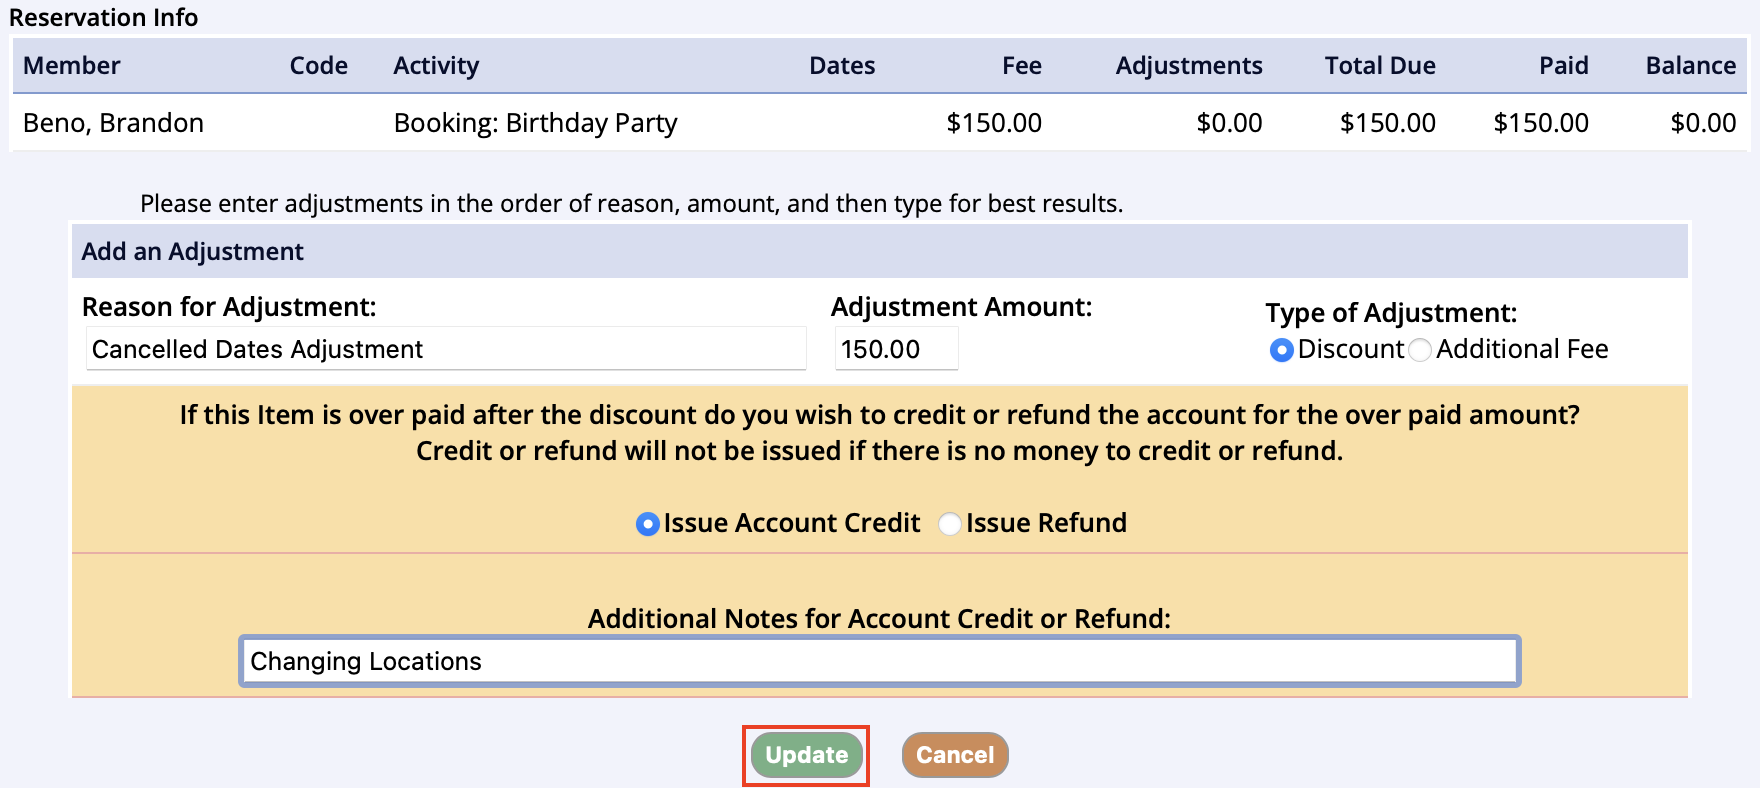
- Fill in the Add an Adjustment section as necessary
- For this example, the amount that the customer paid for the reservation fee is going to be credited back to the user's account so it can be applied to the new reservation balance (see step #10 below)
- Once the Add an Adjustment section has been filled out, click on the Update button
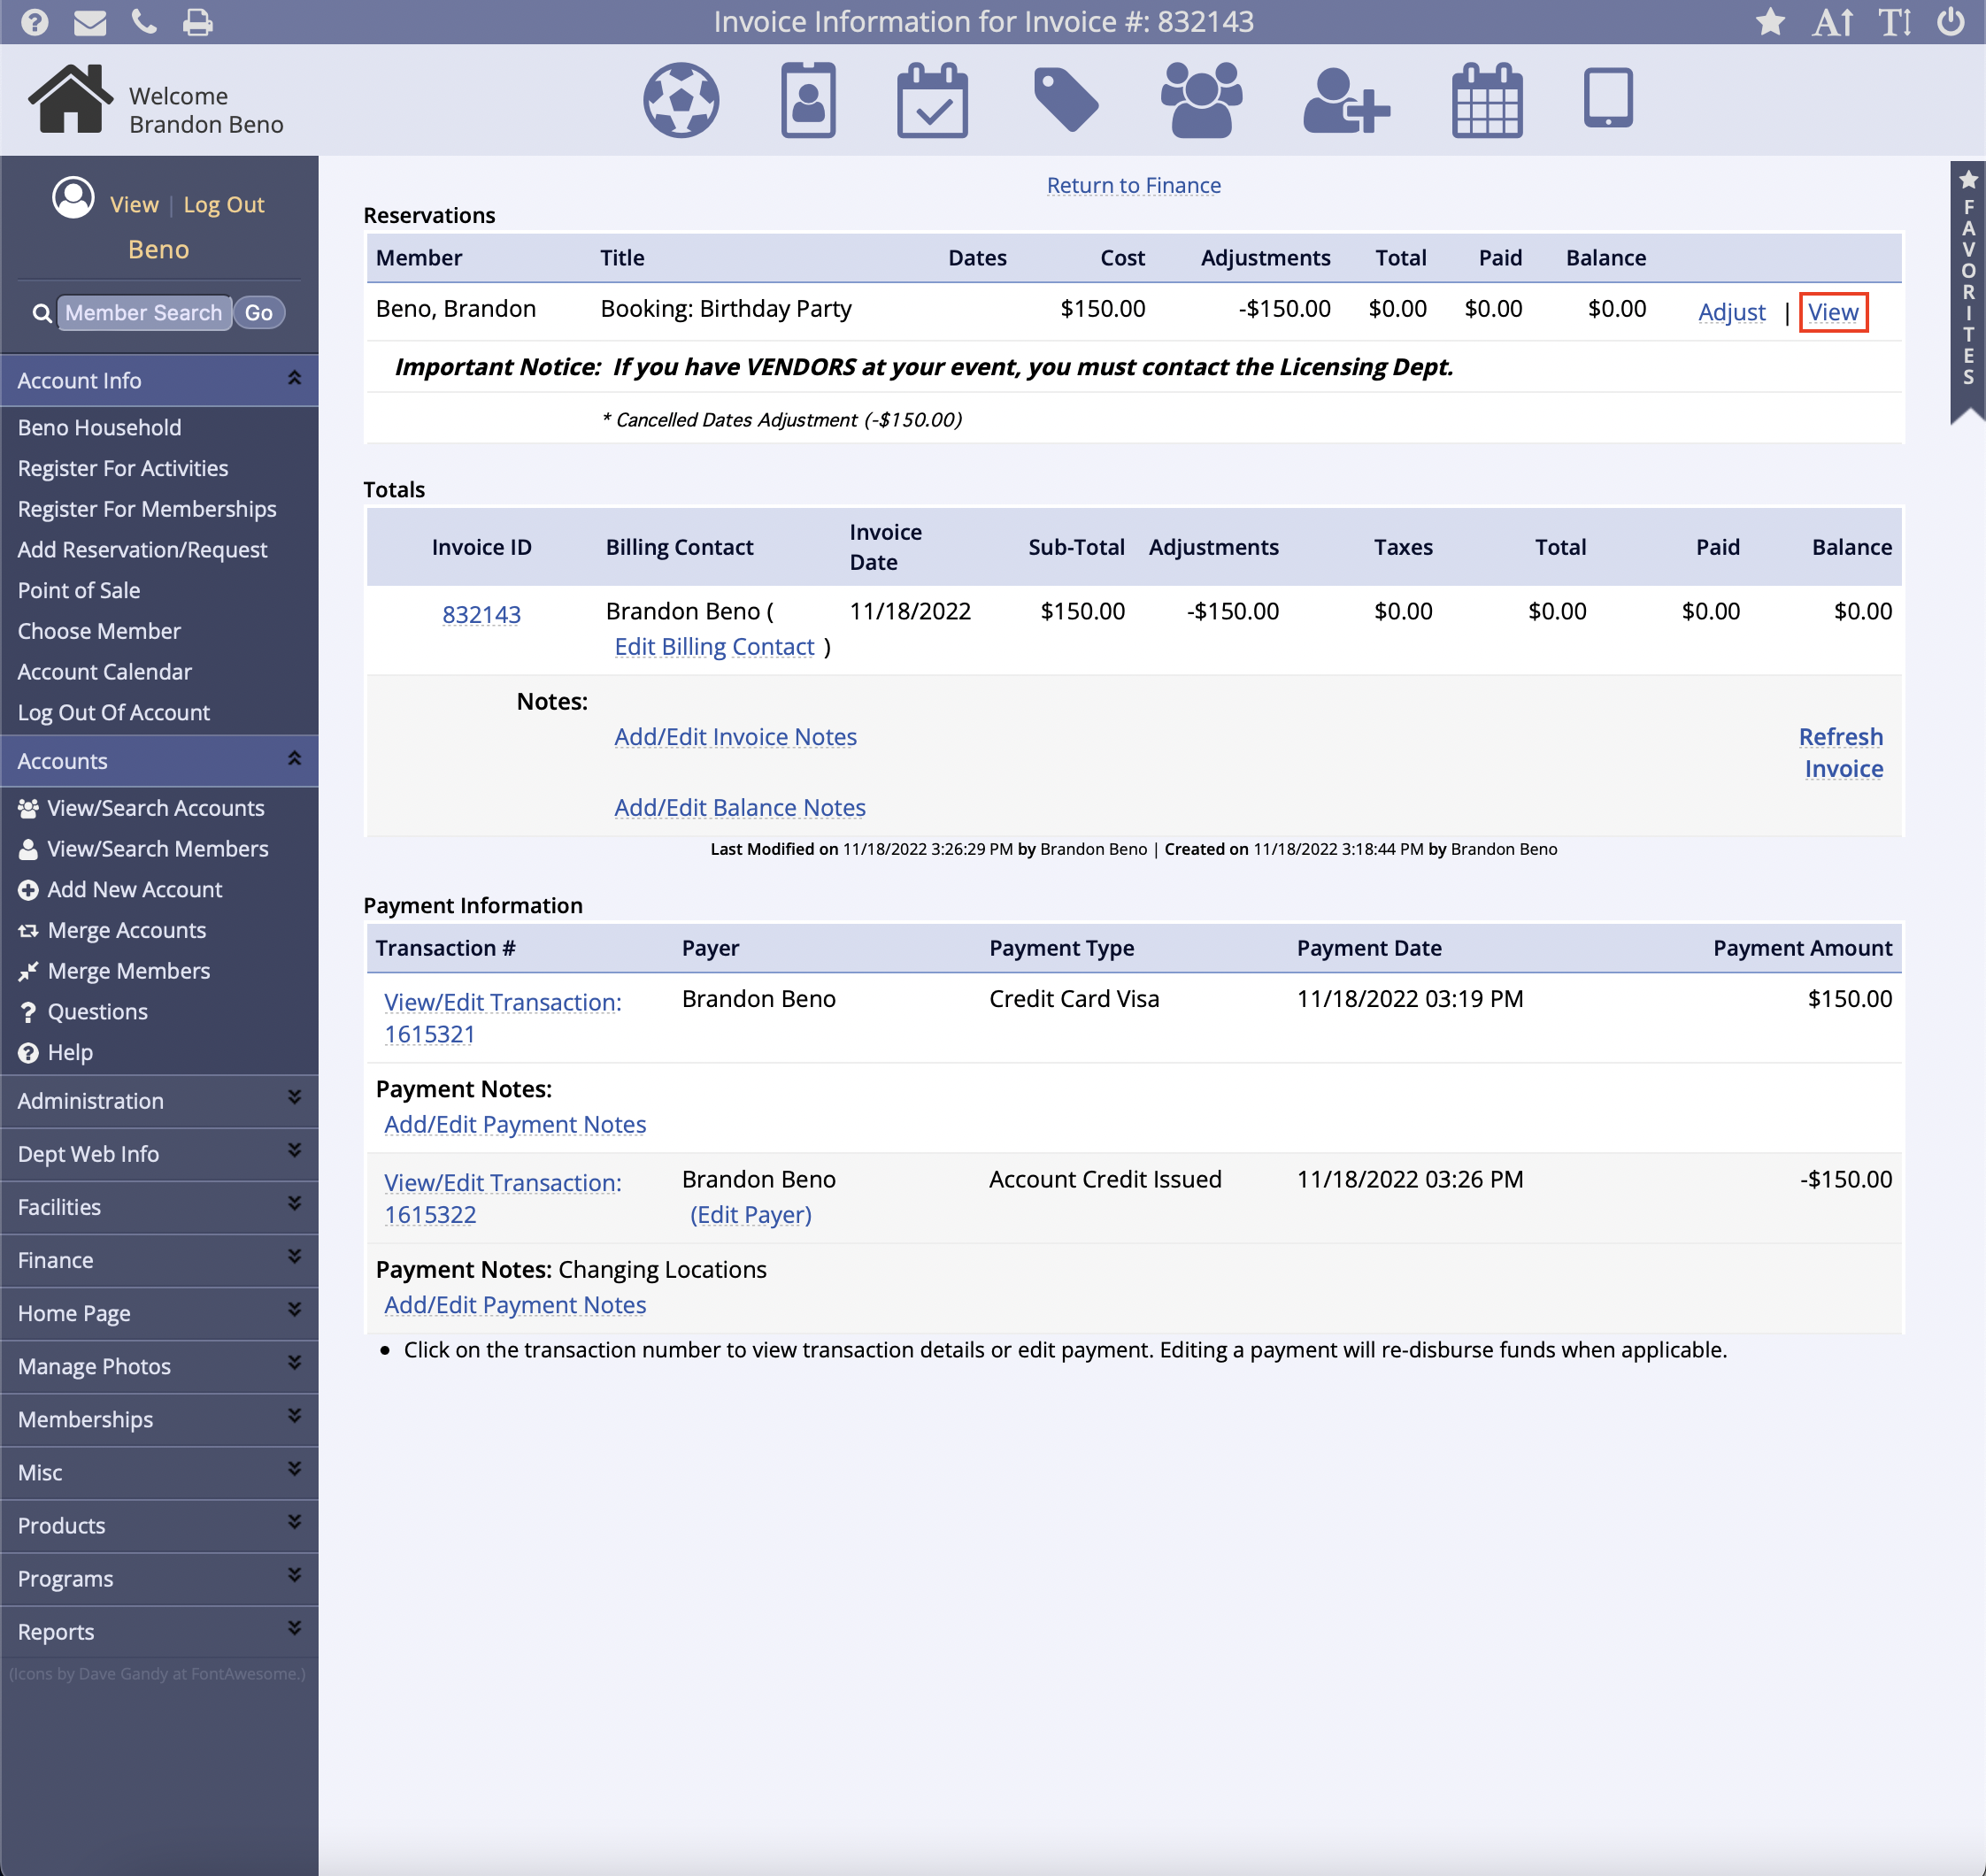
- Once the existing reservation dates have been cancelled, you will automatically be taken back to the initial reservation invoice
- Click the View link, next to the initial reservation, to be taken to the Reservation Information page
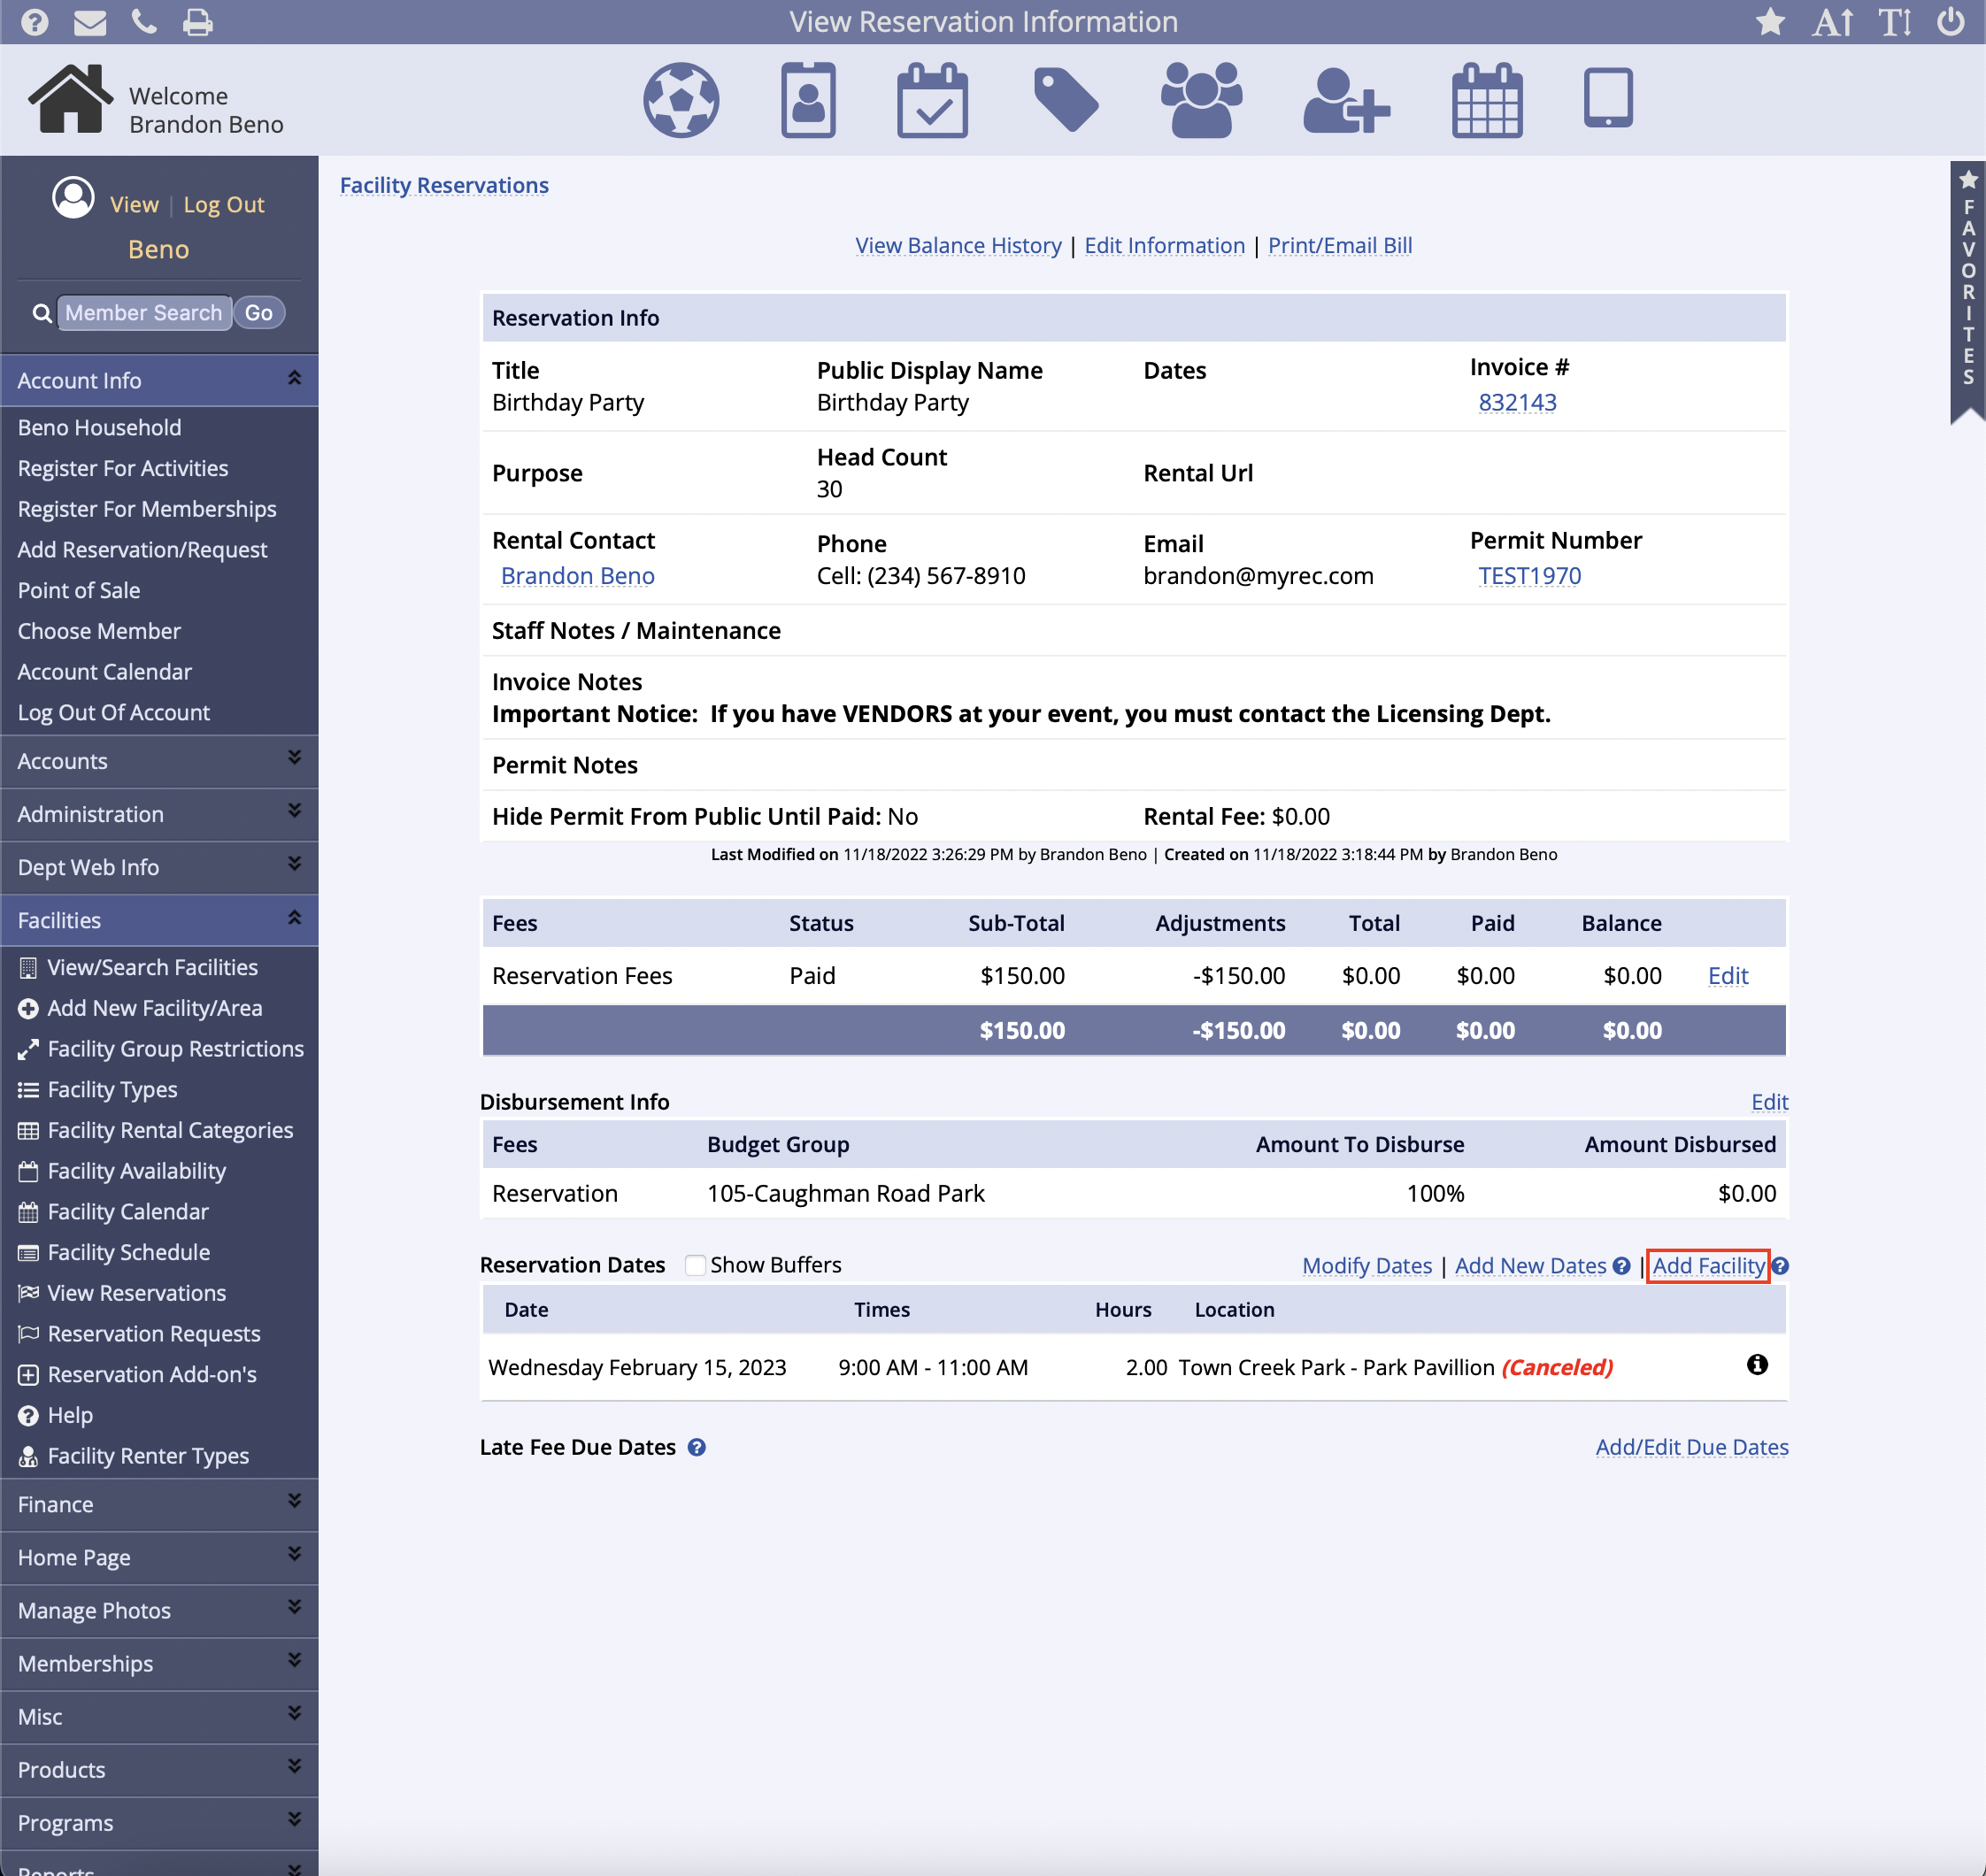
- Once in the Reservation Information page, scroll to the Reservation Dates section, and click Add Facility
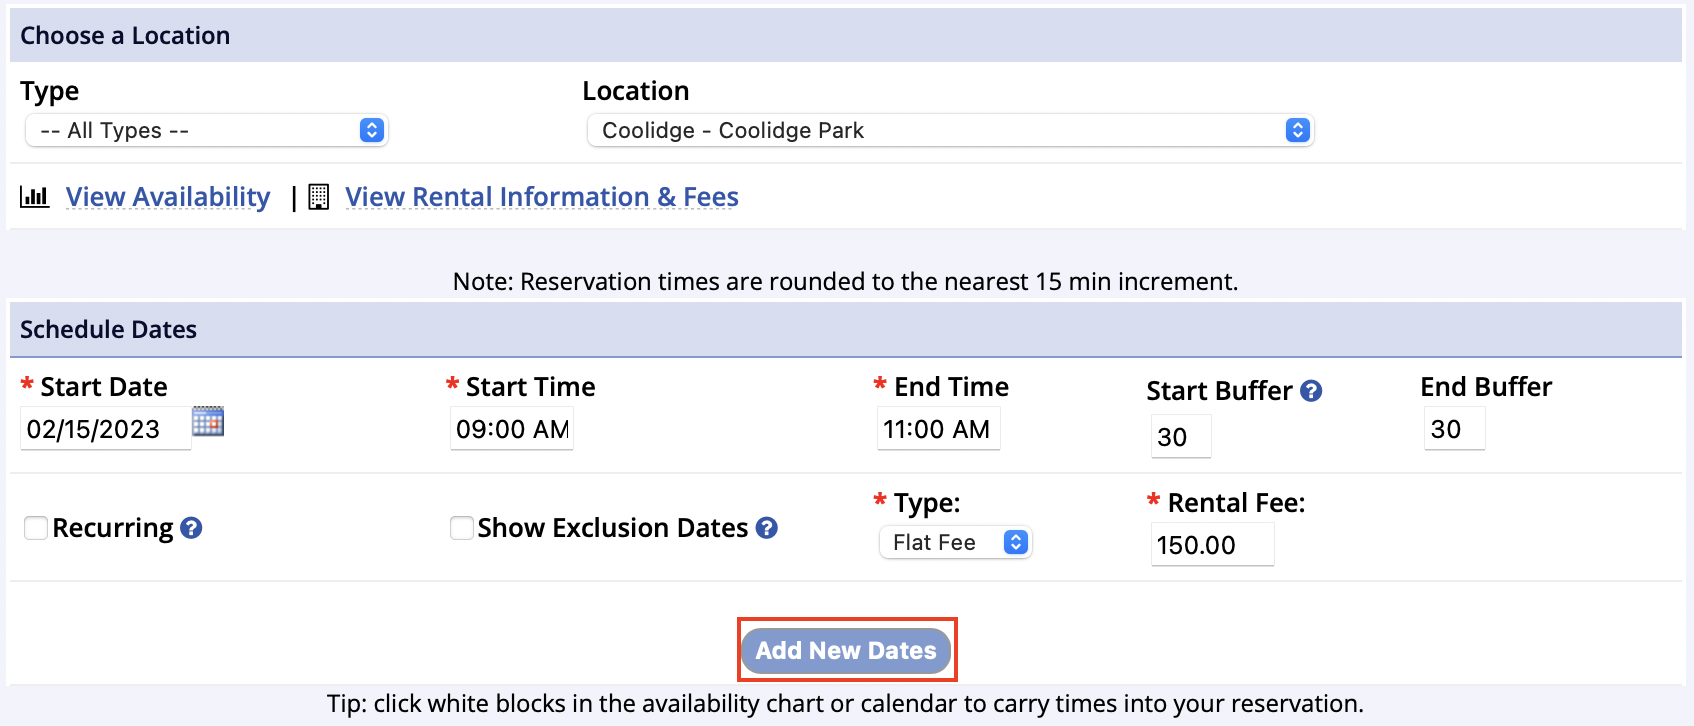
- Next, add the new facility location
- Please notice that you can add Rental Fees to the new location's reservation
- For this example, the new location's balance is going to be paid with the credit that was issued to the member in step #7 above
- Once the new location and scheduled dates have been entered, click the Add New Dates button
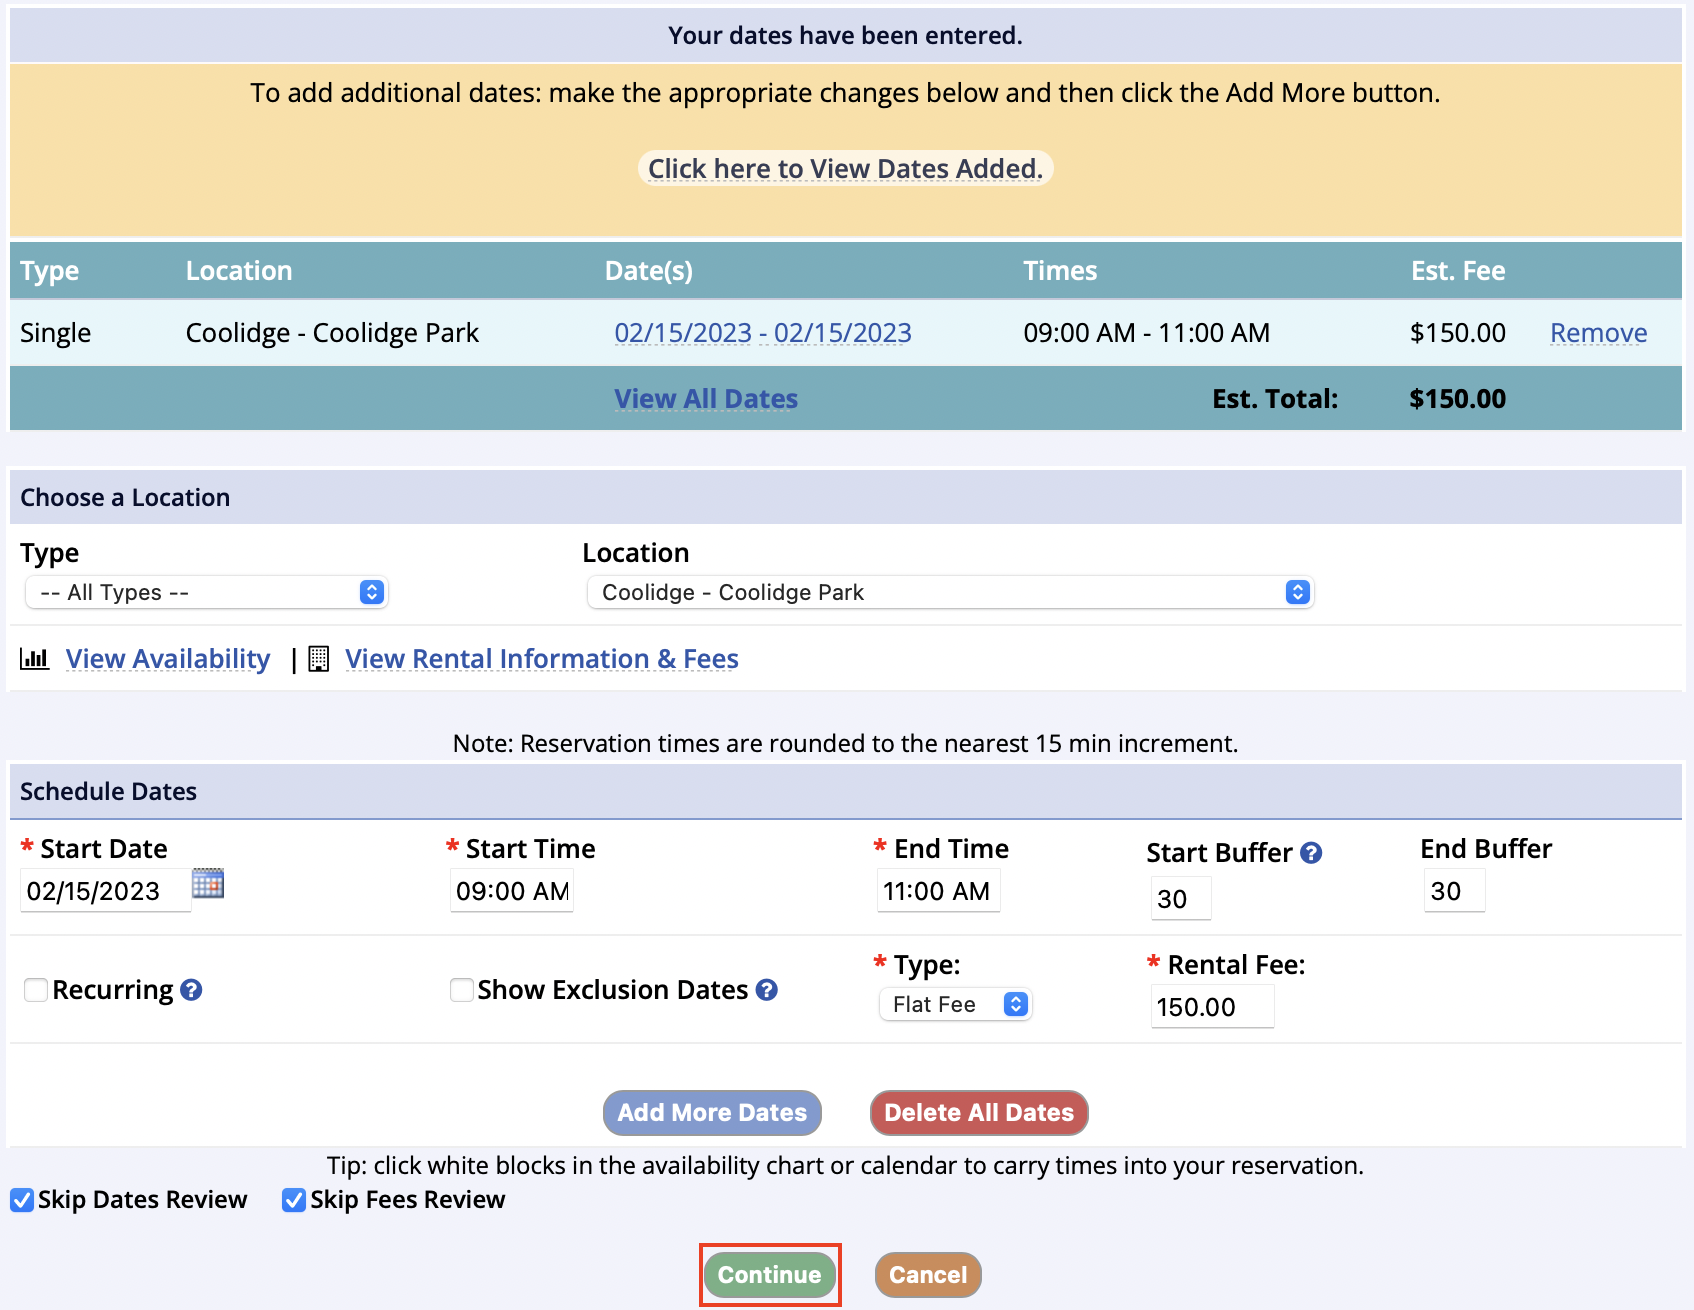
- Confirm that the information in the ‘Your dates have been entered’ section is correct and click on the Continue button
- Confirm that the Schedules & Fees section is correct and click the Submit button
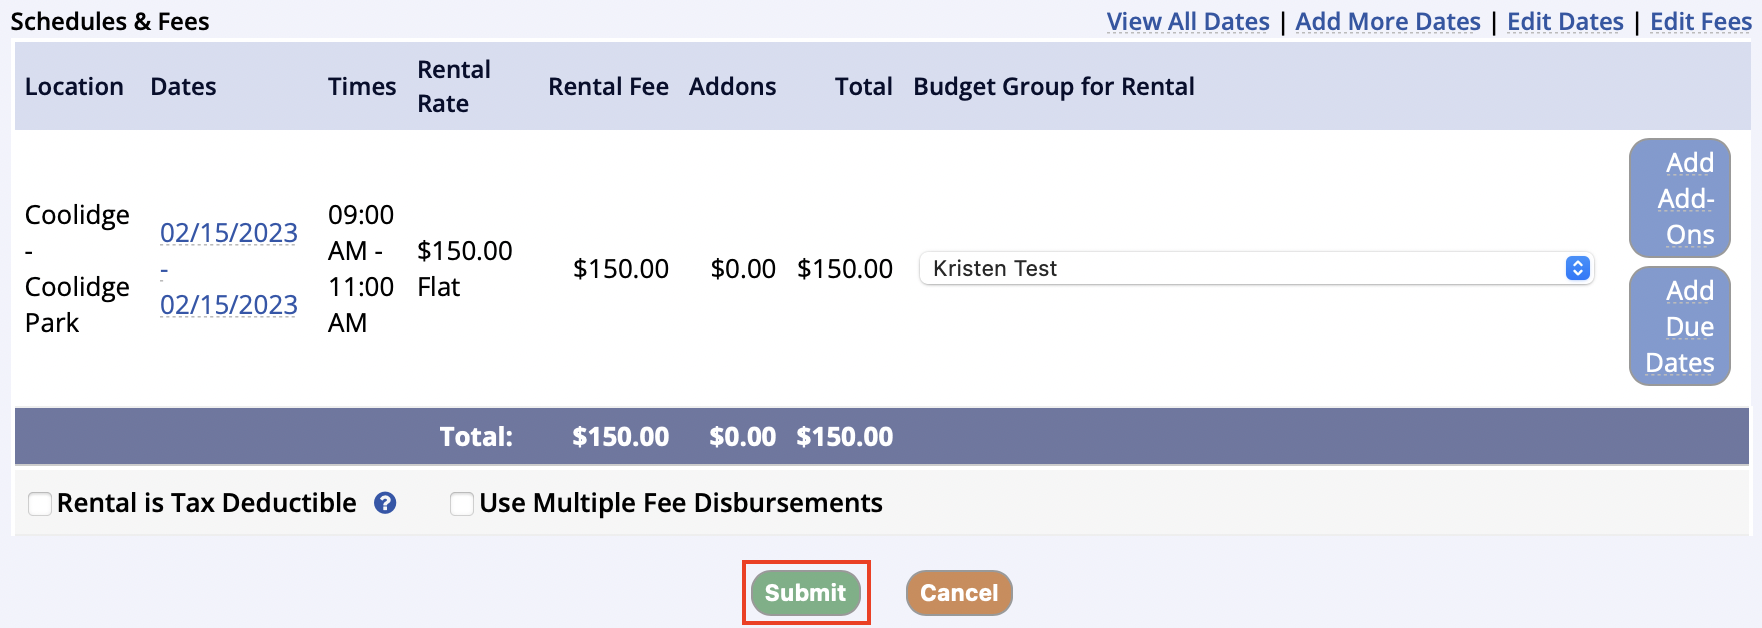
- Once the Schedule & Fees has been confirmed, click Make Payment

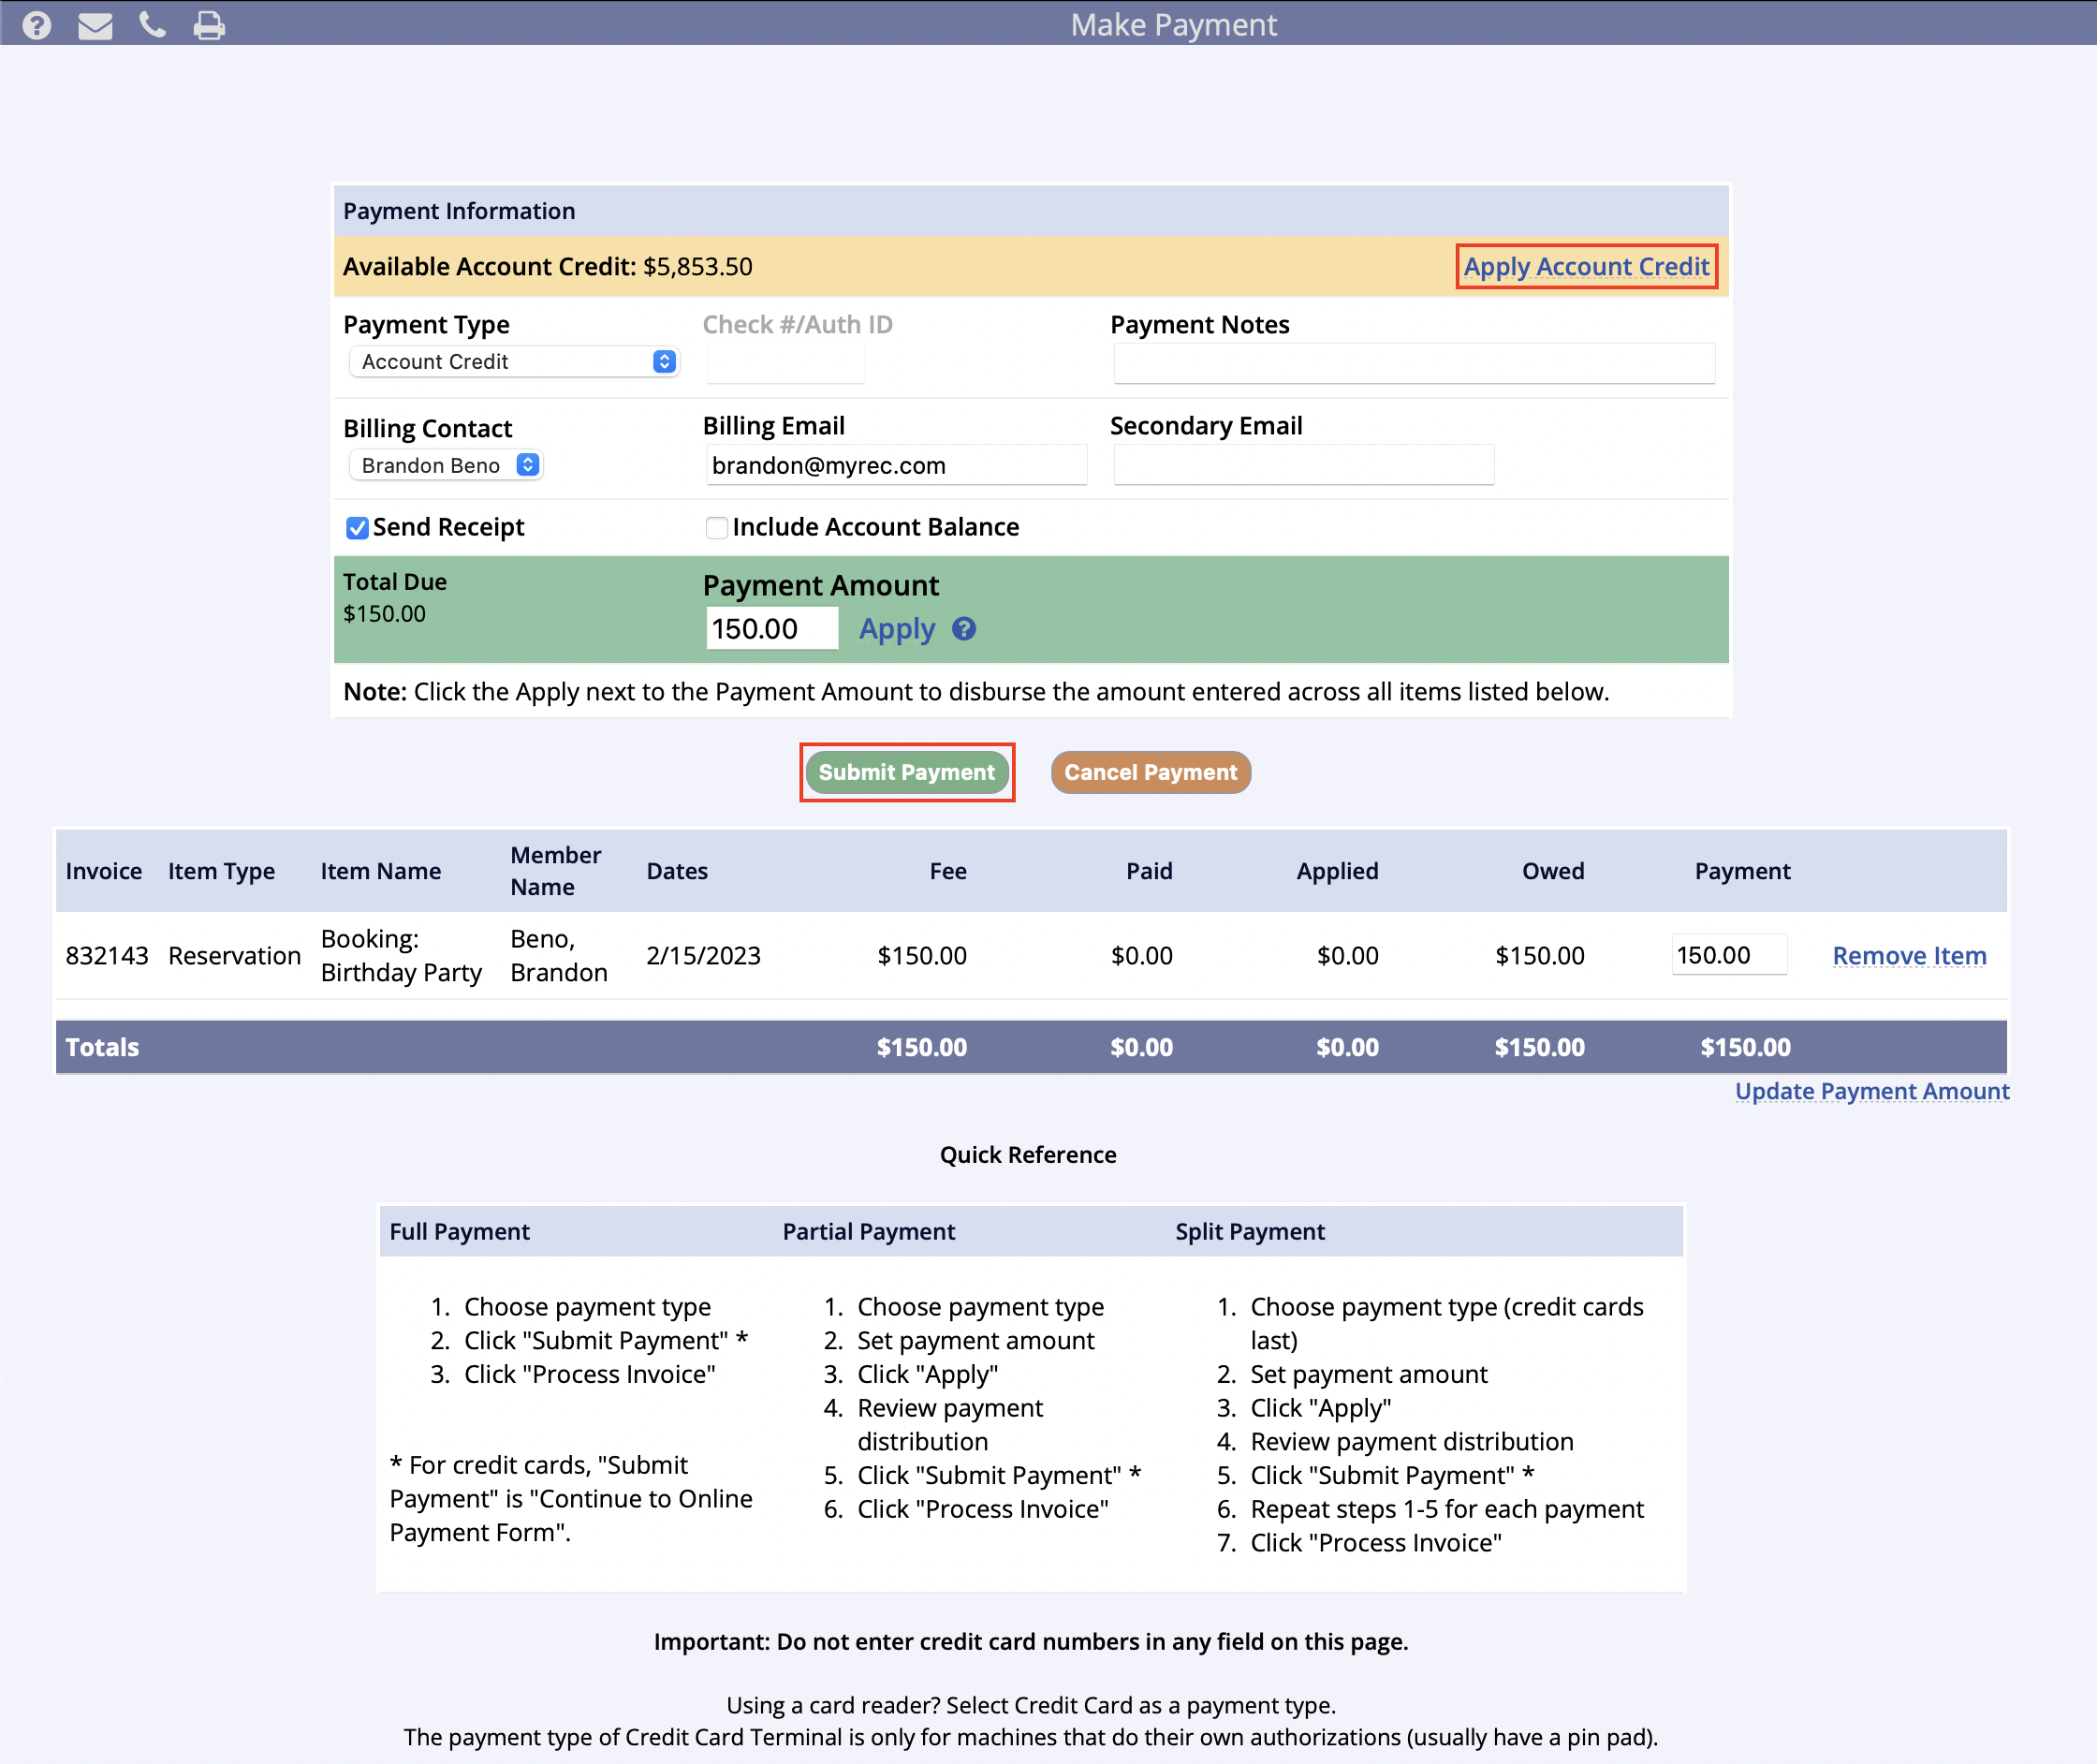
- The final step is to make the payment to the reservation balance
- Note: the credit that was issued to the member earlier in the process can be selected as a payment type by clicking Apply Account Credit prior to clicking the Submit Payment button
- For this example, the balance of the reservation is going to be paid with the credit that was issued to the member
- If the payment is going to be paid with a different payment type, don't select Apply Account Credit, instead, select the payment type from the drop down
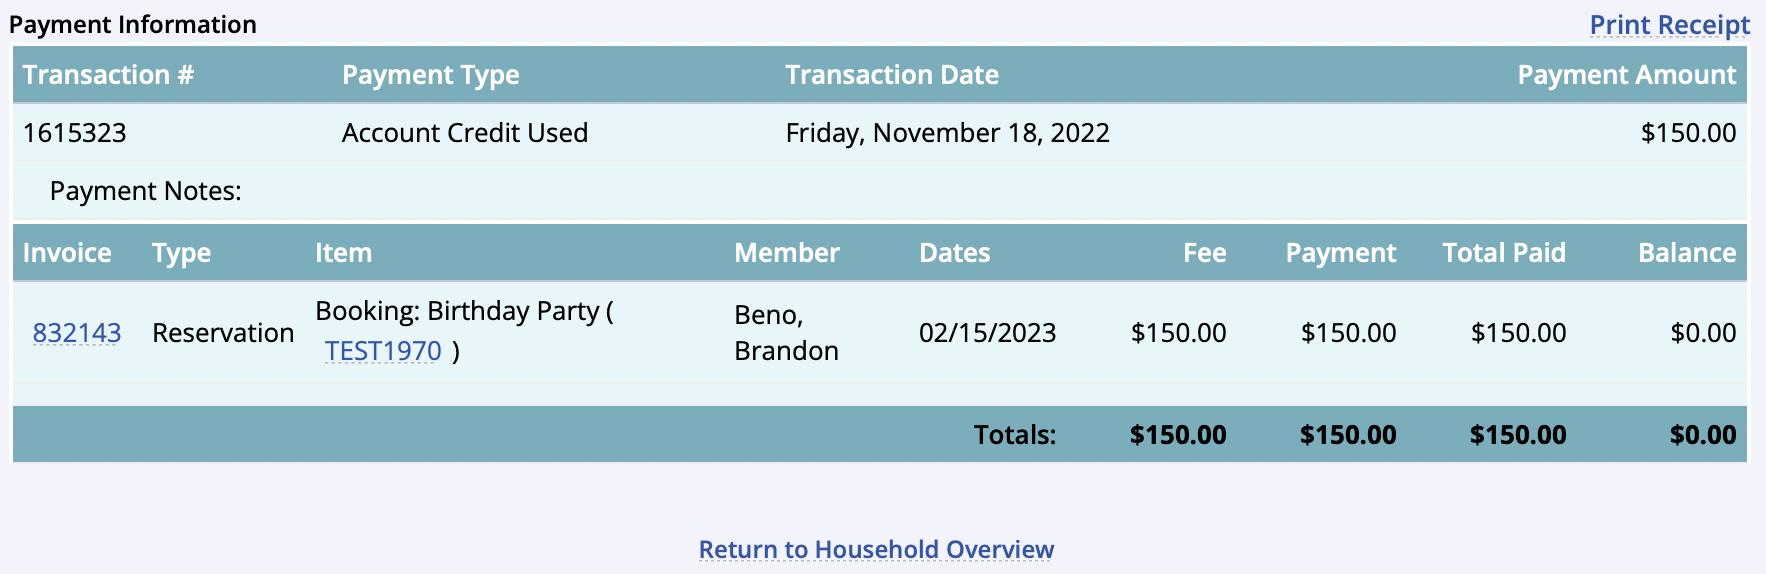
- Click the Submit Payment button.
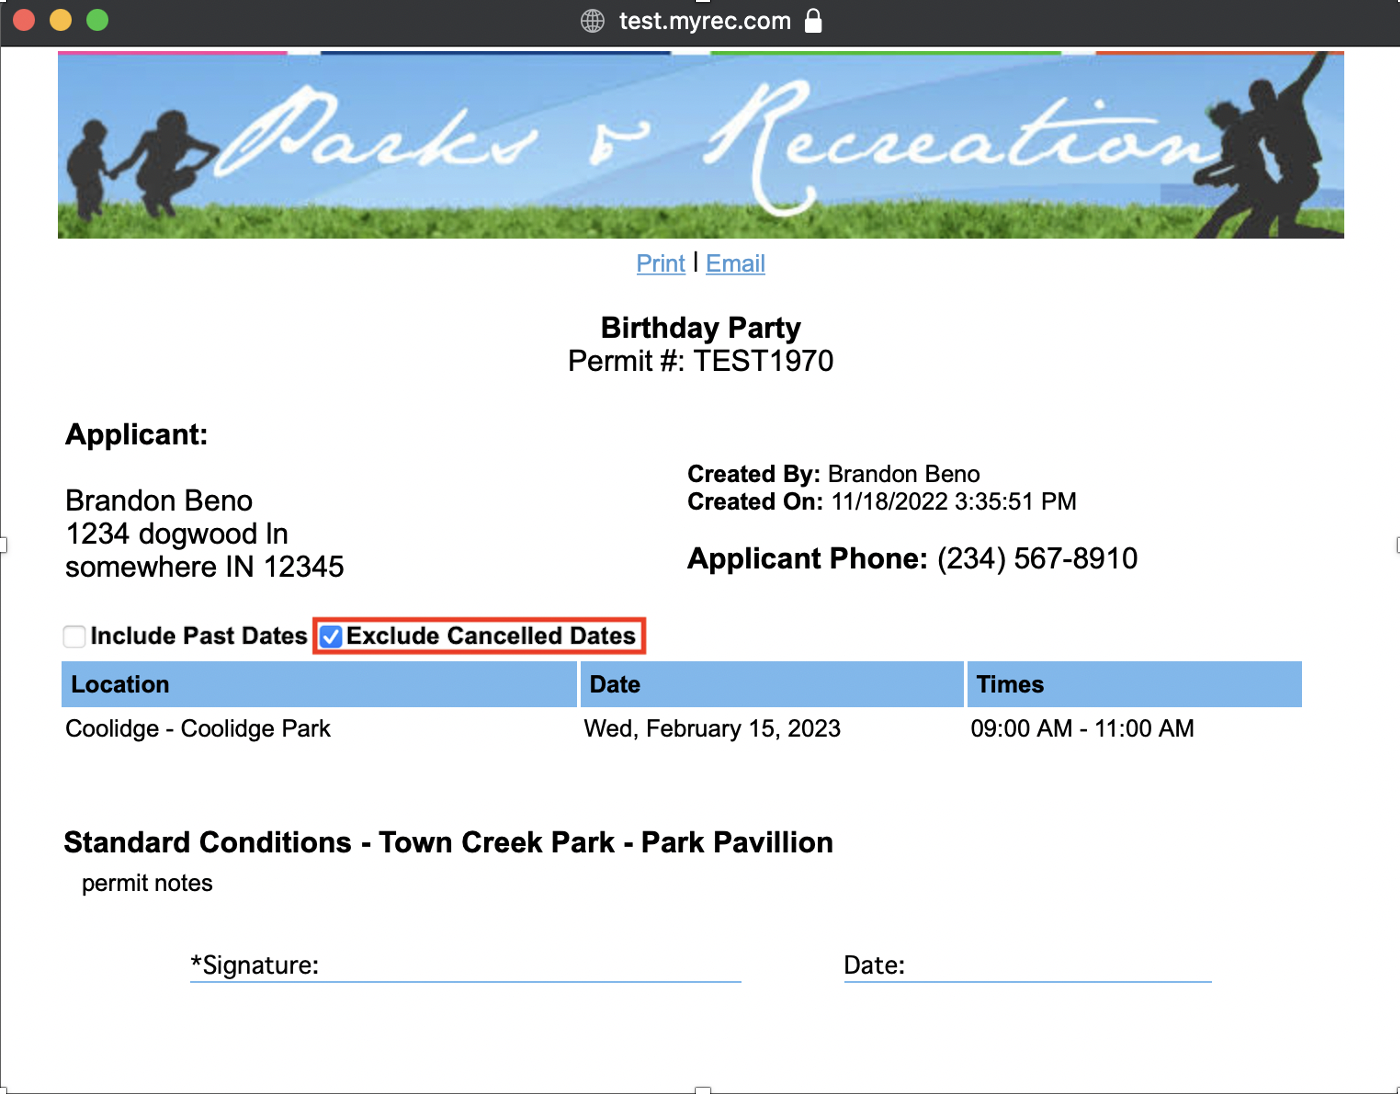
Exclude Cancelled Dates on Permit
After submitting payment, the permit will allow you to Exclude Cancelled Dates, which is active by default. When this is checked, the canceled dates will be excluded from the list and will not be included if you print or email the permit. If there are no canceled dates, the Exclude Cancelled Dates won't appear on the permit.
- Open the existing reservations permit that you want to print or email either by an Invoice search in Quick Utilities, by searching reservations on the Reservation tab in a household account, or by View Reservations in the Facilities menu on the left
- View the Permit
- The Exclude Cancelled Dates checkbox is active by default