An invoice is created as the result of completing the purchase process in a user's account within MyRec.com. Your staff will not “create an invoice” but can generate an invoice by carting items for a customer on the management side and checking out.
Invoices can be created for activity registrations, membership purchases, facility rentals, or product purchases. A public user must have an account first to be able to purchase within the system. An invoice can be created with a balance due or can be created and paid in full. The management side or the public side can be used to purchase these items within the public user's household account.
Example
The local tennis club rents the tennis courts two days each week for the month of May. You need to collect payment for those dates. If you do not require the public user to book this reservation from their portal, your staff will create the reservation in the tennis club's account from the management side.
You add a reservation to their account: select the location, dates, times, and assign the rental fee. Process the checkout either with No Payment or using the payment information they provided. The invoice will be created through this process and will be emailed automatically to the customer. It is also available in their account and is accessible from the public side.
If a balance is due, they can pay that from the public side or by sending you payment/paying at your office. In this case, your staff will have to apply the payment from the management side. A rental “permit” is generated along with the invoice in this instance.
For more information, please contact the Support team for assistance at Support@myrec.com
Purchases that Create Invoices and the Checkout Process
Activity Purchases
How to Register for an Activity on the Public Side
-
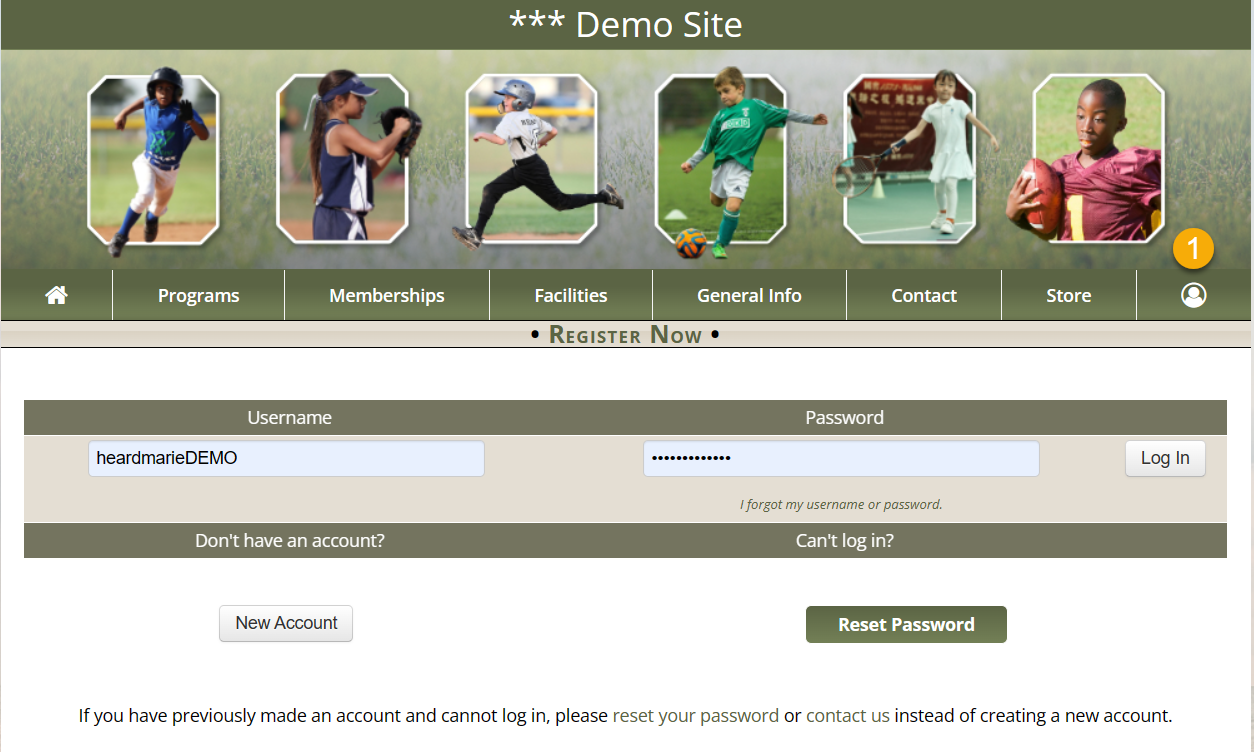
Log in to your account
- If you do not have one, Create a New Account
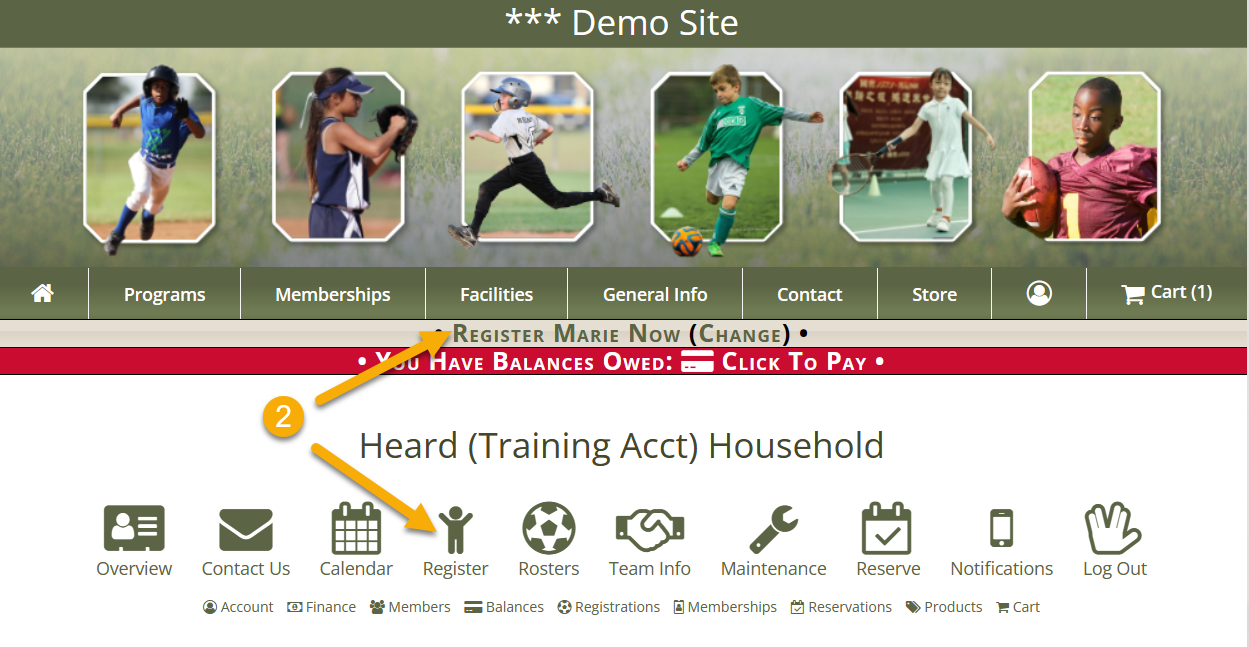
- Click on the Register icon at the top your account or click the Register from the navigation bar
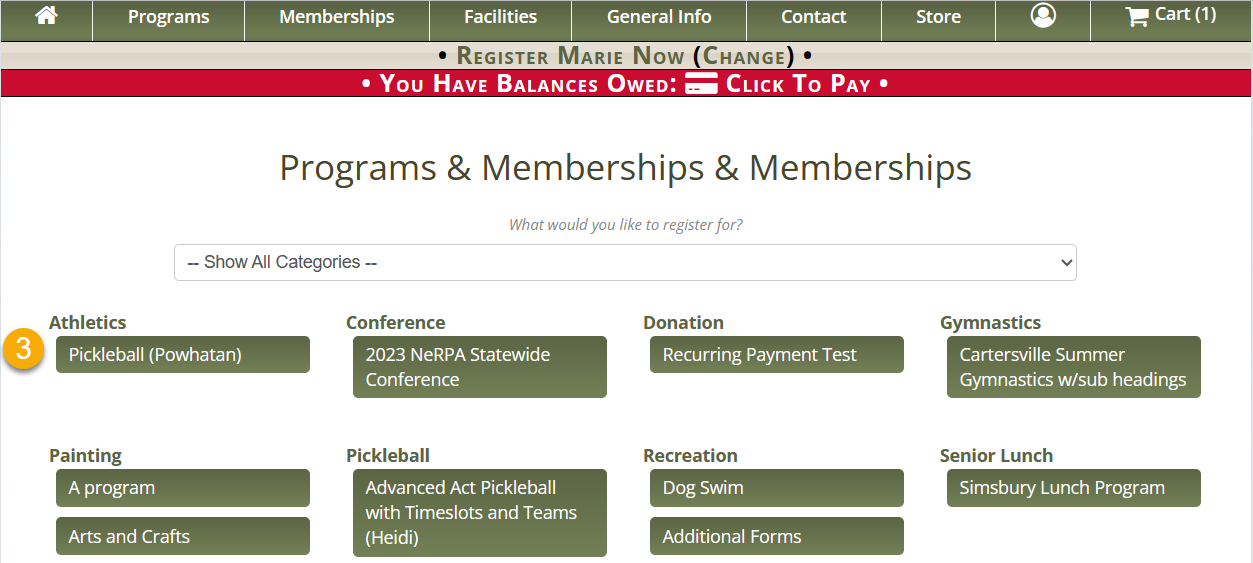
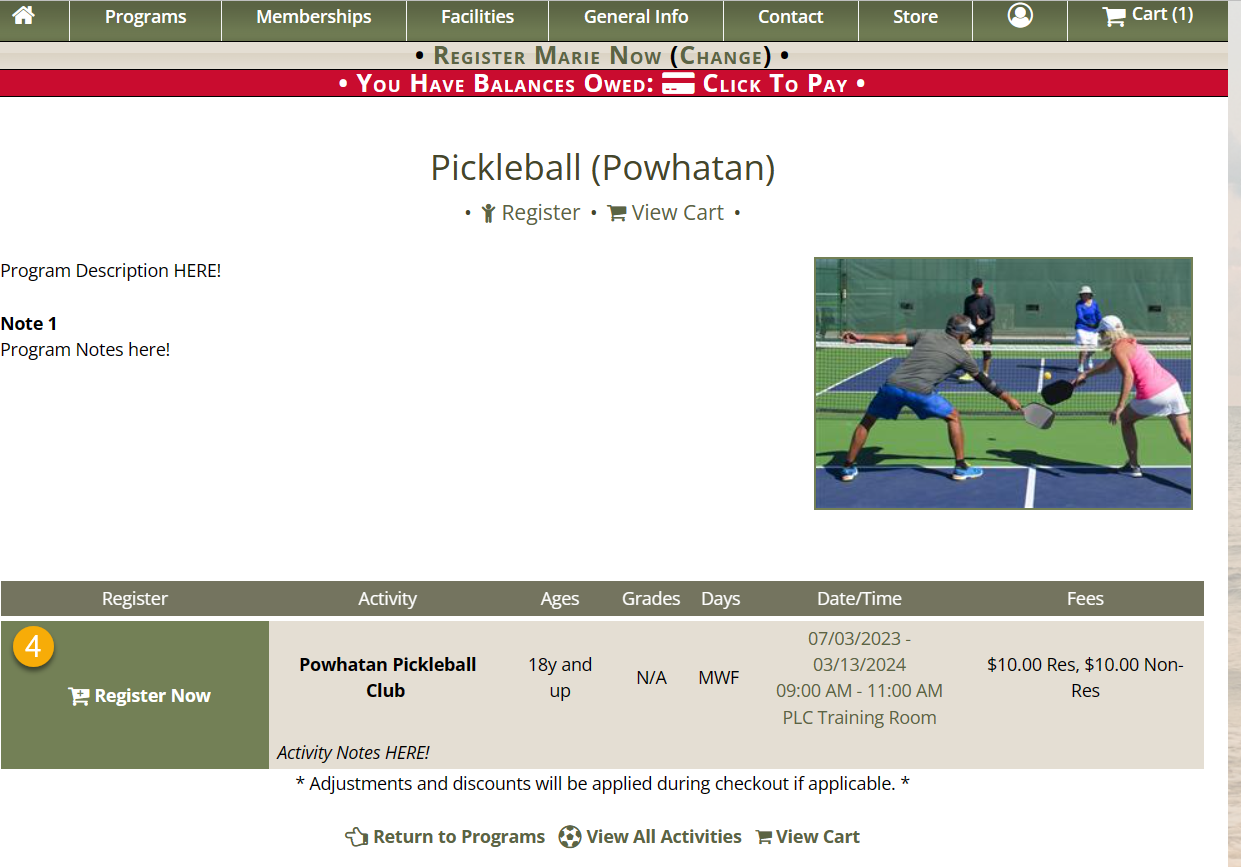
- Select a program of interest
- Click Register Now or Register (selected member) next to the desired activity
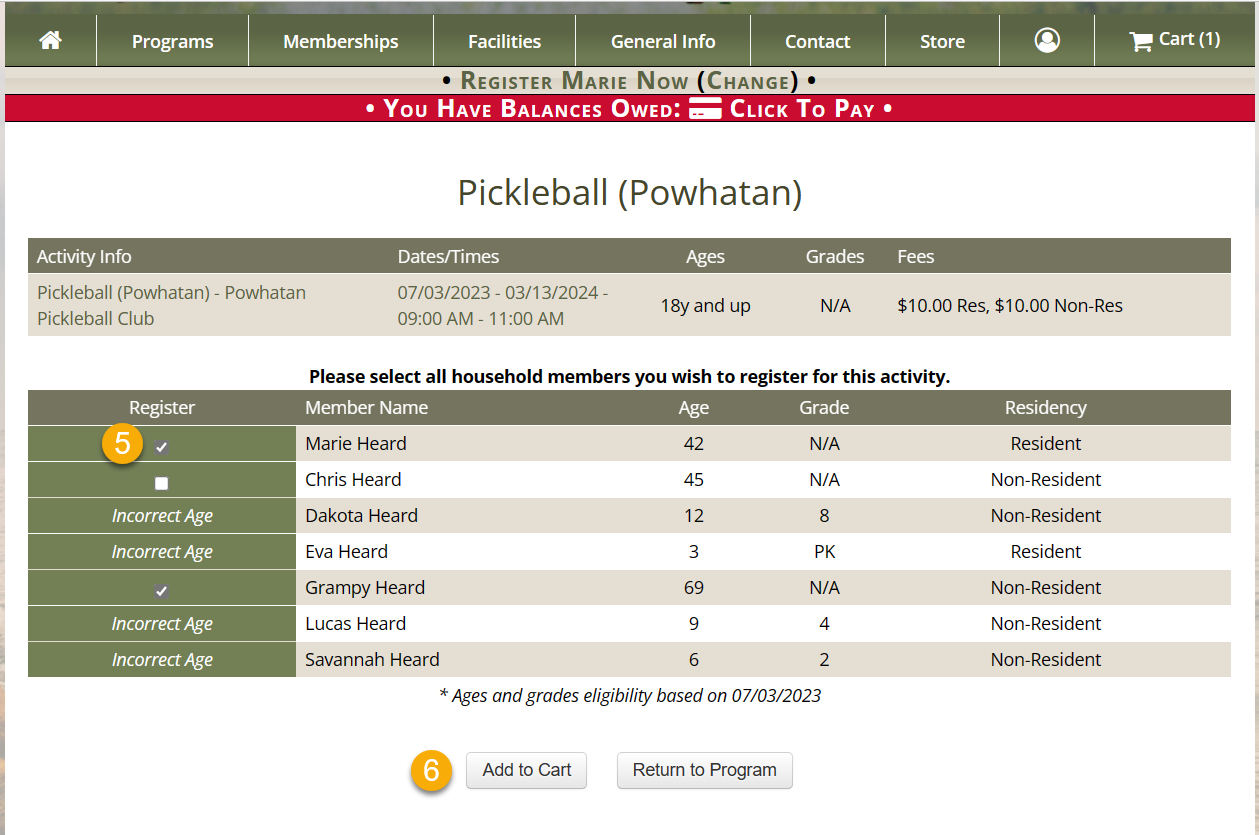
- Check the register box next to the names of the members in the account that you are registering
- Select the add to cart button
- If registering an individual member for an item with purchasing options, click on the option that best fits your desired registration
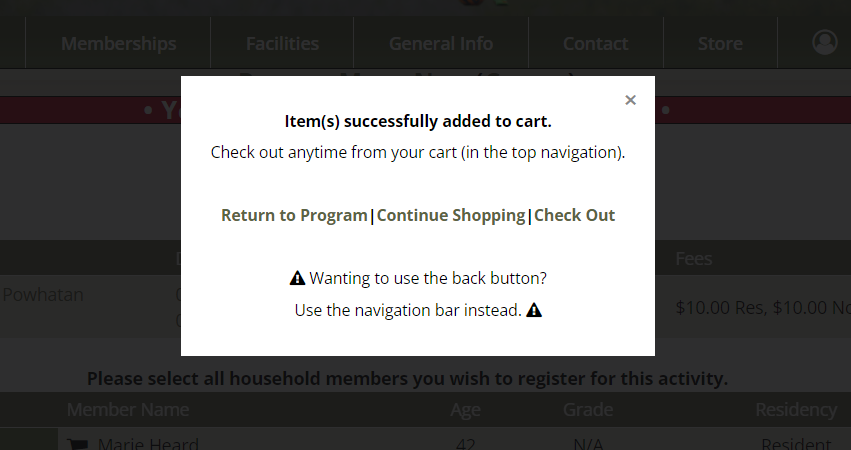
- Once added to the cart, you will get options to Return to the Program, Continue Shopping, (if you need to add other items to the cart) or Check Out if you are ready to process
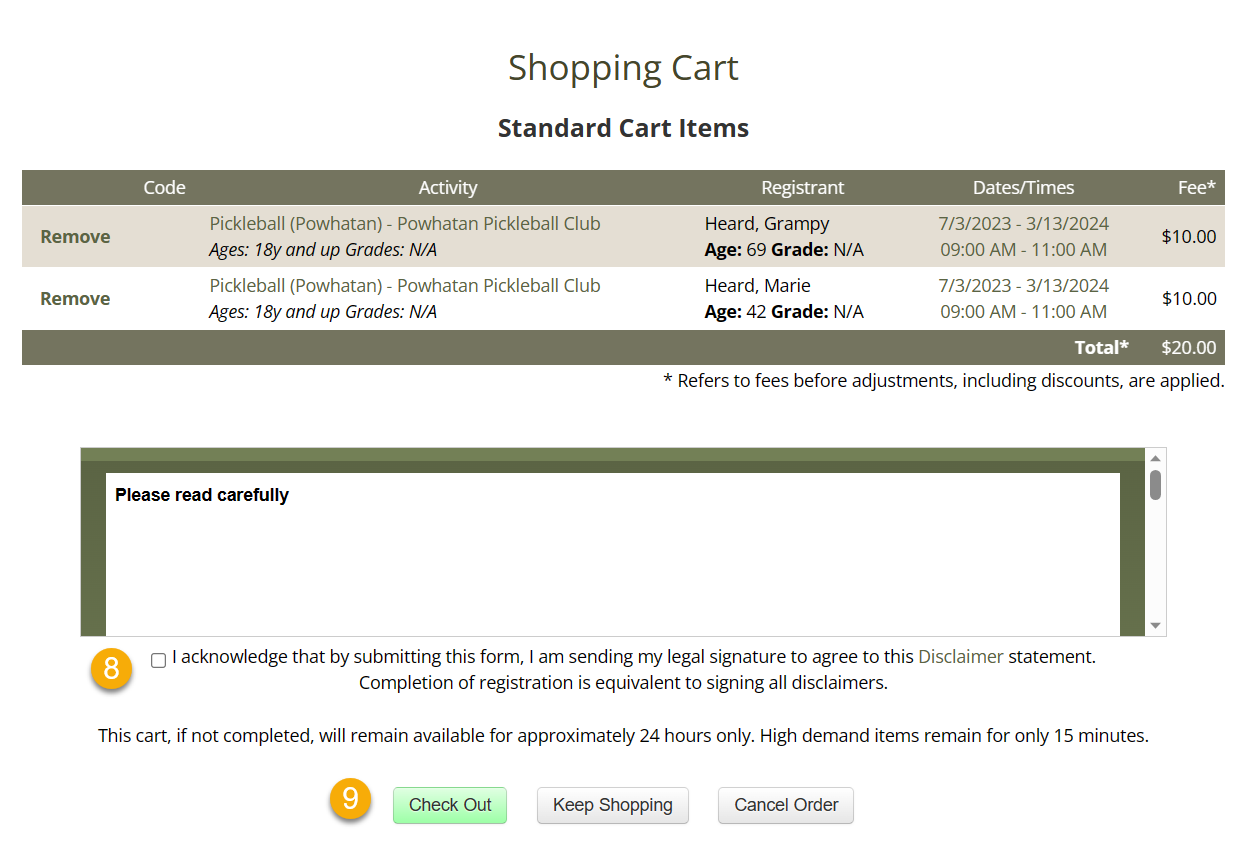
- Check the box to agree to the disclaimer
- Click Check Out to review your shopping cart, then Continue to move forward with your order
- Your department may have promotional items or forms for you to complete on the following screens
- Complete these steps to move to Check Out
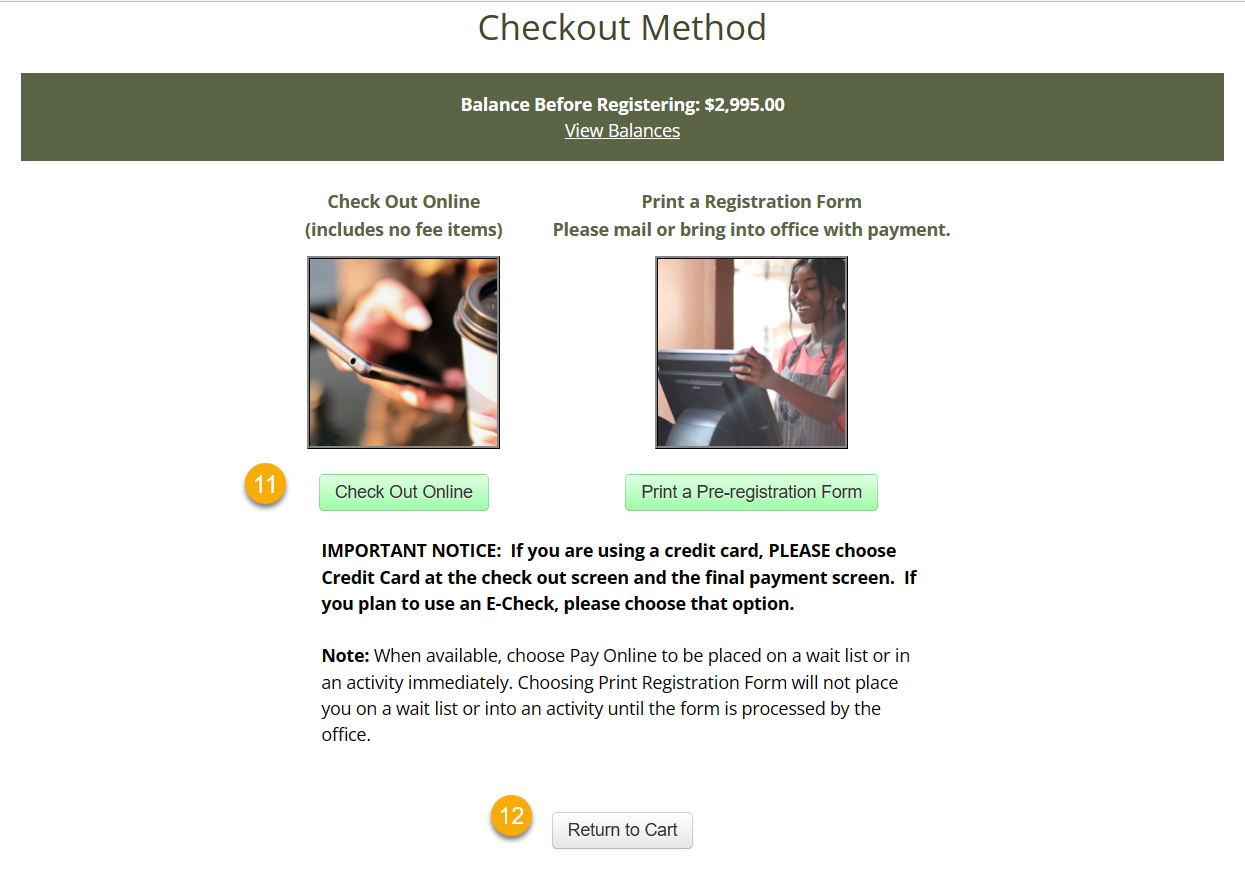
- Choose Check Out Online (when available) or Create a Pre-Registration Form (if available) and follow the steps for payment
- A Pre-Registration form does not register you or save you a seat until payment has been processed by the department
- Click Return to Cart to make changes or additional purchases
- After submitting payment (if online checkout is available), a receipt will be sent to your listed billing email
- Your invoice and receipt can also be accessed later for email or printing by clicking the invoice ID from your account after completion
- Finance page
- Registration page
- Membership page
- Reservation page
- Products page

Membership Purchases
Video: How to Register for a Membership
Register for a Membership
Register for a Membership from the Management Side
Open the Member Household

- Click Accounts in the left navigation bar
- Click either Search Accounts or Search Members to search for the account
- Click the account name
- Click the member name

Register for the Membership
- Click Register for Memberships (left nav)
- Enter part of the name of the membership you'd like to register for and click Search
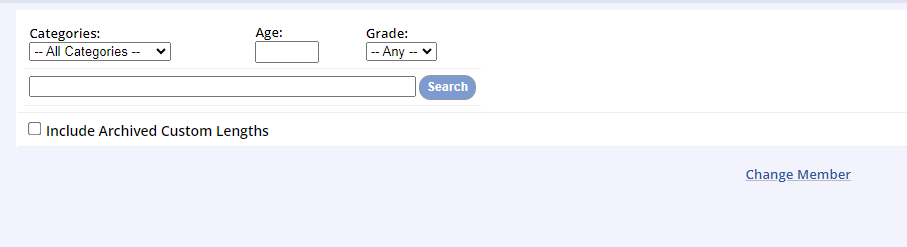
- Click Purchasing Options on the item you'd like to add

- Select the members who you would like to register
- If the member is not the correct age, grade, or gender, you will be asked to override the registrants to complete checkout
- Check the Override box if necessary
- You may repeat the search as many times as necessary to continue adding to the cart
- When all items are in the cart, click Check Out (upper left) to complete the checkout process
Reservation Purchases
Public Reservations
To Enable Public Reservations
A MyRec.com staff member must turn a setting on in the advanced settings for facility options. Please ask a MyRec.com representative to turn this feature on for you.
In order for public reservations to occur
- Management side Reservation Settings that must be activated
- The facility or facility area must be set to allow public reservation
- This can be done in a new facility or existing facility
- The Facility's Rental Availability must be set as well as its Rental Fees
- Set Blocks, which will be a set schedule with a fee by hour or by day or a fee matrix, which sets the hourly fees for each day of the week can be used for public reservations
Public Reservation Instructions
- In your public site, log in with a household or organizational account
- After logging in, go to Facilities navigation and select either the Reservation link
- Then Start Online Reservation if your department also allows the choice of public reservation requests or the Facility List from which you can select Reserve button next to eligible facility
- Next select the location for the reservation from the dropdown
- If started reservation from facility then location will be populated
- To see availability of the facility, you can click View Calendar or View Availability if necessary
- Any facilities that are available for public reservations will be listed in the dropdown
- After selecting the location, you will schedule the dates
- The scheduling for the reservation is determined in settings for the facility
- Enter the Start Date
- If the reservation is for recurring dates, check Recurring and enter the end date and day/days of the week for the recurring reservation
- Click Save Dates button
- For block scheduling – If the facility is set for block scheduling, the blocks will appear after selecting your location
- Check off the desired block(s)
- The fee and days available will also appear
- Click Save Dates button
- Enter the Start Date
- The scheduling for the reservation is determined in settings for the facility
Note: If there is a conflict with dates, you will get a warning message not all your dates are available. If this happens, you can click View Dates to see what days had the conflict. The dates with the conflict will be removed in the next screen.
- Enter the purpose for the reservation, such as the name of the event
- Enter the head count, if required
- Click Continue
- In the next screen, you can review the reservation, including the fees and schedule
- If necessary, you can add or edit dates to your reservation or add a different reservation.
- When finished click Continue to Checkout
- Next, the item will be in the shopping cart
- Read and agree to a disclaimer by checking the box to continue checking out
- Click Check Out when finished
- On Checkout Method Page select Check Out Online
- The next screen will have the amount owed and allow you to select Pay In Full or Pay Deposit, if deposits are allowed for the facility
- This will be the down payment for the reservation
- You can pay more than what the recommended deposit is
- Make your selection, and click continue
- This will be the down payment for the reservation
- The invoice total will be listed, including any deposits or down payments
- Click Continue to Credit Card Form (could also be online check if you have them as an option)
- Fill out credit card information and click Submit
- Once the payment is complete, you will receive a receipt
- You can view the permit in the household’s Account Overview Reservations section
Product Purchases
Selling Products in Point of Sale (POS)
Selling a Product via Point of Sale
You can use the POS portal to sell a variety of products including shirts, concessions, gift certificates, and even passes to your facility.
Accessing the POS to Make a Sale
Selling a Product from the Management Screen
- Search for the member purchasing the product by entering their name in the Member Search bar
- Click Go
- Select the correct member
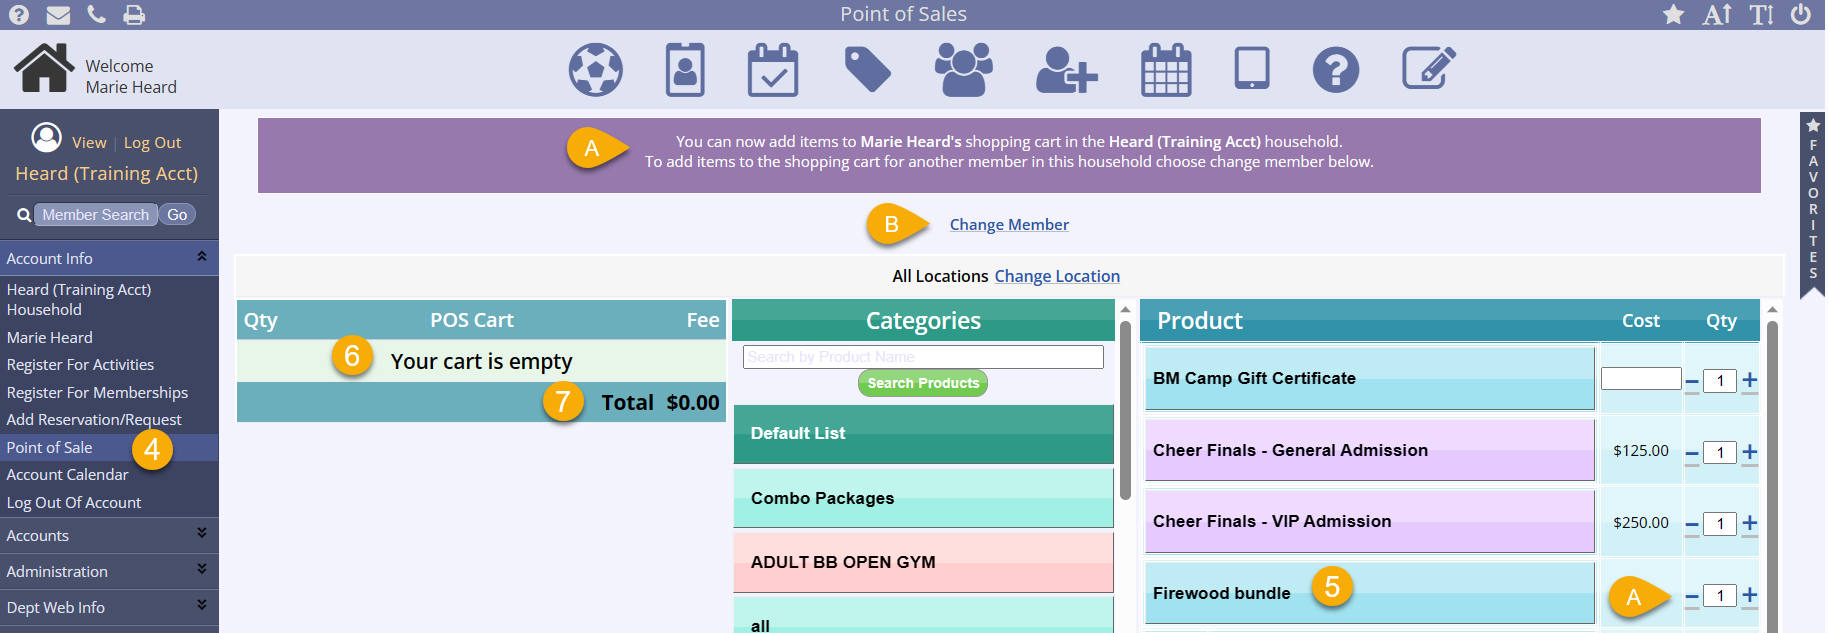
- Click Point of Sale from the Account menu on the leftside navigation bar
- You will see that the customer's name is featured in the purple bar at the top of the screen
- To change the member purchasing the product, click Change Member below the bar
- To add the product to the customer's cart, browse the Default List or Category, if applicable, and click the product name
- Change the quantity if more than one is desired, then click the product name
- Items will be displayed in the POS cart
- You can remove items from the cart or change quantities in the cart as well using the trashcan icon
- The total will reflect the total purchase price of all items in the cart
- Click Continue
Selling a Product from the POS Portal
- Click the POS icon on the top of the management screen
- Select the facility from the list or see default products
- This is required for EMV clients
- This will be an accountless transaction
- To make this purchase within a member account for reporting purposes, click Member Search on the top toolbar and find the member account
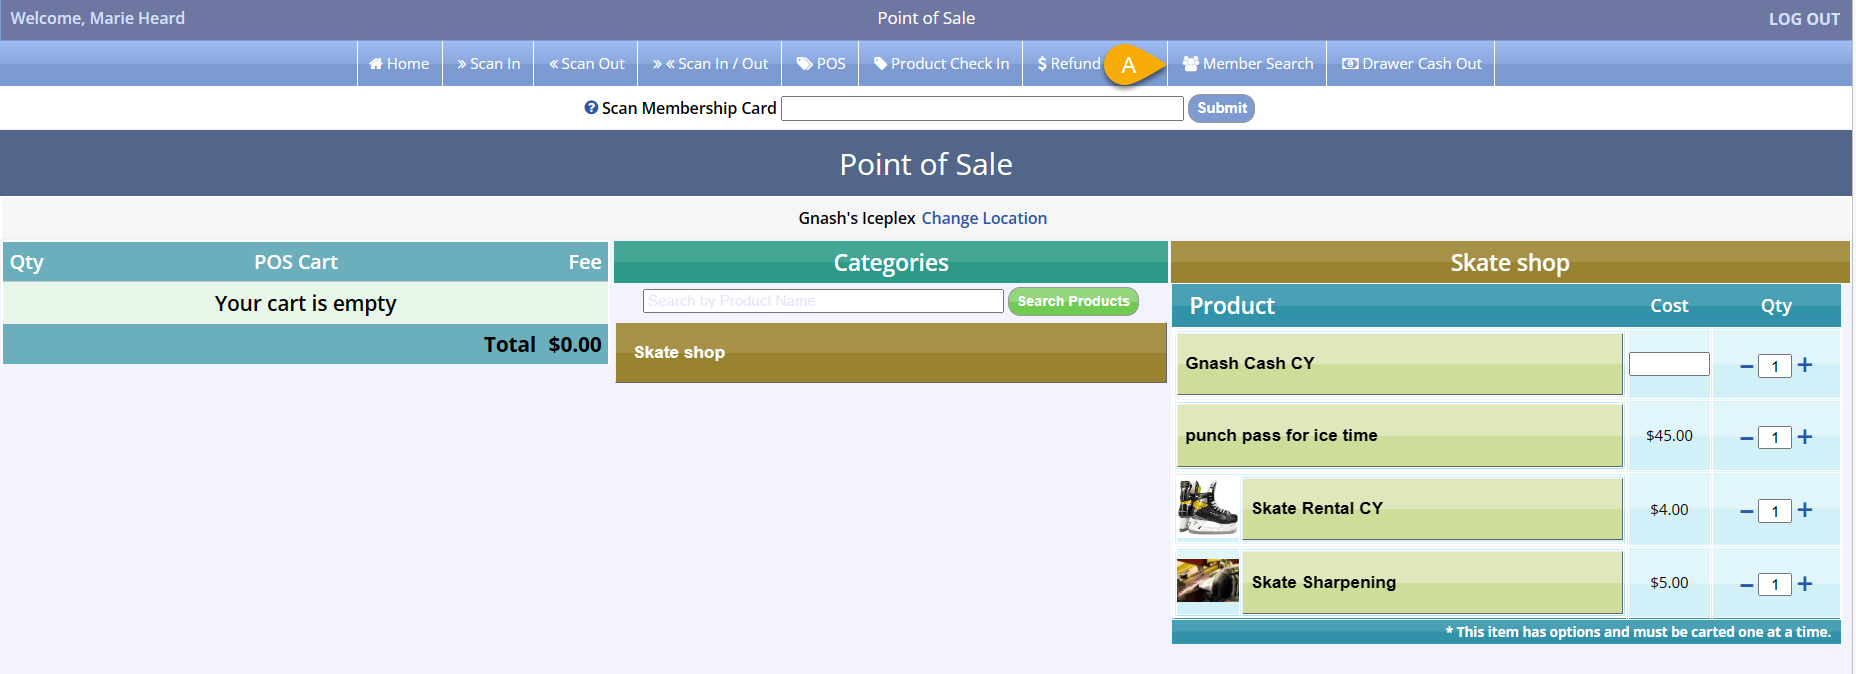
- Enter the member name
- Click Search
- Select the correct member from the search results
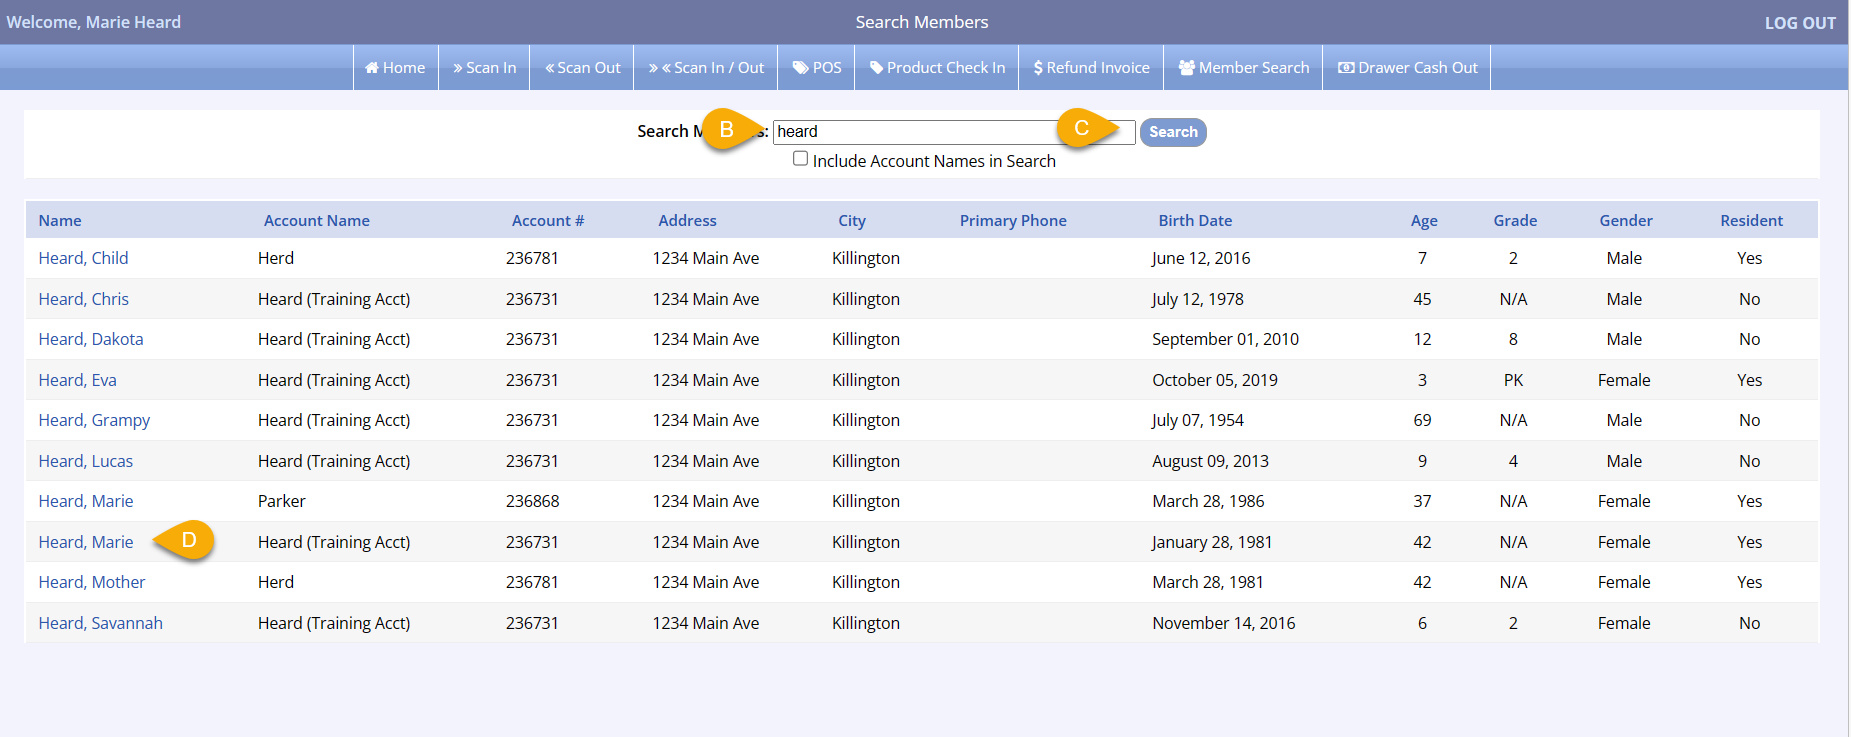
- Member info will be displayed in a box, and there will be a Point of Sale link to click under the Member Info box
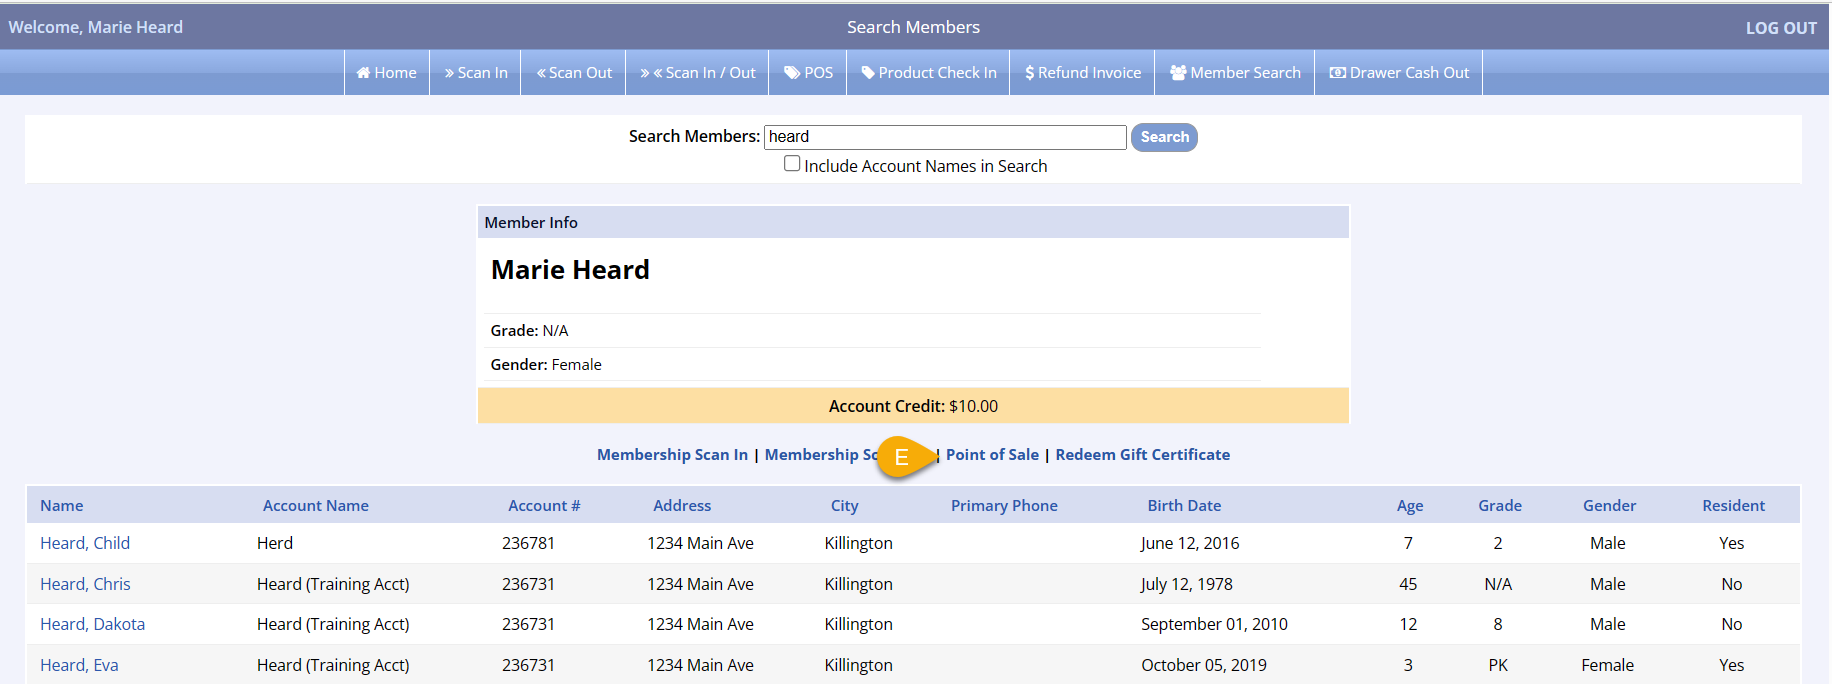
- Note that the member name is now selected, indicating that the purchase will be made within the member's account

Adding Items to the Cart
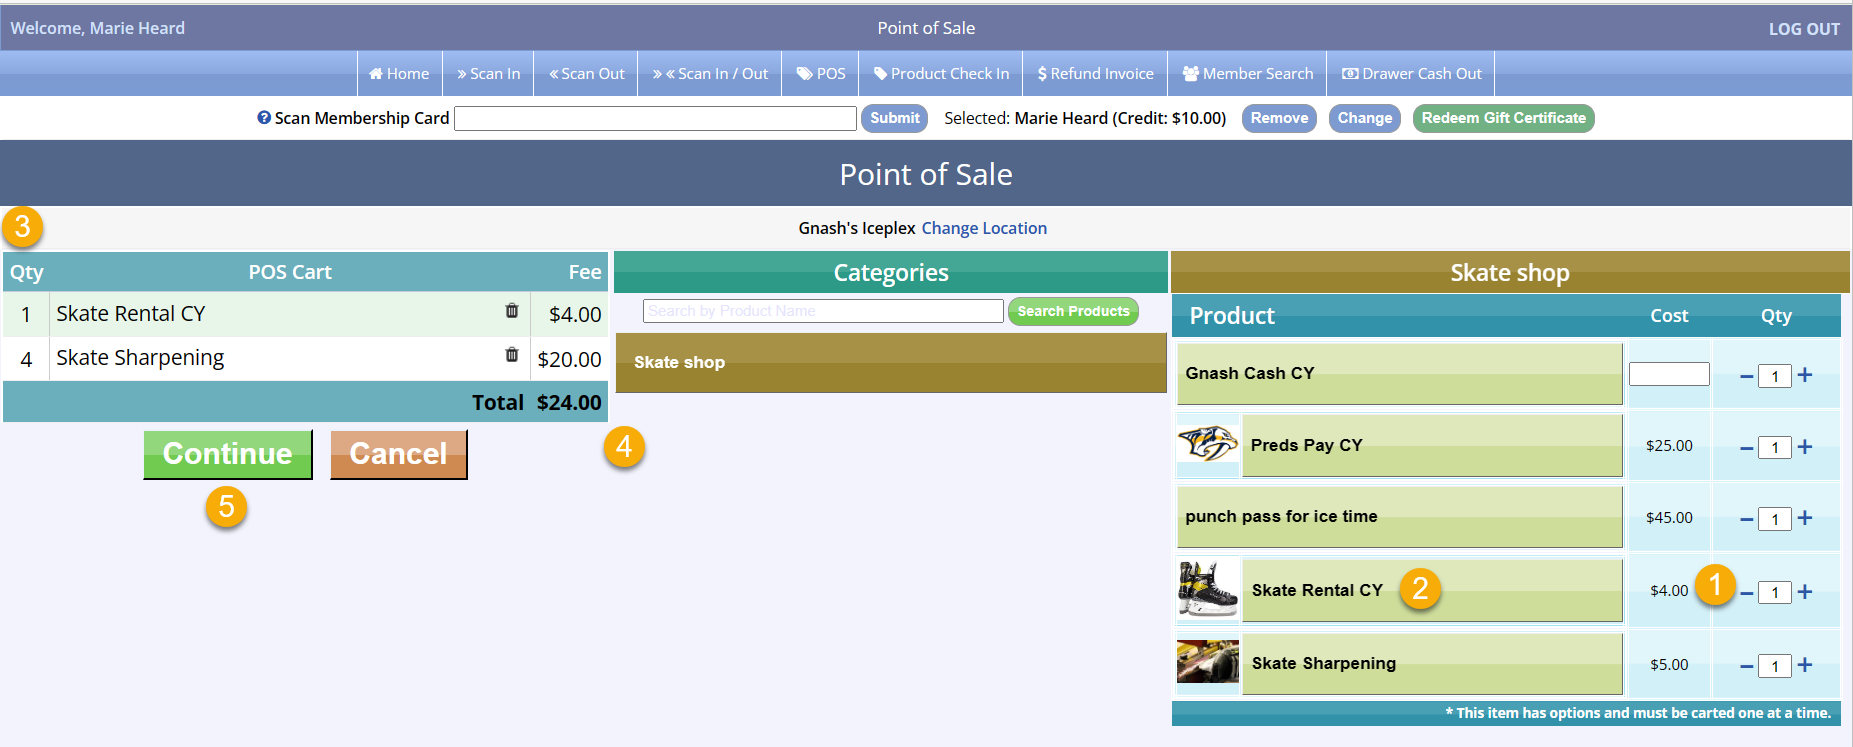
- To add the product to the customer's cart, browse the Default List or Category, if applicable, and change the quantity if more than one is desired
- Click the product name to add to the cart
- Items and their quantity will be displayed in the POS cart
- You can remove items from the cart or change quantities in the cart as well using the trashcan icon
- The total will reflect the total purchase price of all items in the cart
- Click Continue
EMV Clients
If you are using EMV, your products must be assigned to a specific location or locations in order to show up during the POS process. Return to the product setup screen to add locations for your products and update so you are able to see those in the POS portal for purchase.
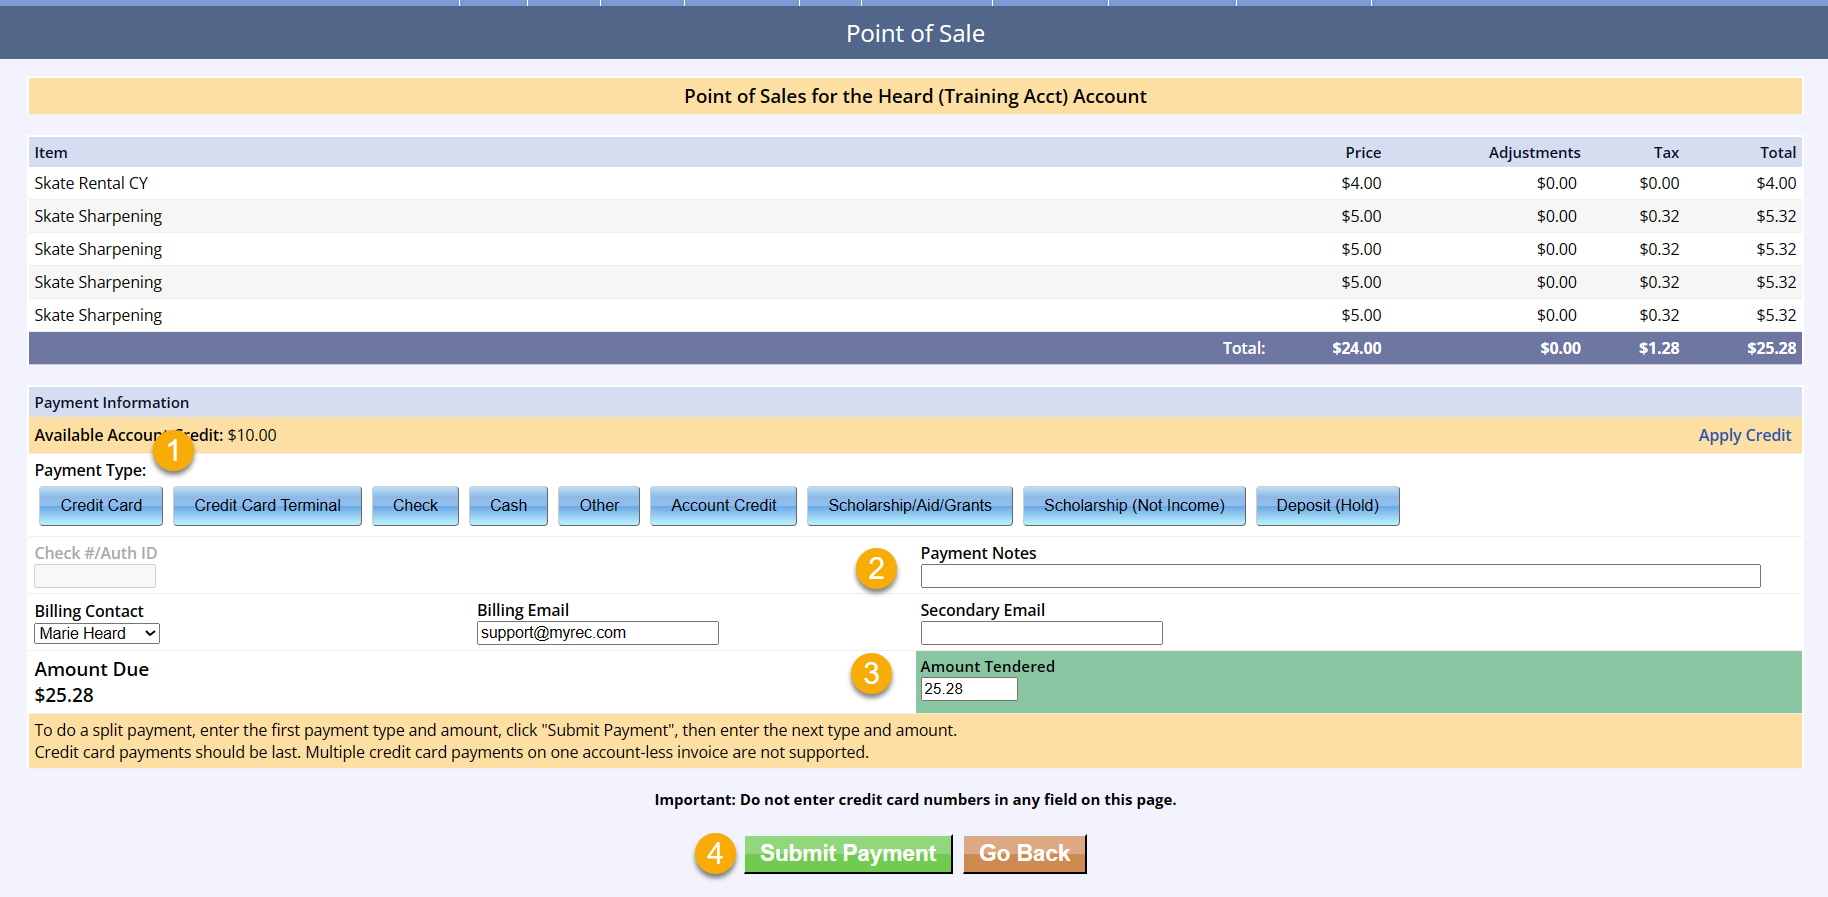
Checking out in POS
- Select the payment type
- Add any applicable payment notes
- Change the Amount Tendered if necessary
- Click the green Submit Payment button
Checking Out and Viewing Invoices
Check out - Management
Processing Transactions on the Management Side
We recommend having the user present or at least on the phone to complete the checkout process since there are likely disclaimers that need to be accepted and possibly questions, forms, or documents that are required.
- Confirm that your customer has seen and agreed to any applicable disclaimers
- Click Continue
- Review any additional questions, disclaimer, or other required documents with the customer
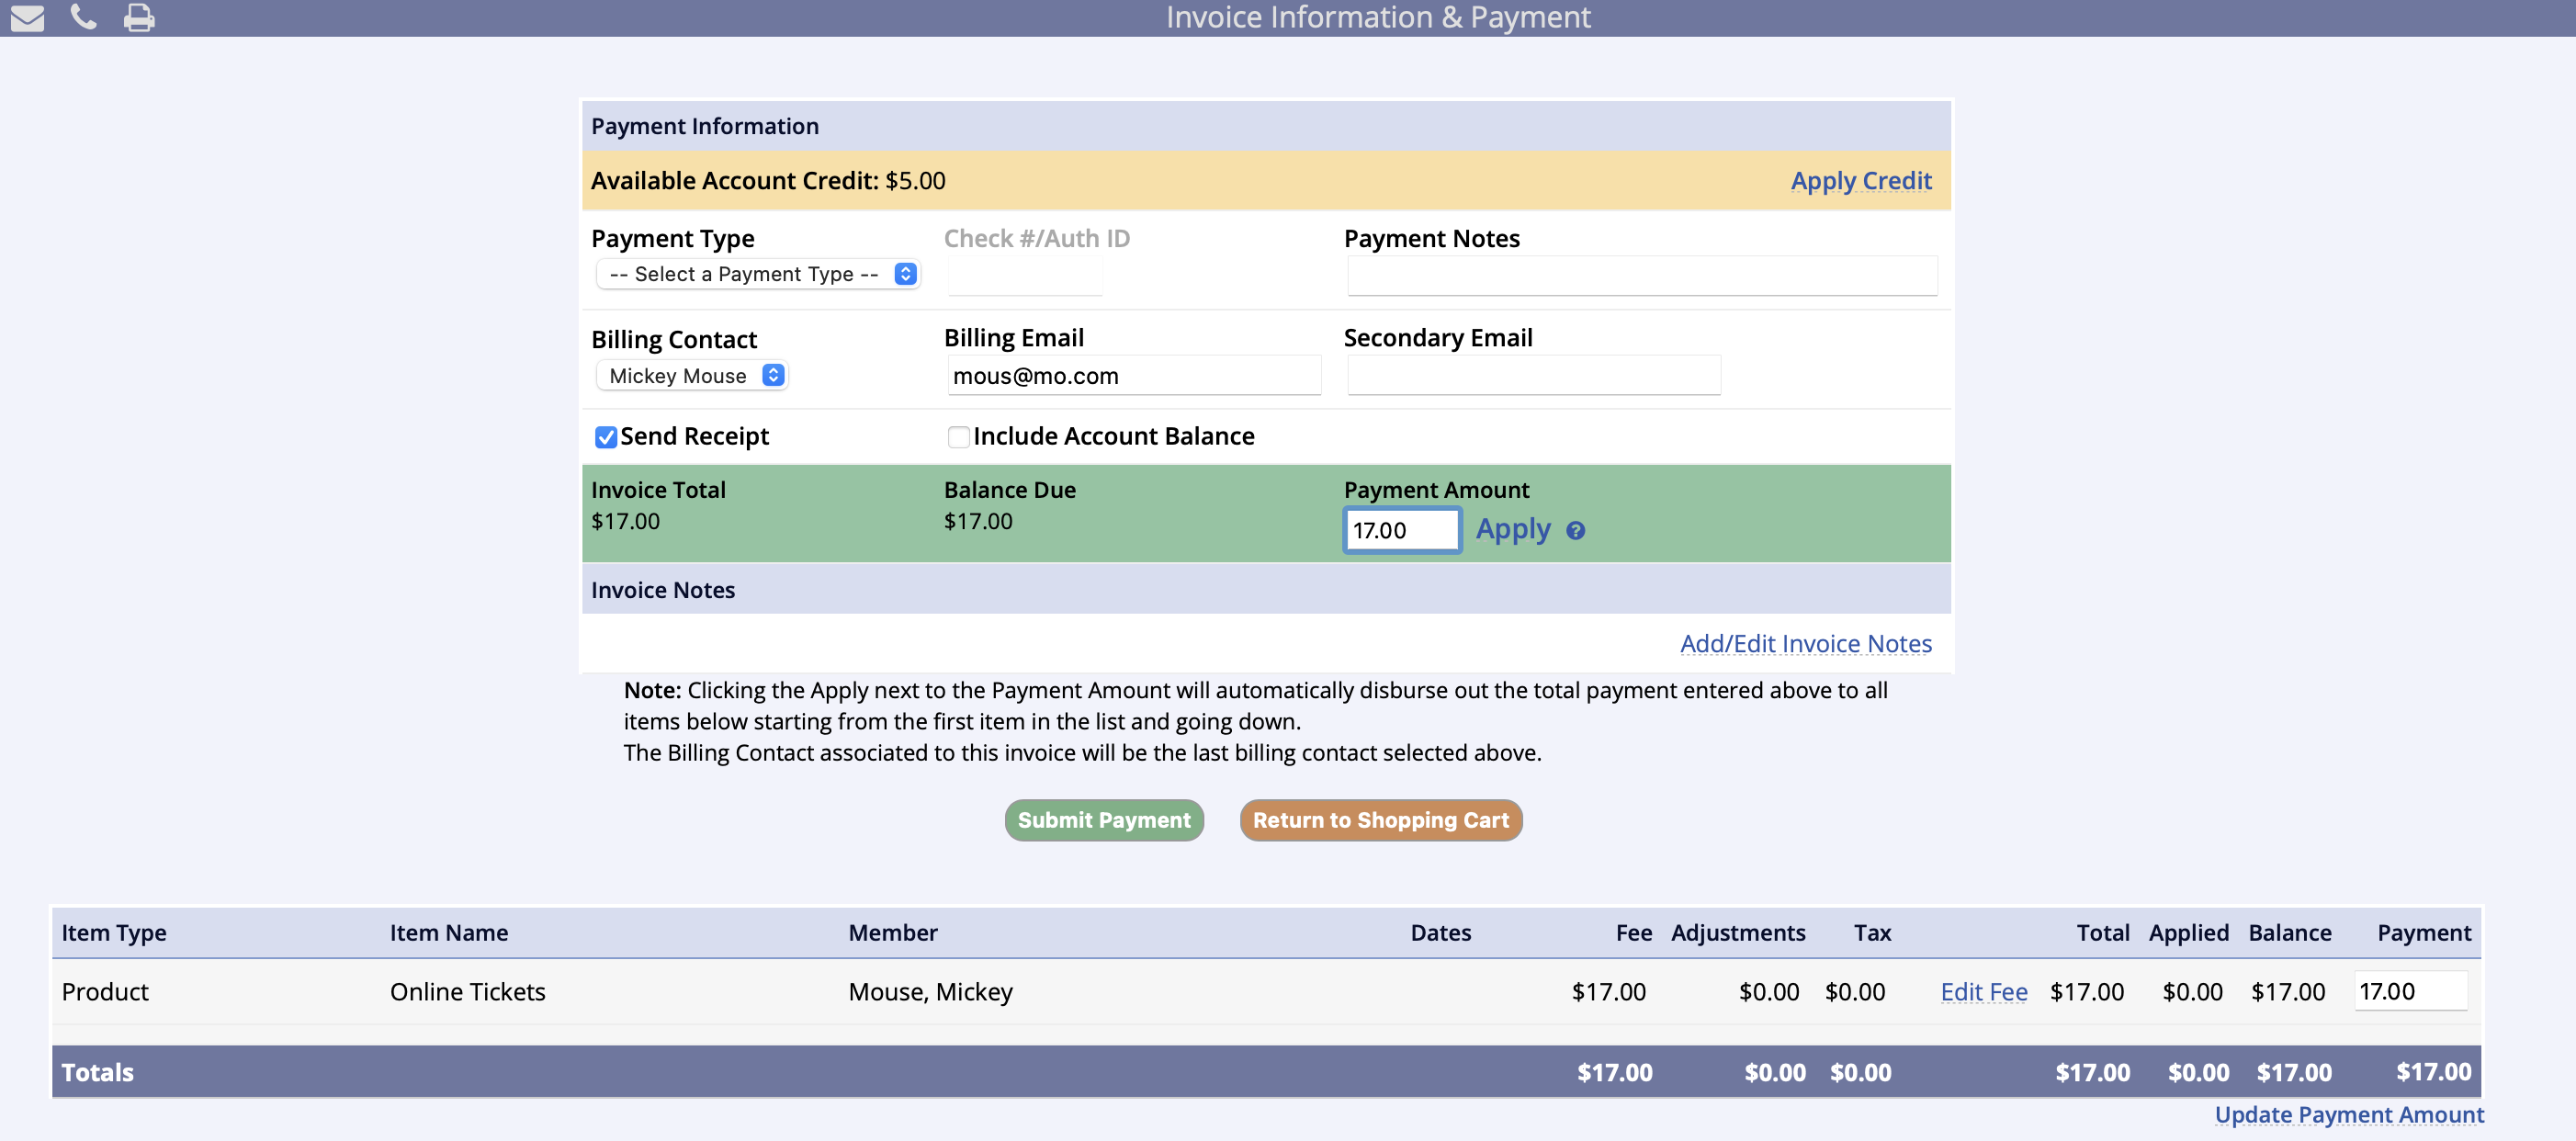
- Select Payment Type
- Confirm Billing Contact and Billing Email is correct
- Enter Payment Amount
- A receipt will be automatically sent to the billing email unless the checkbox is deselected prior to submitting payment
- Receipts can be located from the management and public side after creation; to learn more see our article on Receipts
Full Payment
- Choose payment type
- Click Submit Payment *
- Click Process Invoice
* For credit cards, Submit Payment is Continue to Online Payment Form
Partial Payment
- Choose payment type
- Set payment amount
- Click Apply
- Review payment distribution
- Click Submit Payment*
- Click Process Invoice
* For credit cards, Submit Payment is Continue to Online Payment Form
Split Payment
- Choose payment type (credit cards last)
- Set payment amount
- Click Apply
- Review payment distribution
- Click Submit Payment *
- Repeat steps 1-5 for each payment
- Click Process Invoice
* For credit cards, Submit Payment is Continue to Online Payment Form
Credit Card Payment
Swipe Devices
Credit card readers that utilize swipe-technology are being deprecated within MyRec.com due to new security measures in the credit card industry. These devices are no longer recommended by MyRec.com for new setup purchases. More information can be found in our EMV Quick Reference Guide.

- Select payment type and proceed
- If this was a credit card payment,
- Select Credit Card as the payment type
- if your department has EMV readers, select from the location dropdown
- E-Com transactions will allow you to select a stored card or to enter new payment information, so move to step b
- EMV transactions will be completed on the EMV device
- Select the device from the dropdown
- Click the Pay on Device button
- Follow the on-screen instructions on the card reader
- if your department has EMV readers, select from the location dropdown
- Select Credit Card as the payment type
- If this was a credit card payment,

- if your department does NOT have EMV readers, you will simply proceed to the credit card screen*
- Confirm name and address match the name and address for the credit card
- Choose Card Type
- Enter Expiration Date
- Enter Credit Card Number
- Enter CVV code from back of card
- Or if using a card reader**, click the Swipe Card button at top of screen, and run the card through the reader to populate into the form
- Click Submit Secure Payment and wait for approval
- If declined, you'll return to the credit card screen
- If approved, you'll proceed to the confirmation screen
- Once on the confirmation screen, you may view/print the receipt and/or disclaimer
- Unless you unchecked Send Receipt or there is no email address entered, your customer will receive a copy of this transaction in their email in full, and you will proceed to the confirmation screen
*Payment page shown is for those with Authorize.net and Mx Merchant gateways
Tap to Pay and Similar Options
Google Pay and Apple Pay are only available to specific gateway users and is not available for management-side checkout. Contact Merchant Services to find out more about these options for your department.
**Credit card readers/swipe devices are being deprecated due to security updates by credit card merchants.
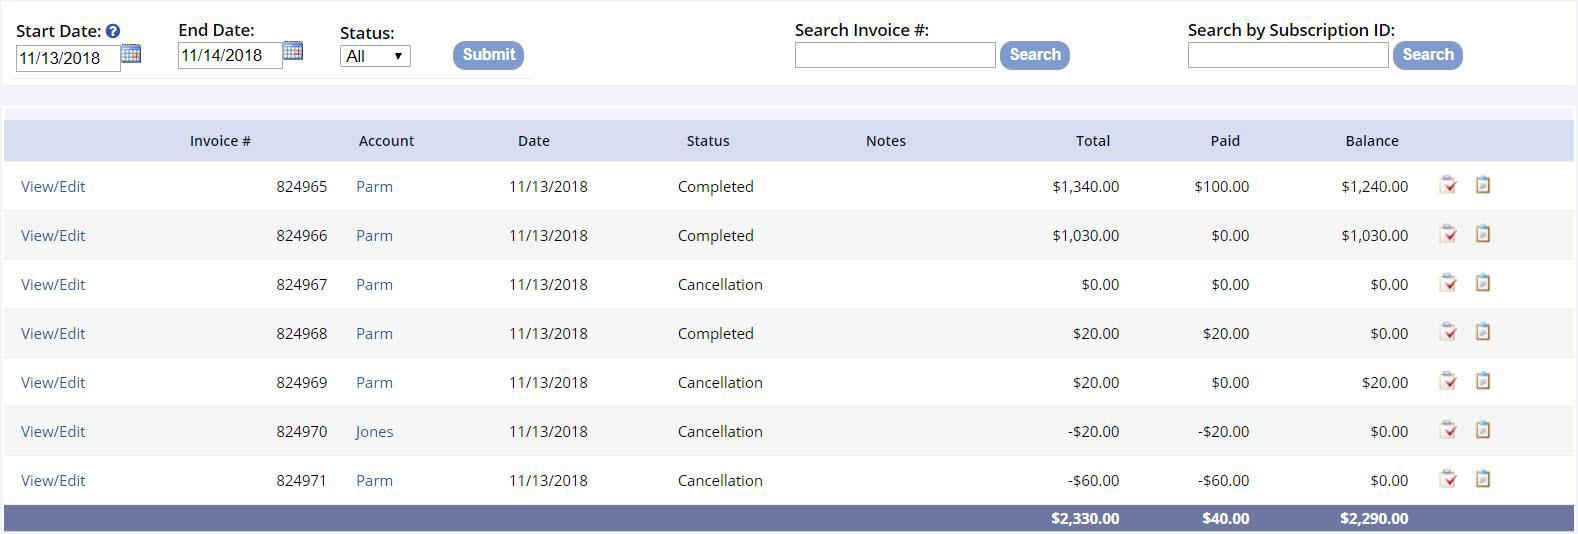
Open/Paid Invoices
Open/Paid Invoices allows you to view all invoices in the system. You can look for individual invoices by their invoice number. You can also filter invoices by date range or status.
This area can be accessed from the Home Screen via the Quick Utilities menu, or from the Finance section of the right-hand navigation.
Open/Paid Invoices Tips
The Quick Utilities link leads to a report that lists all invoices based on a date range and status (all, open, or paid).
Invoices can also be brought up by searching an invoice # or a Plan # (payment plans)
Directly from this screen:
- Invoices can be viewed / edited by clicking View/Edit
- Invoice receipts and payment history can be accessed using the icons to the right of the invoice
- Household accounts can be accessed directly by clicking the account name